Fifty Shades of Glaze

vegan doughnuts, A Streetcar Named Devour

Yes, they’re real and they’re spectacular.

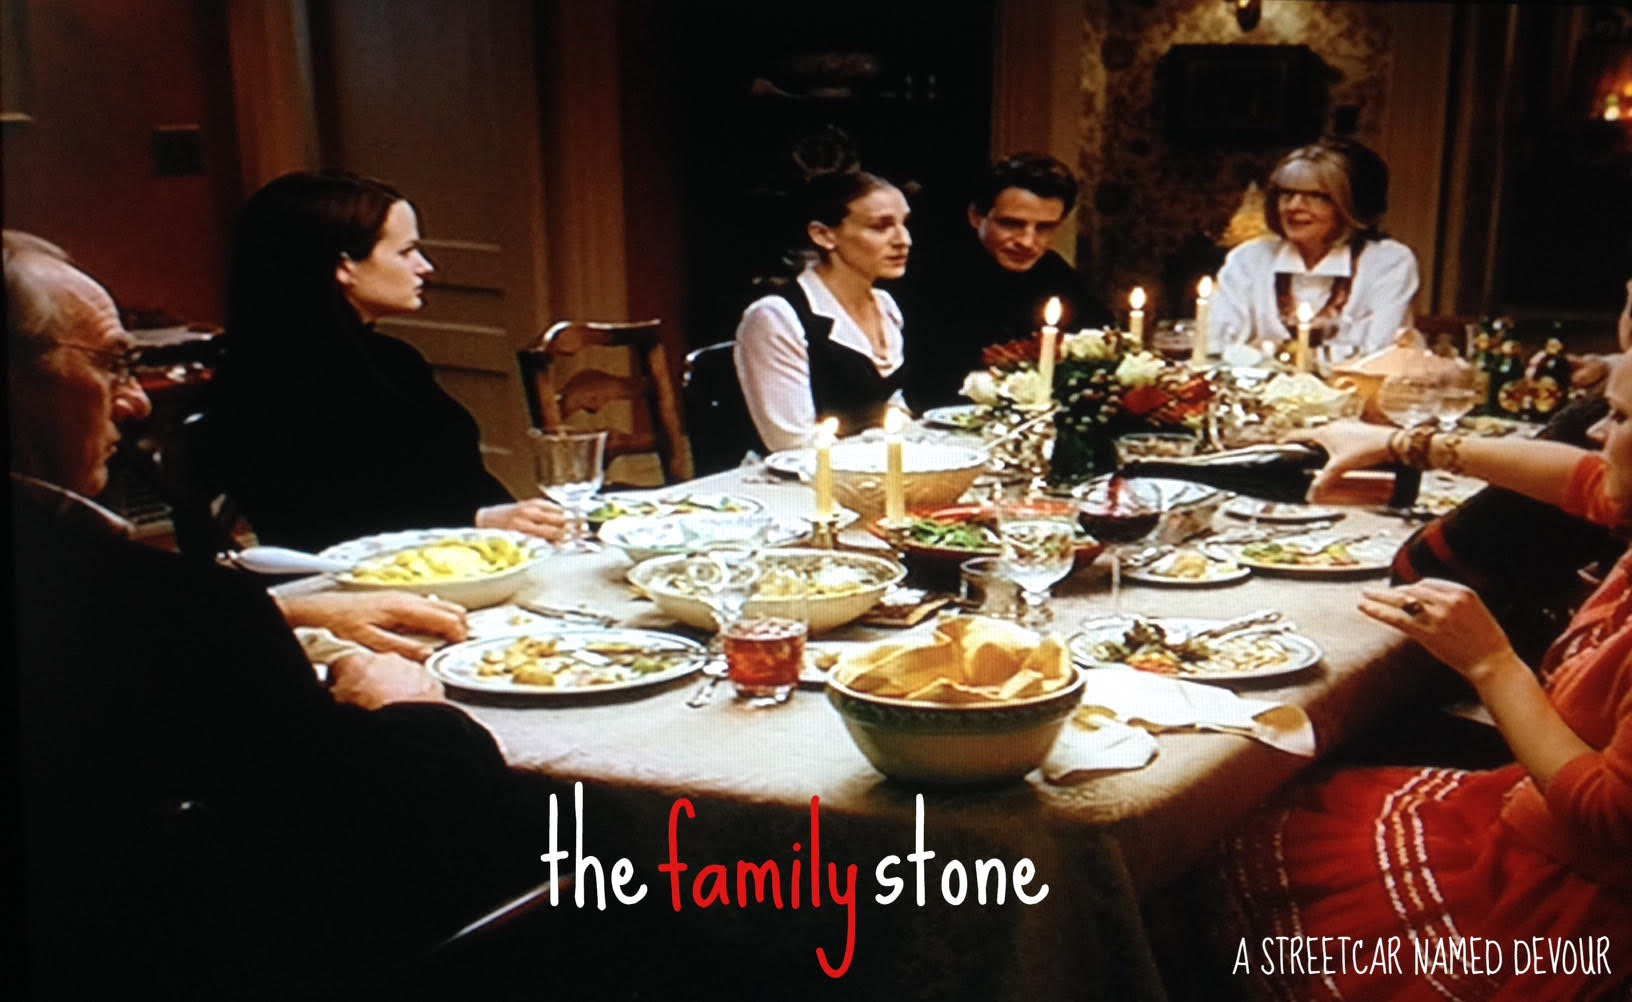
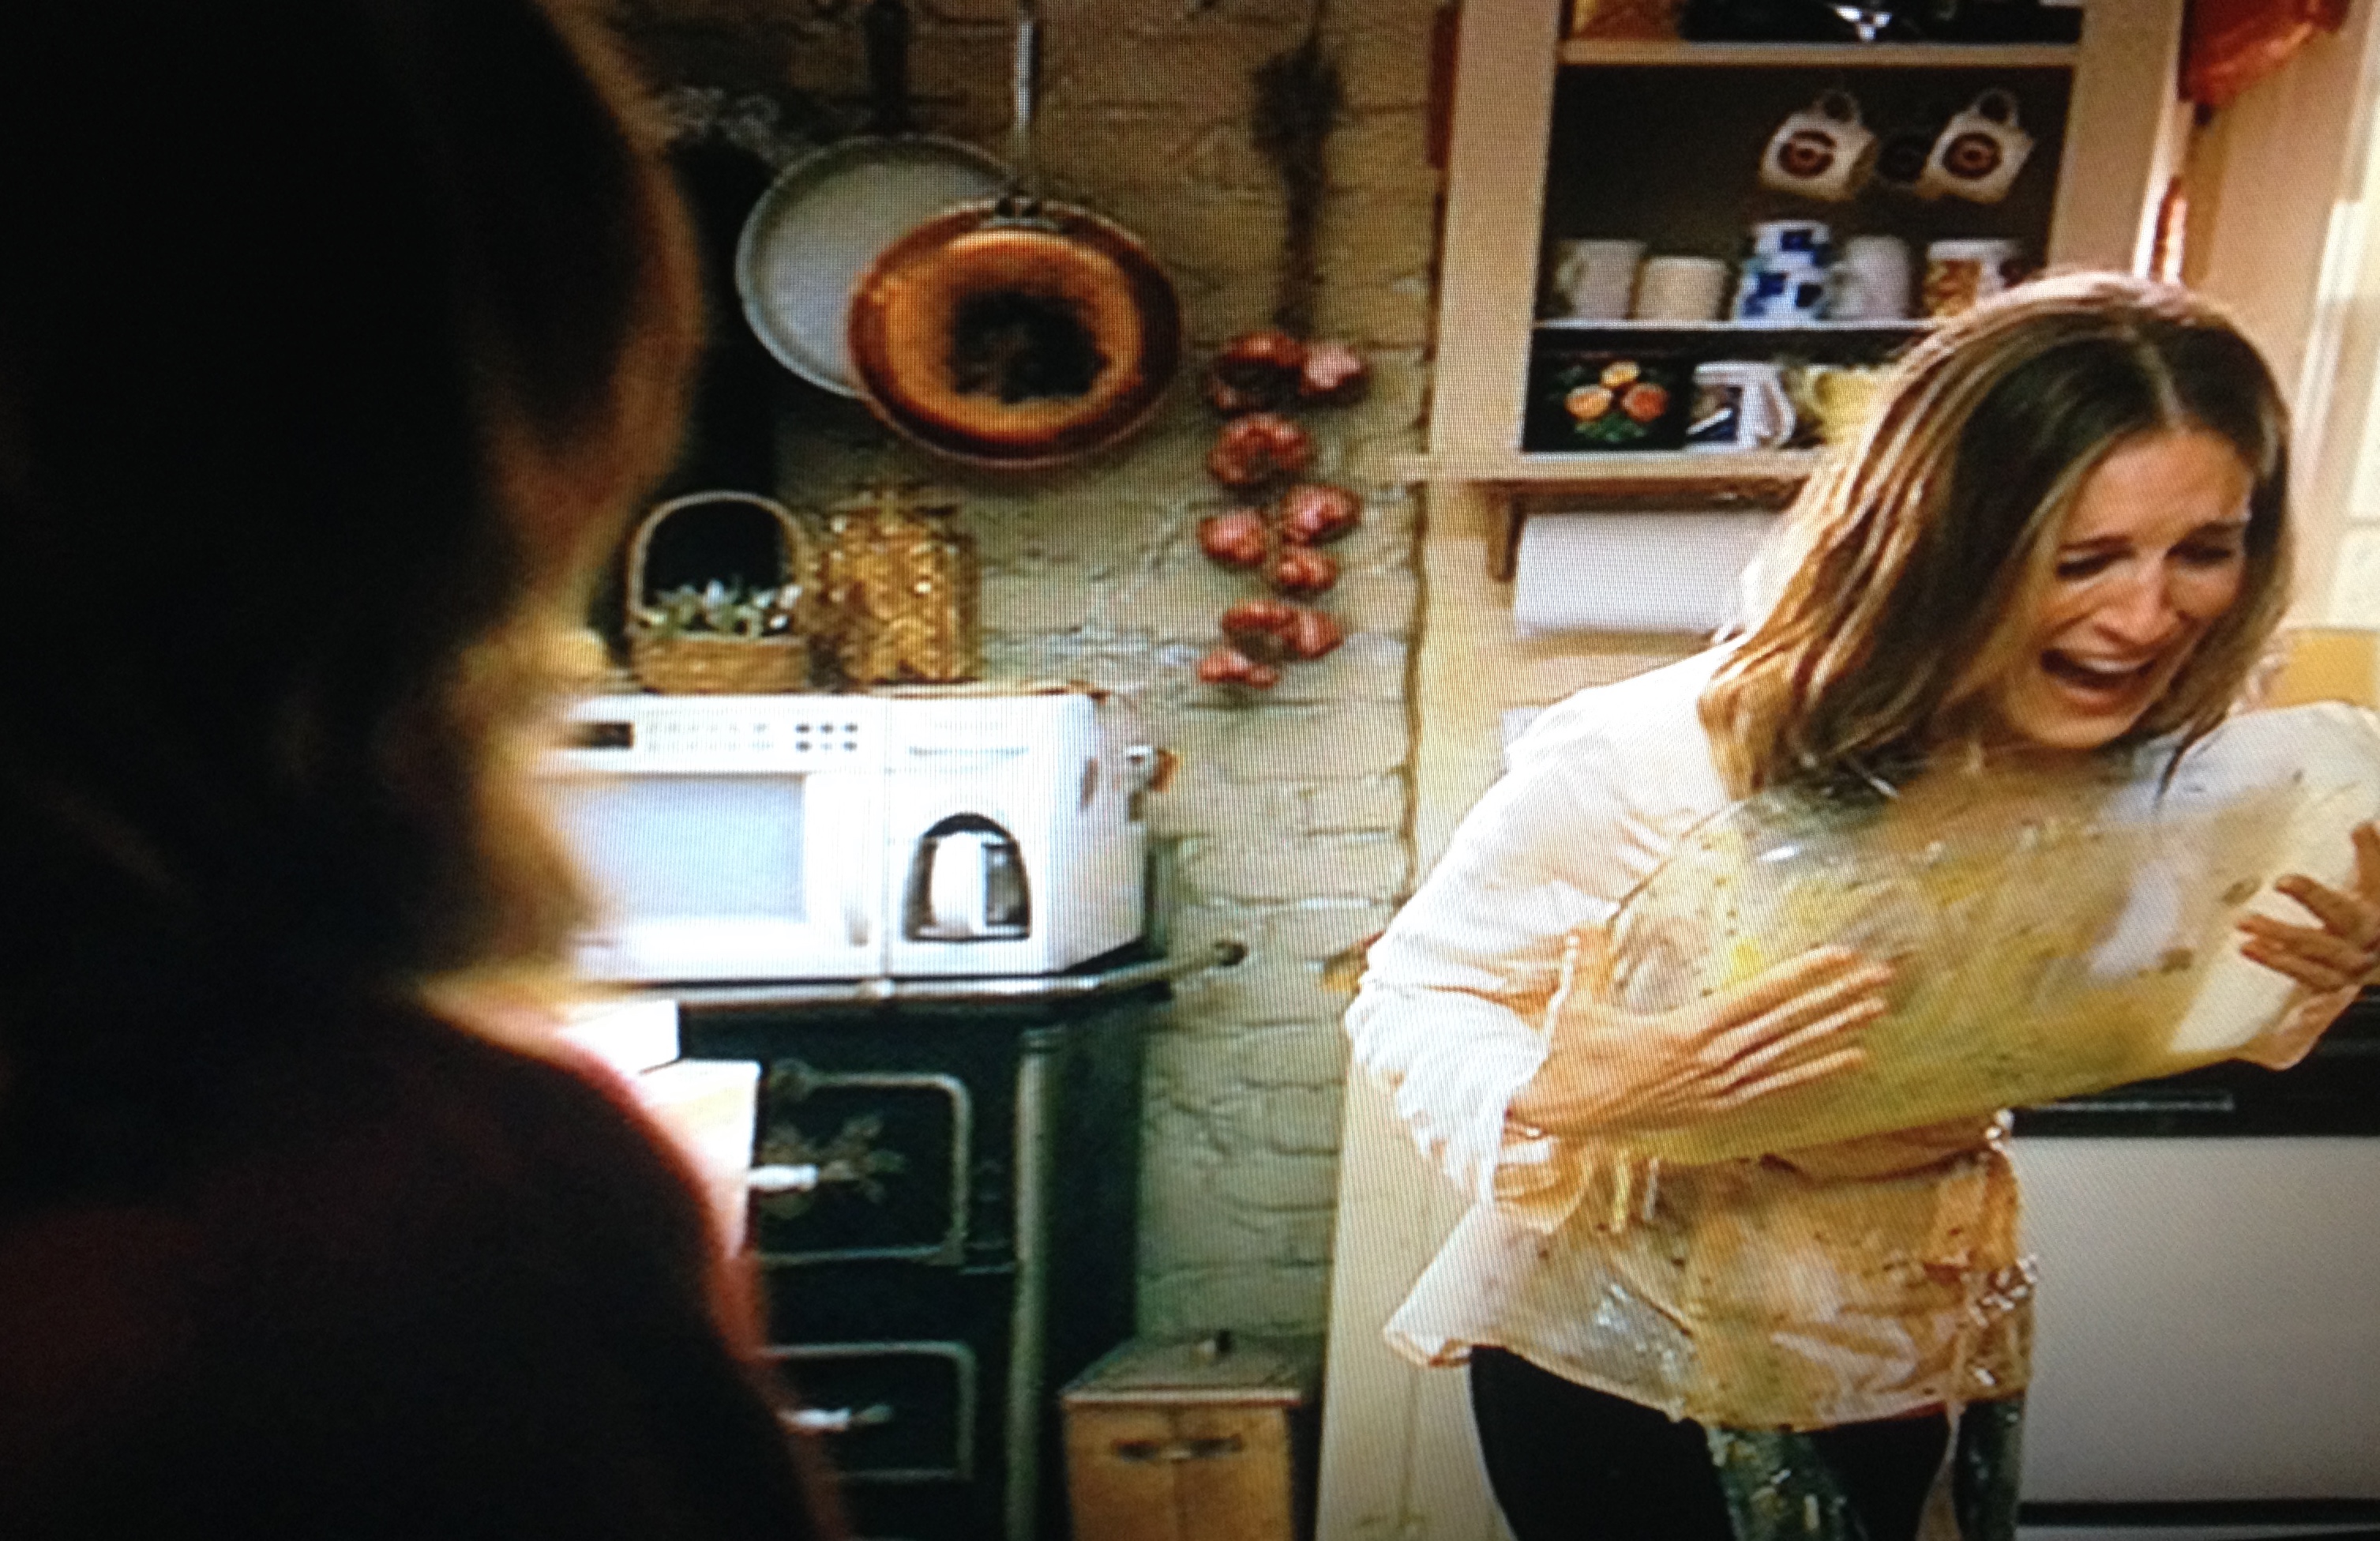
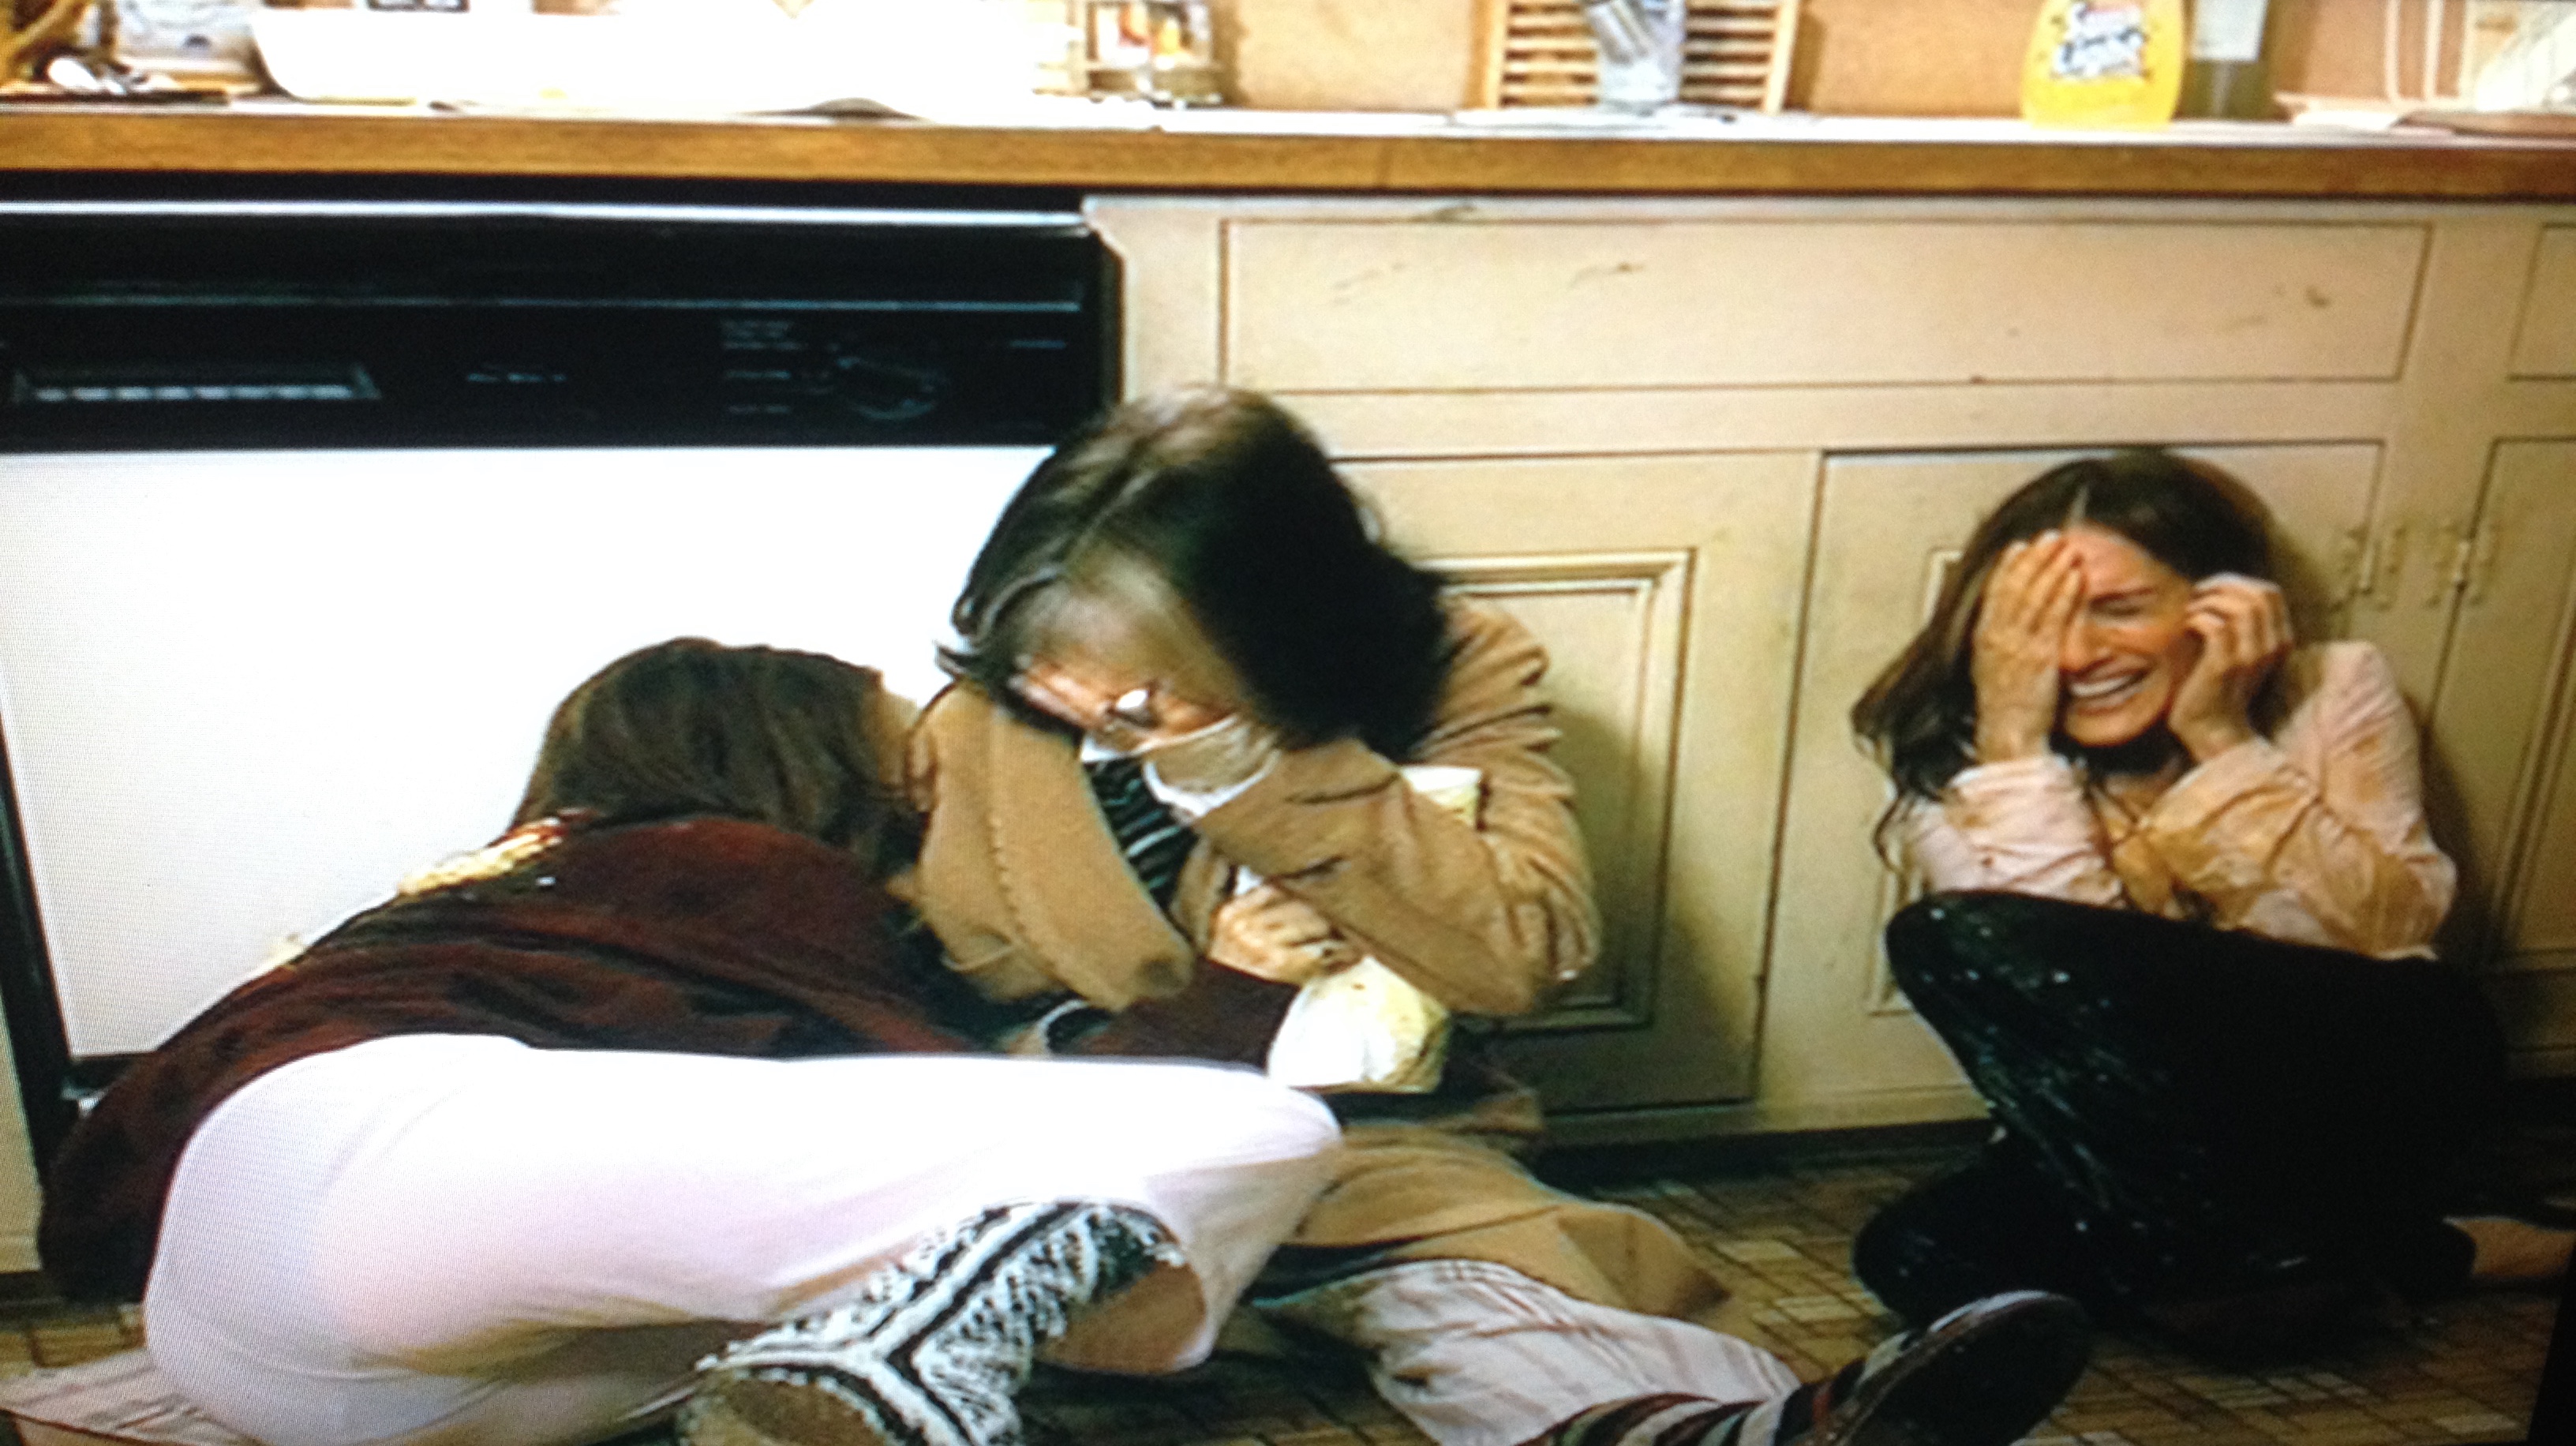
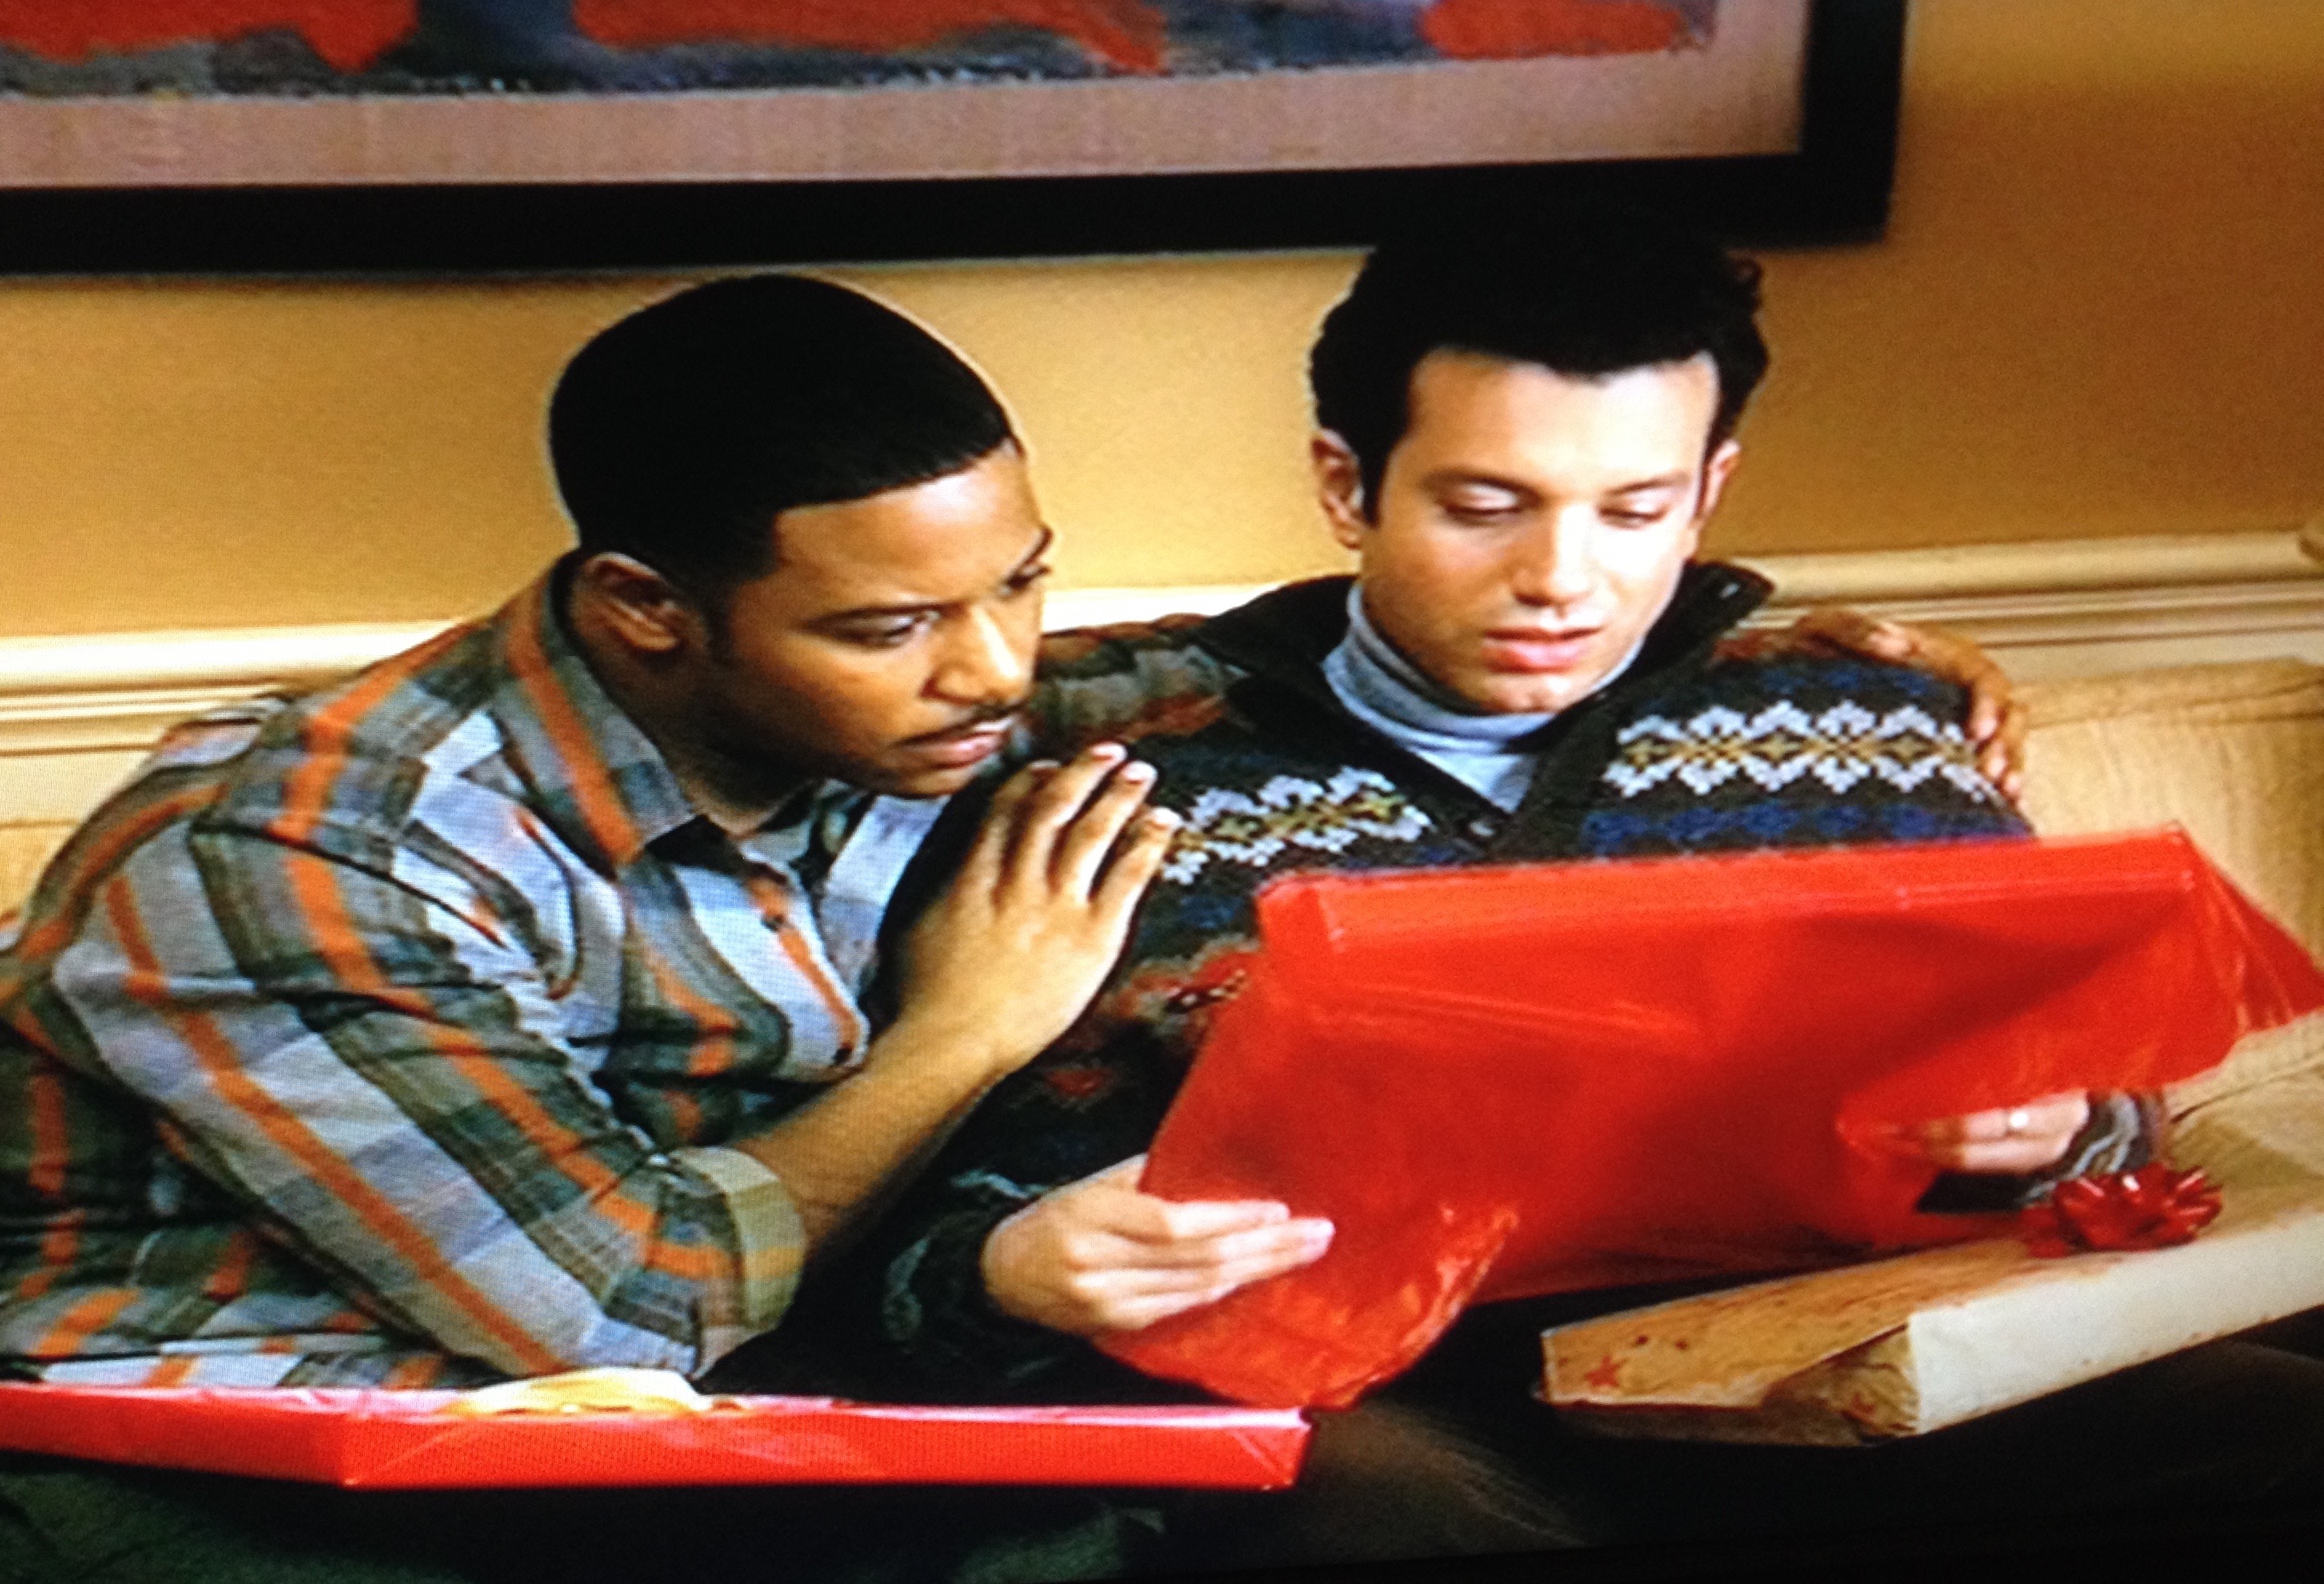
Let’s talk about Book Club. Not generally speaking; the 2018 rom-com, Book Club. Starring Jane Fonda, Diane Keaton, Mary Steenburgen and Candice Bergen, the film follows these life-long best friends, (now in their 70s ) navigating their post-menopausal, post-divorced, post-widowed, and post-sexless marriage lives. (Side note: Did you know that Jane Fonda was 81 when this film released?! Yes, 81! She looks amazing.)

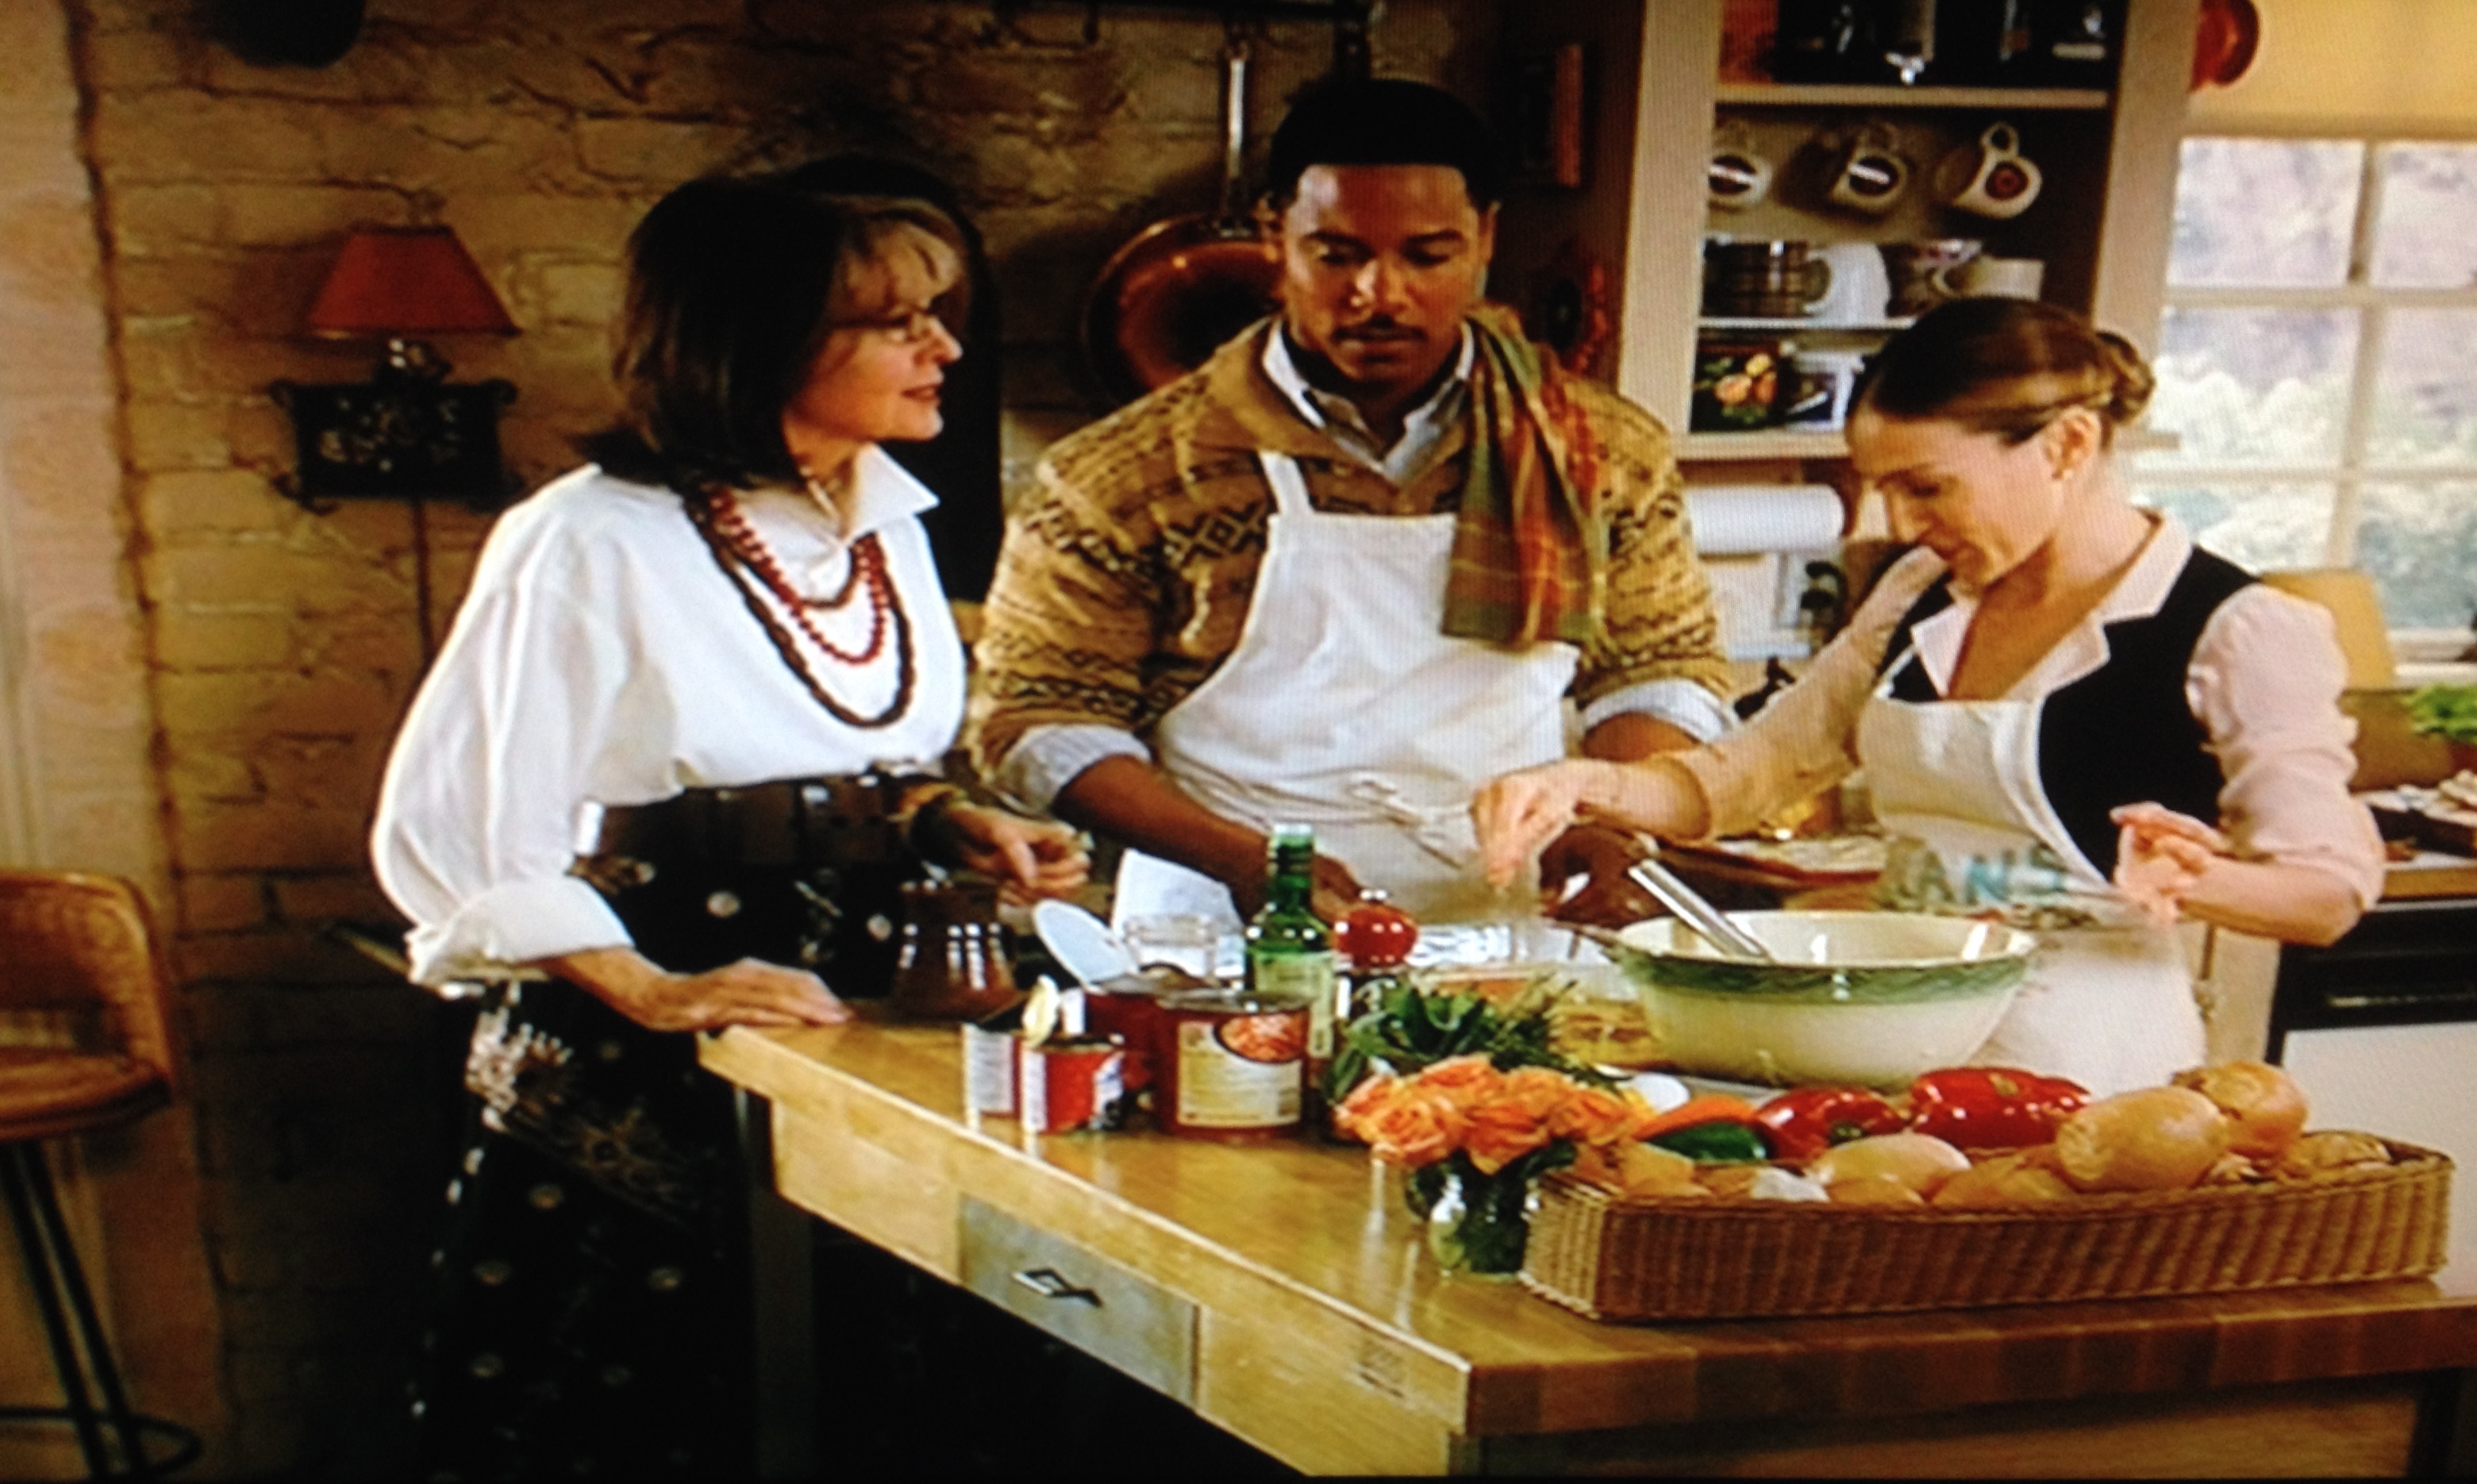
The friends are in a book club, and their next book is Fifty Shades of Grey. The story continues with them reading the book while finding love, rekindling love, reigniting love and rediscovering their self love. Some may say it’s cheesy, but I’m a sucker for any rom-com, and I found it lighthearted and endearing. The scenes between Fonda’s character, Vivian and former flame, Arthur (played by Don Johnson), clearly have incredible on-screen chemistry. Or the adorableness that’s Steenburgen’s, Carol, performing a tap-dancing number as her husband (a very hilarious Craig T. Nelson) rides in a motorcycle singing Meatloaf’s, “I’d Do Anything For Love (But I Won’t Do That).”

F8BFAA59-1897-4C5D-9A2E-AF27905B09DF

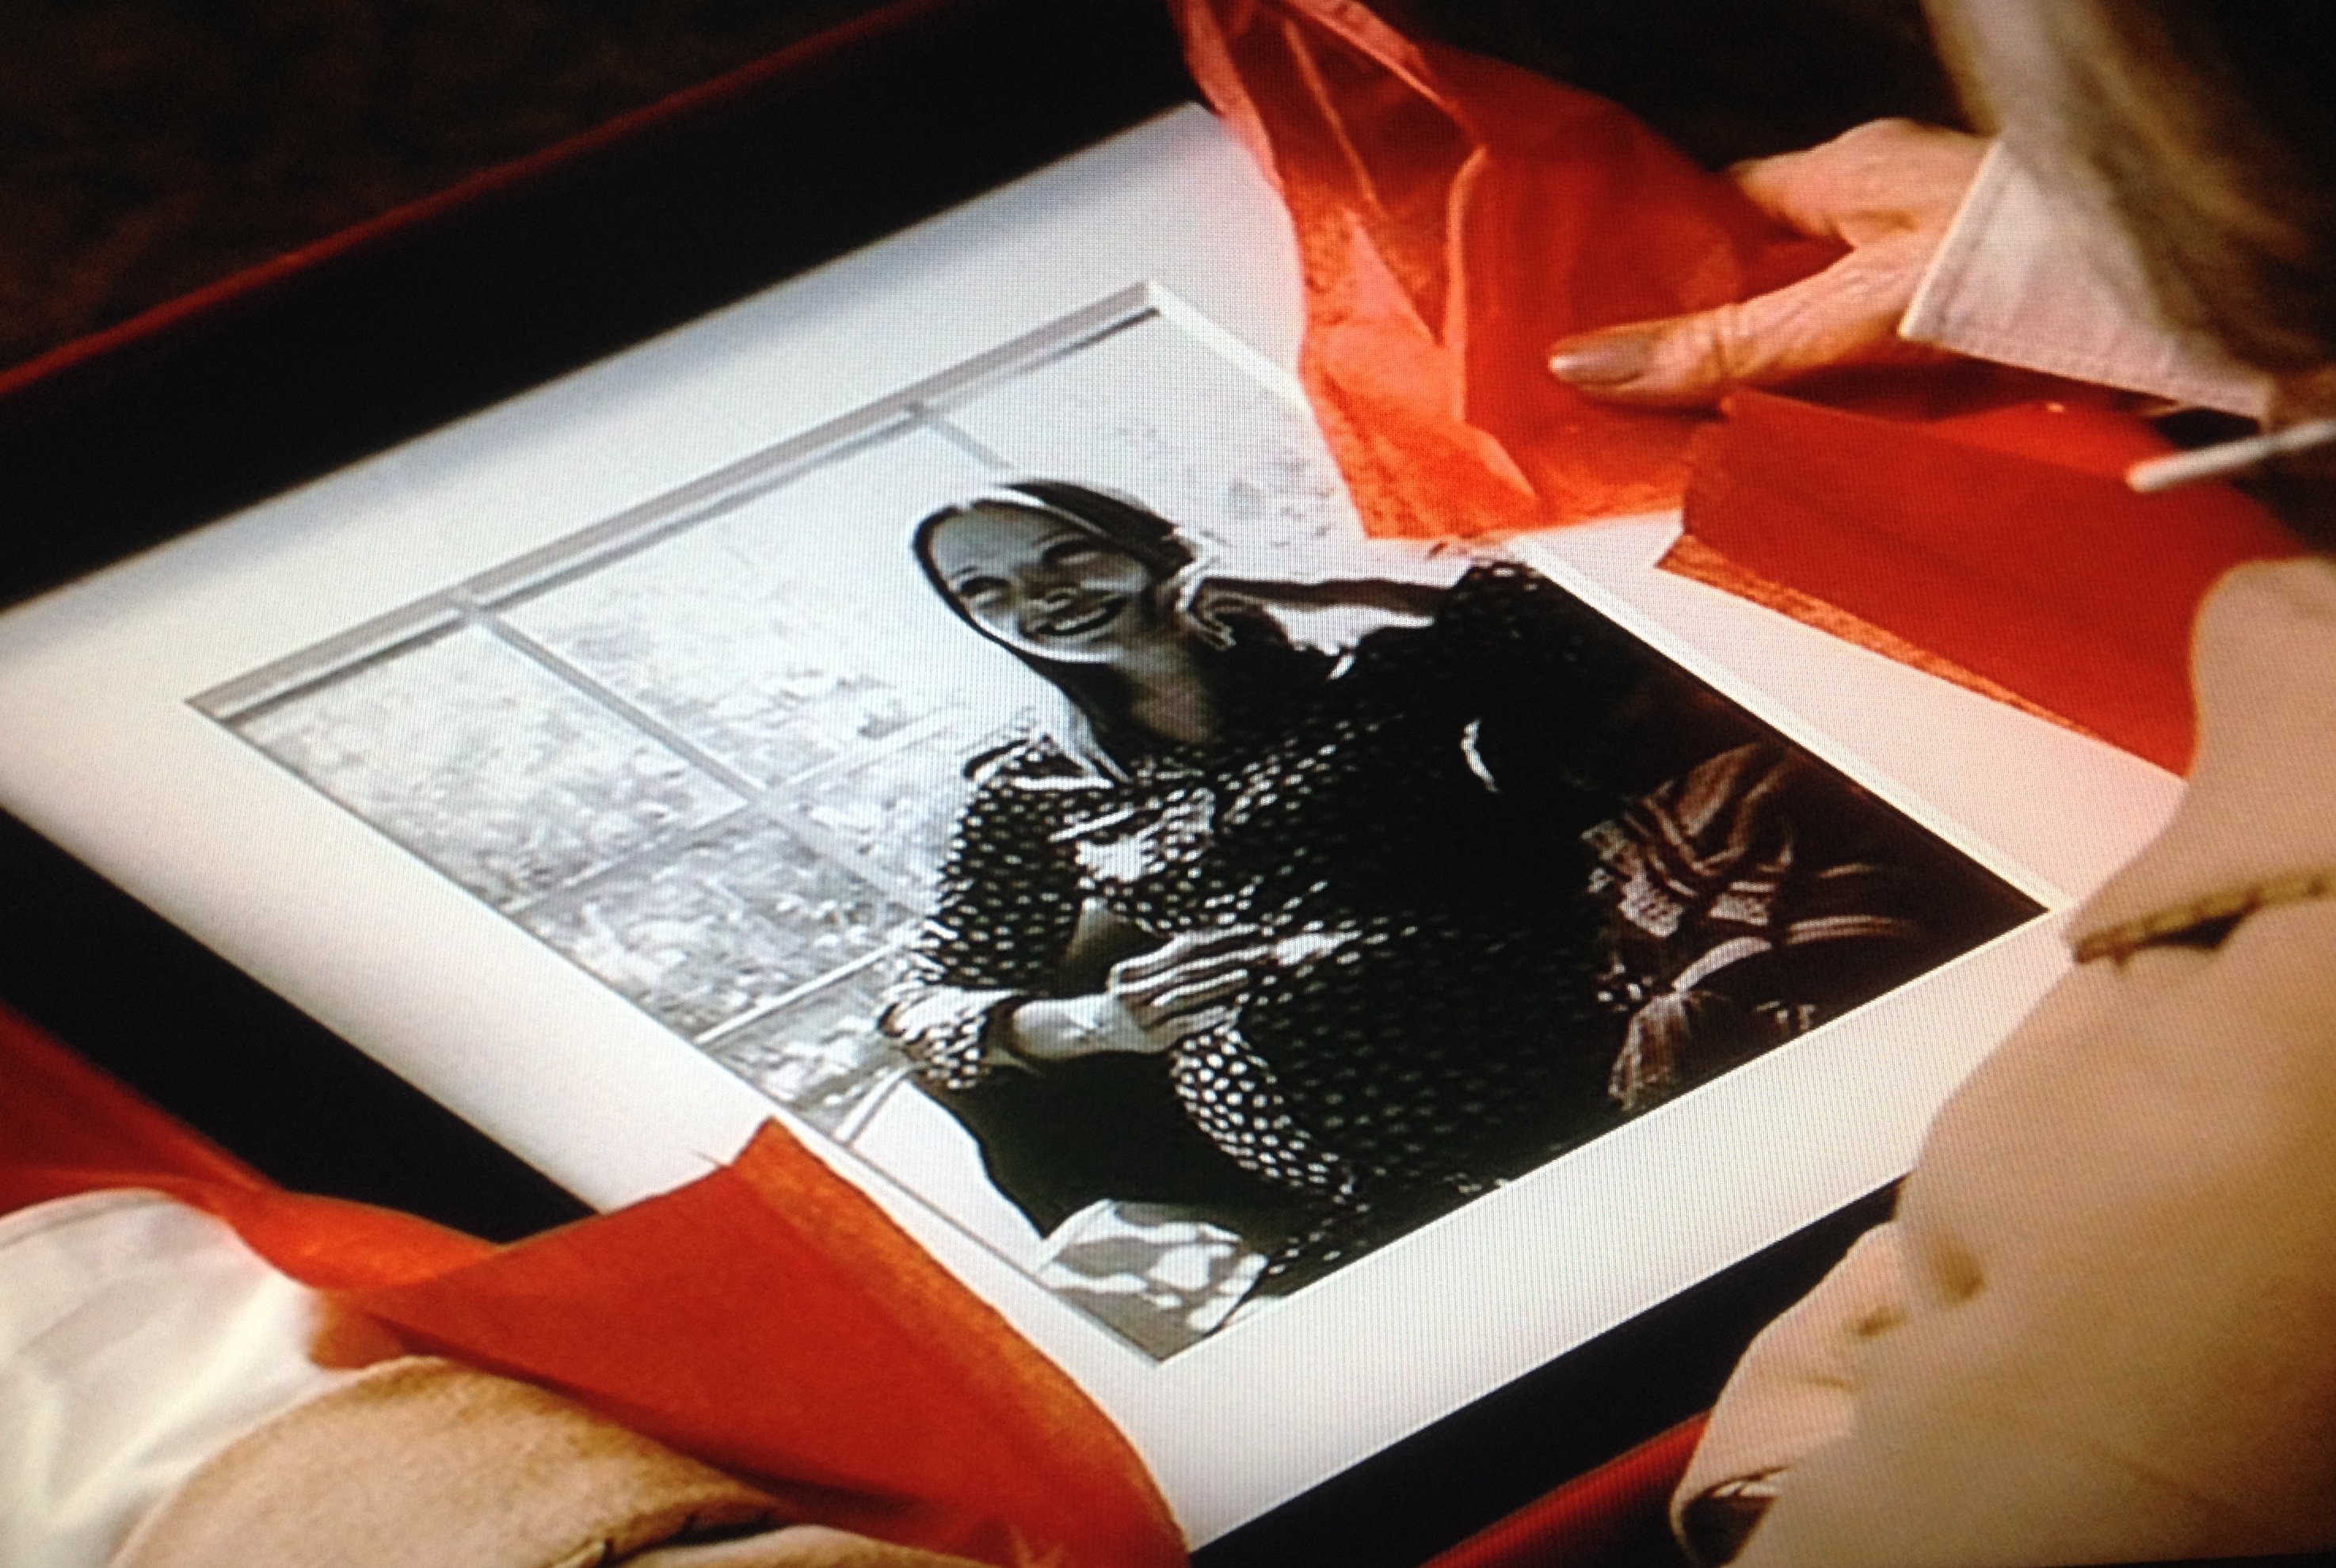
Original image by Apartment Story + June Pictures

I went to see this movie in theaters with my fellow rom-com loving friend, Lindsay when it first came out. I cried. I’m unsure if she did. But I definitely cry watching movies. I’m an empath. It happens.

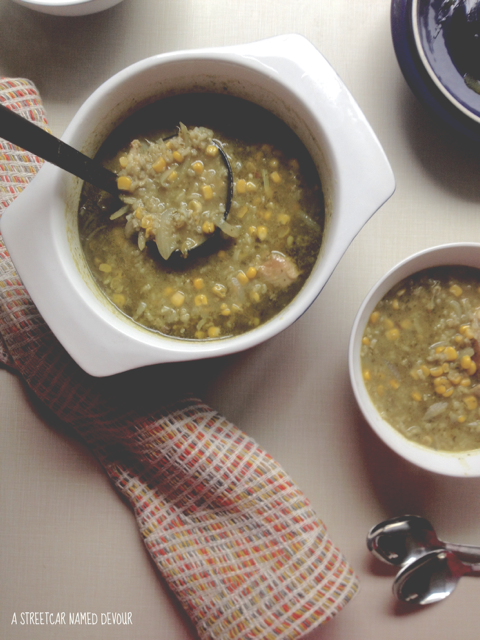
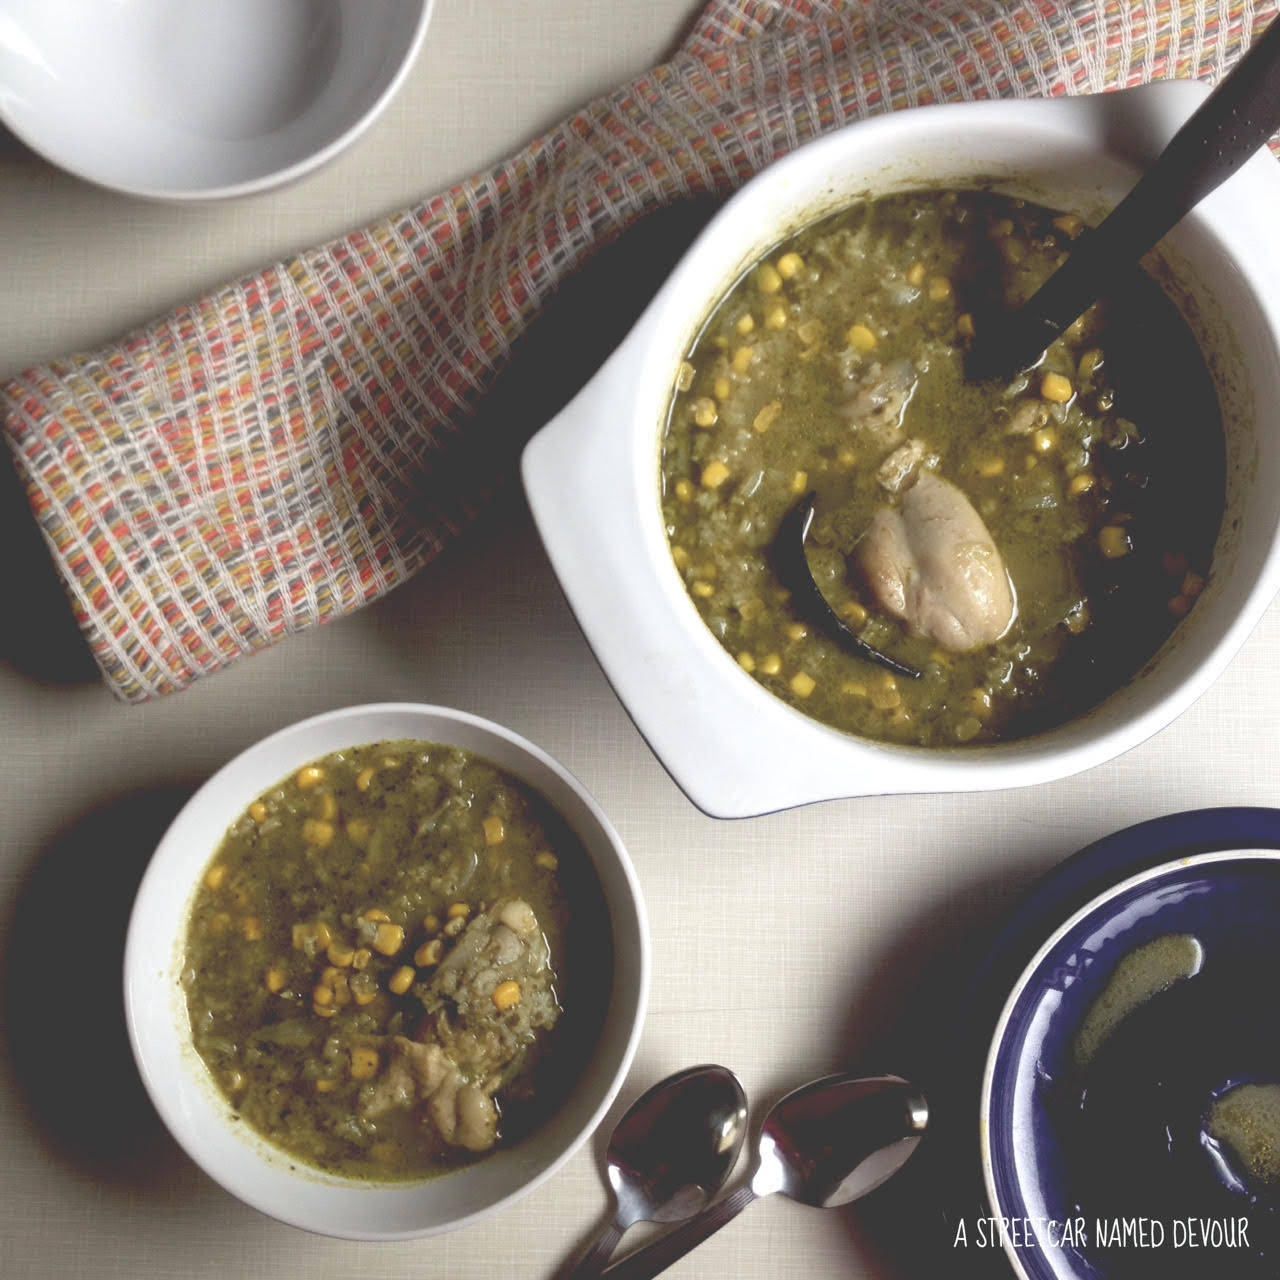
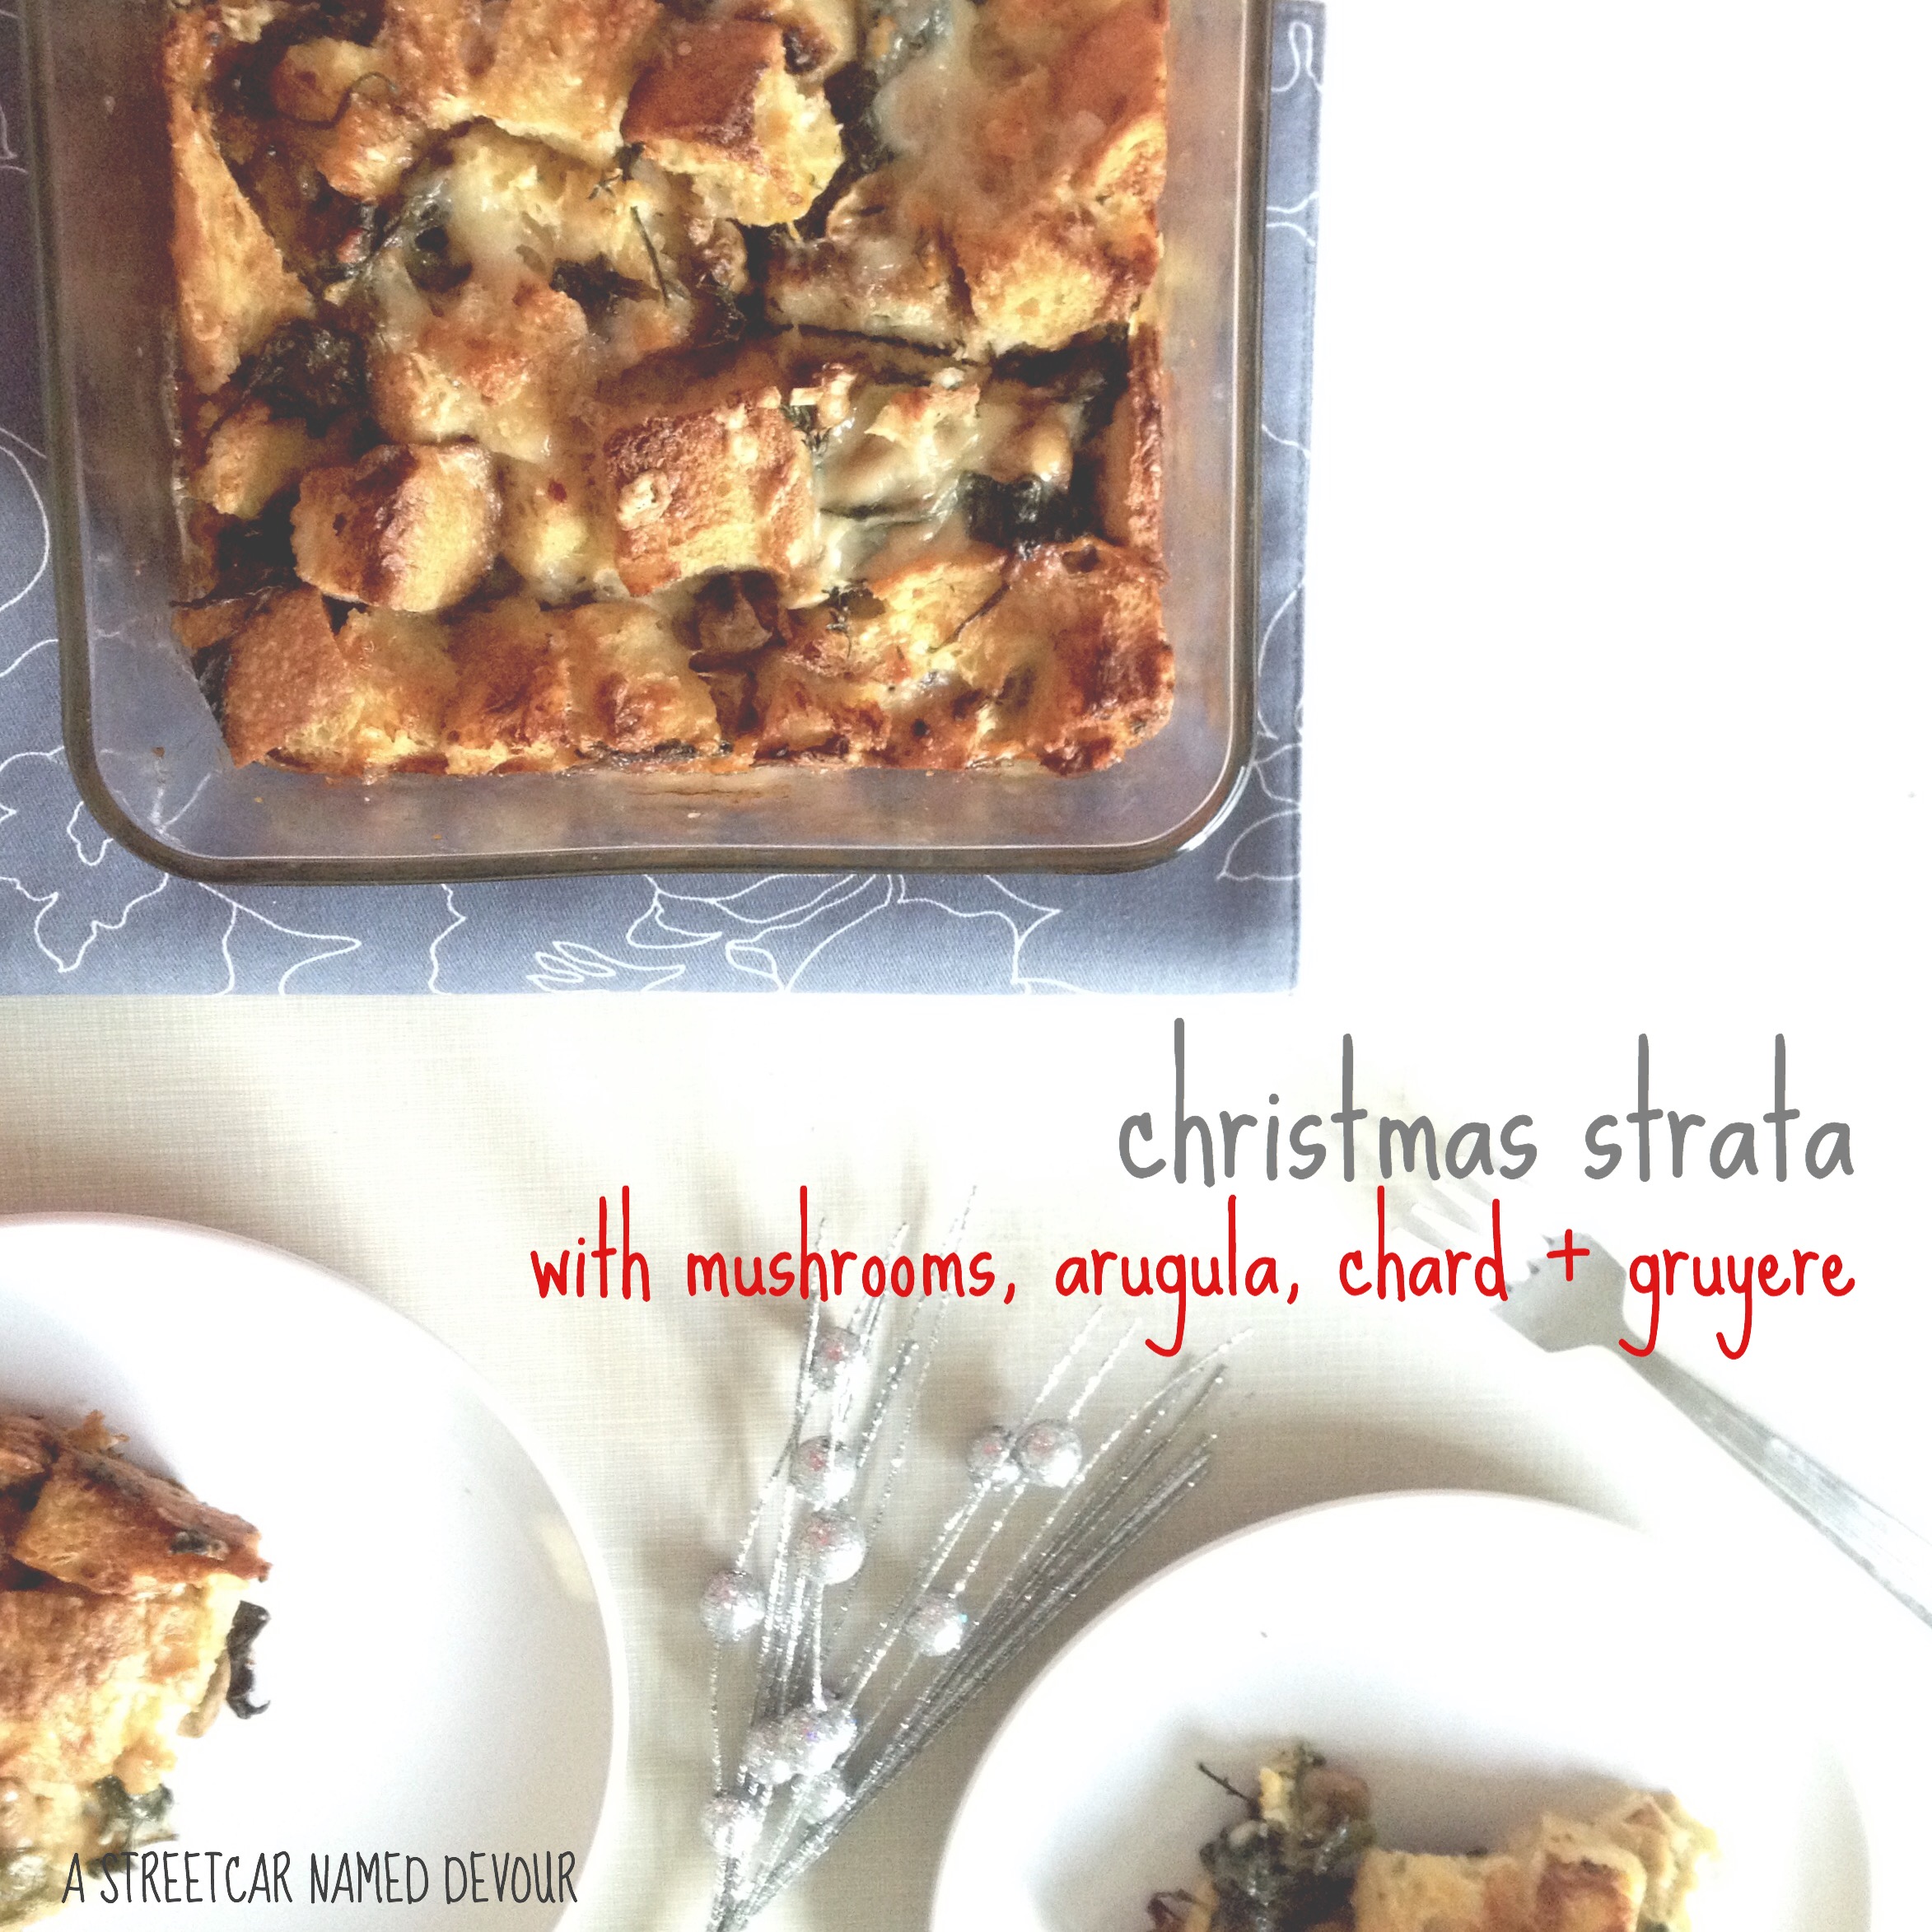
I watched it again recently (it’s currently steaming on Amazon Prime.) I still enjoy it. With all of this extra time on my hands, I wanted to make time-consuming yeast-raised doughnuts. Fridge foraging is a trending hashtag on social media right now, as many of us are in self-quarantine and socially distancing. I discovered that I had almost three bottles of black sesame seeds in my pantry, so I wanted to make doughnuts with them. I found a recipe on Belly Rumbles, and made a couple of edits and vegan-ized it. I replaced the miso glaze in her recipe with matcha glaze (another ingredient I have plenty of in my pantry). And black sesame + matcha go together like peanut butter + jelly. Wouldn’t you agree?

Processed With Darkroom

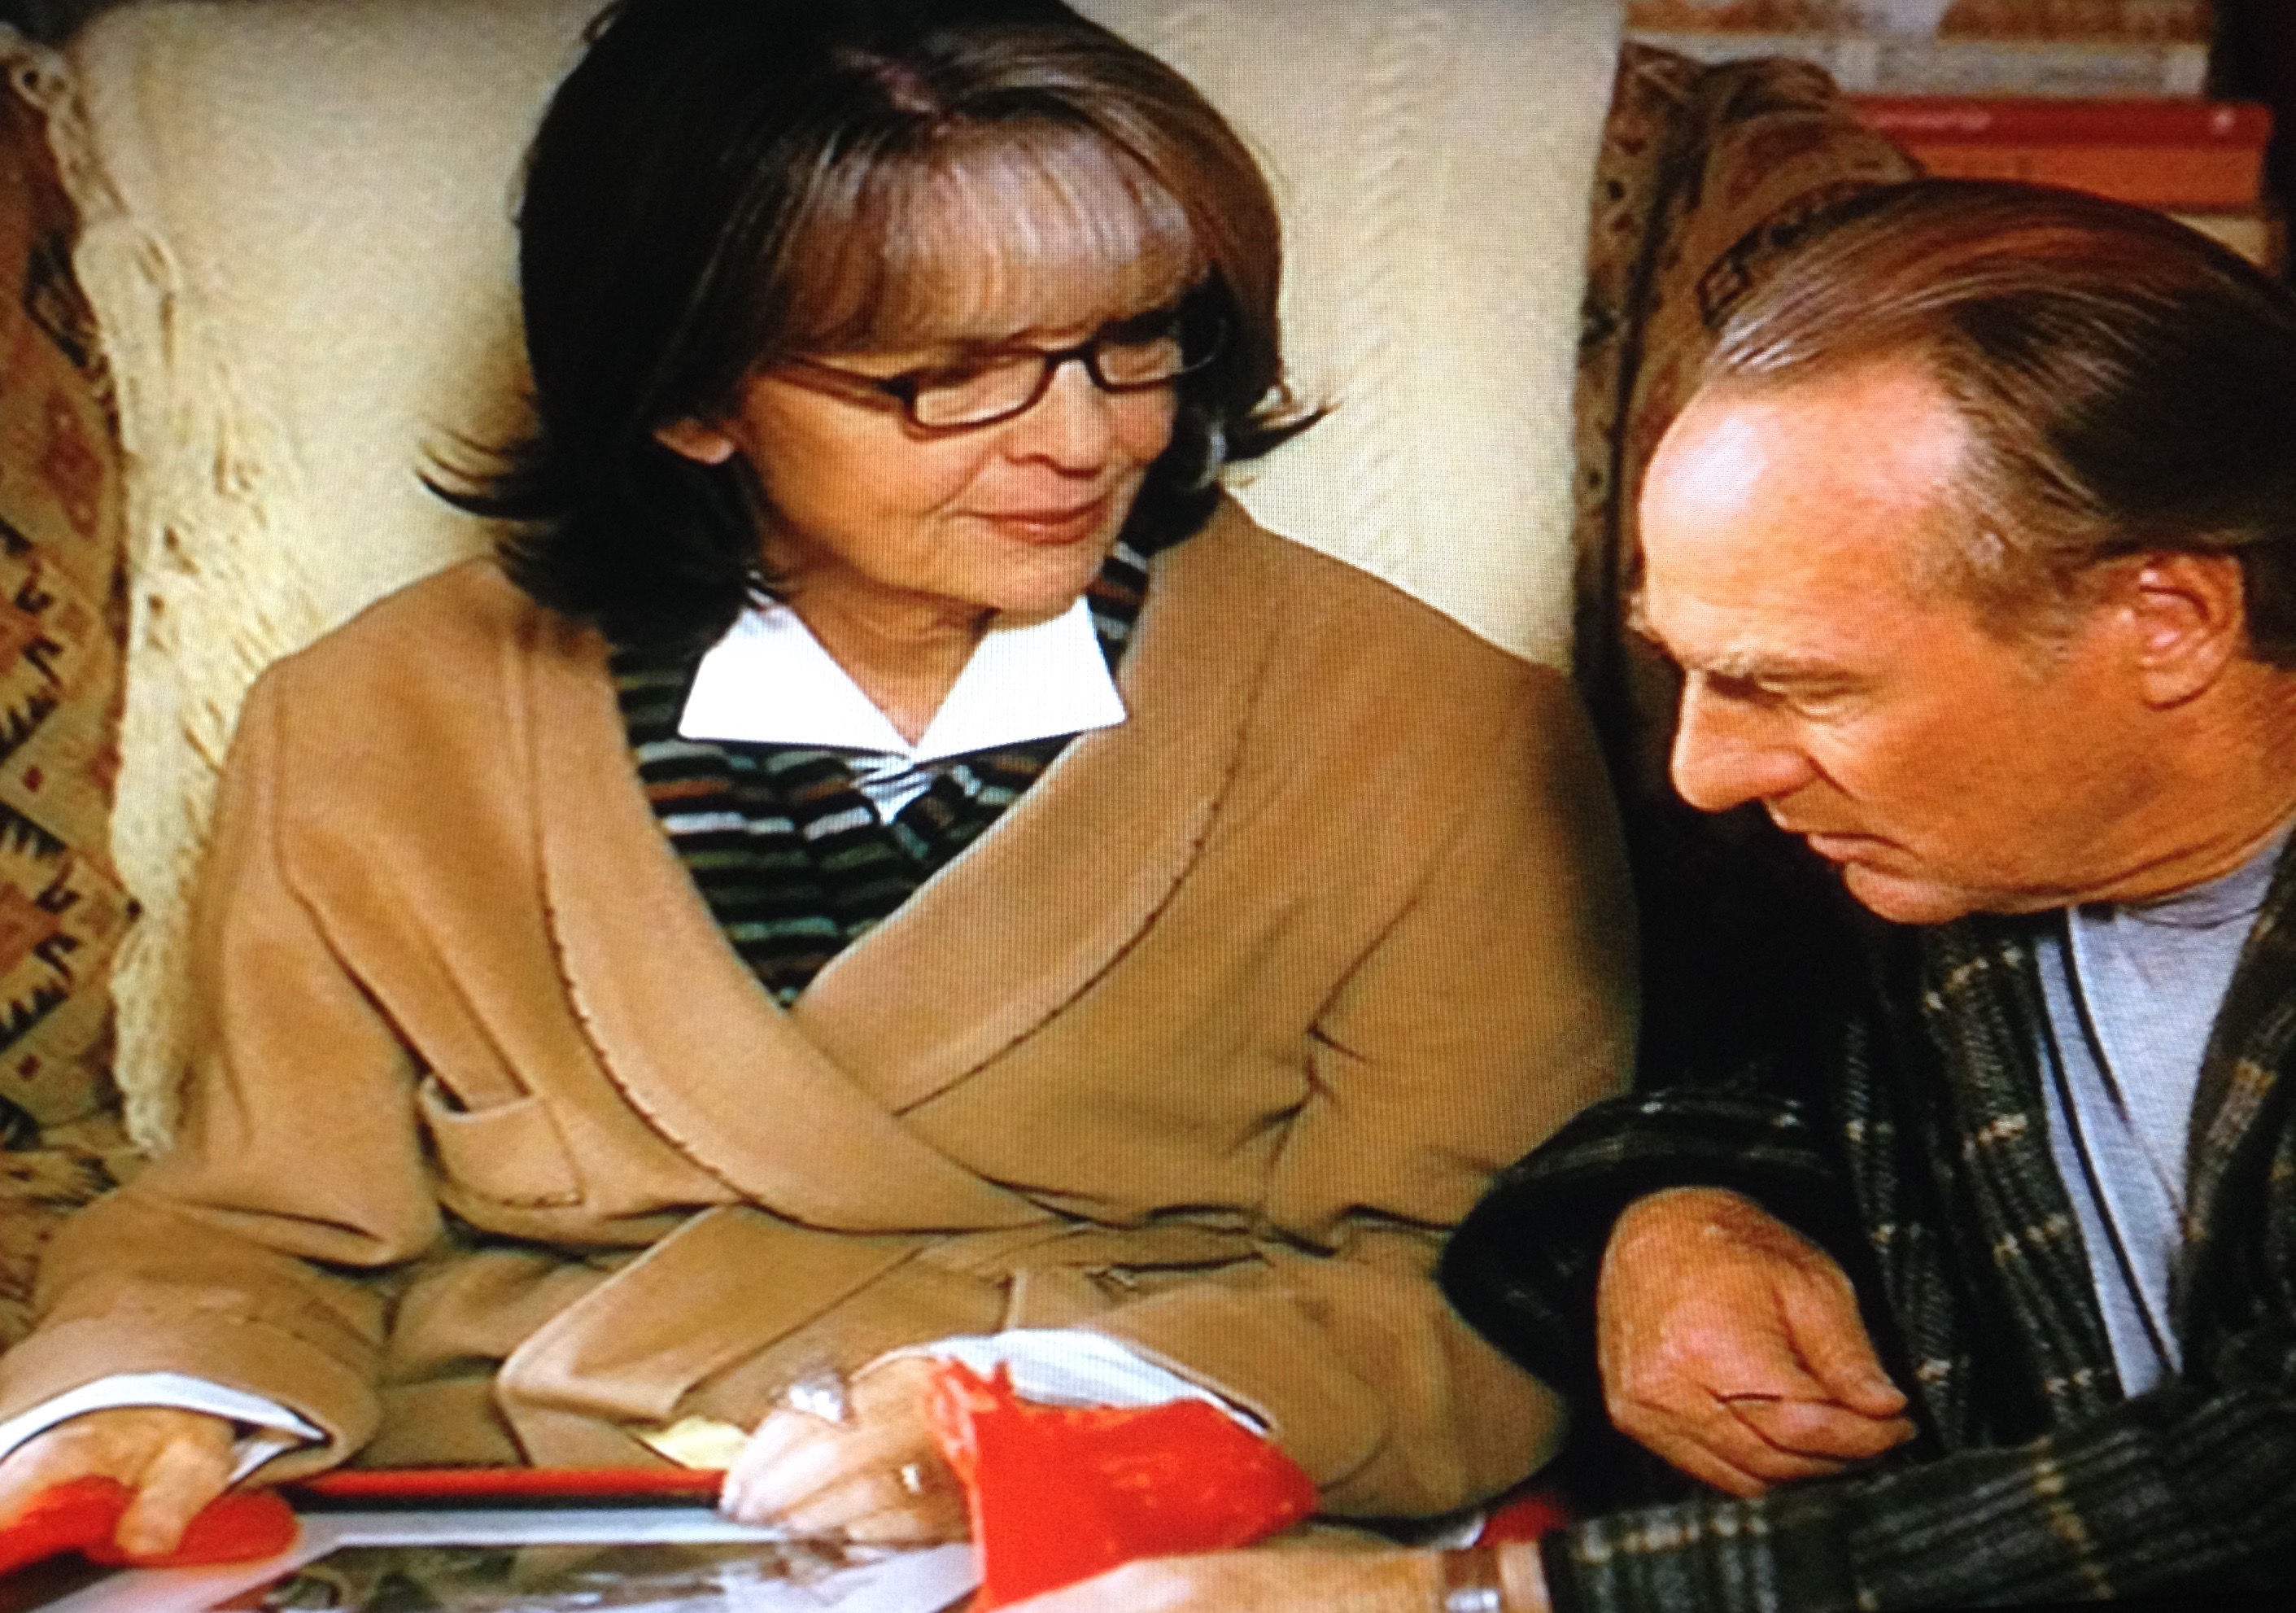
“To even be holding this book is embarrassing.” -Sharon (Candice Bergen)

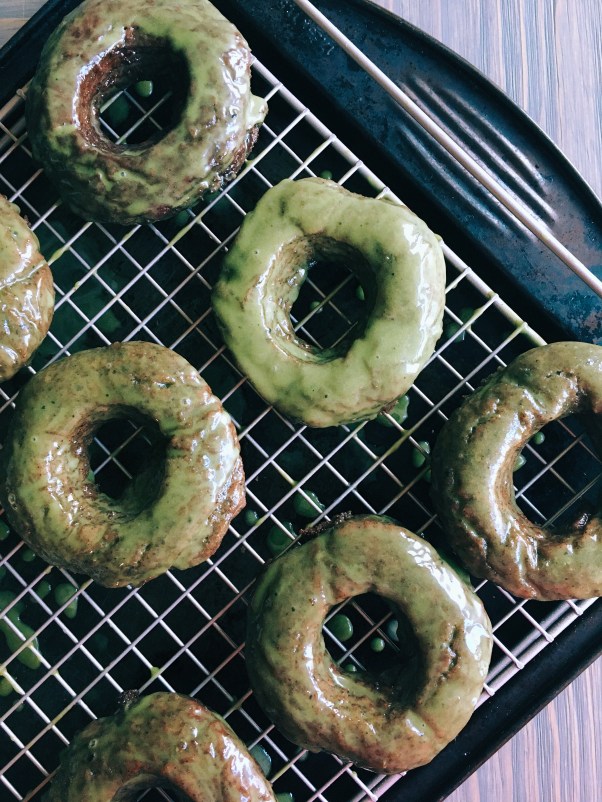
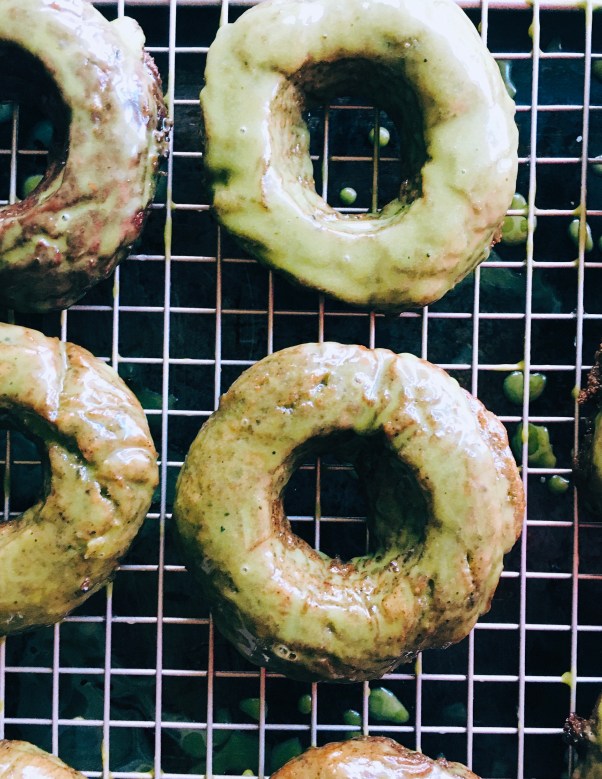
Black Sesame Doughnuts with Matcha Glaze

Yields about 1 dozen
Recipe slightly adapted from Belly Rumbles


FOR THE BLACK SESAME PASTE

INGREDIENTS
1/2 cup black sesame seeds
4T date syrup (or honey if not vegan)

METHOD
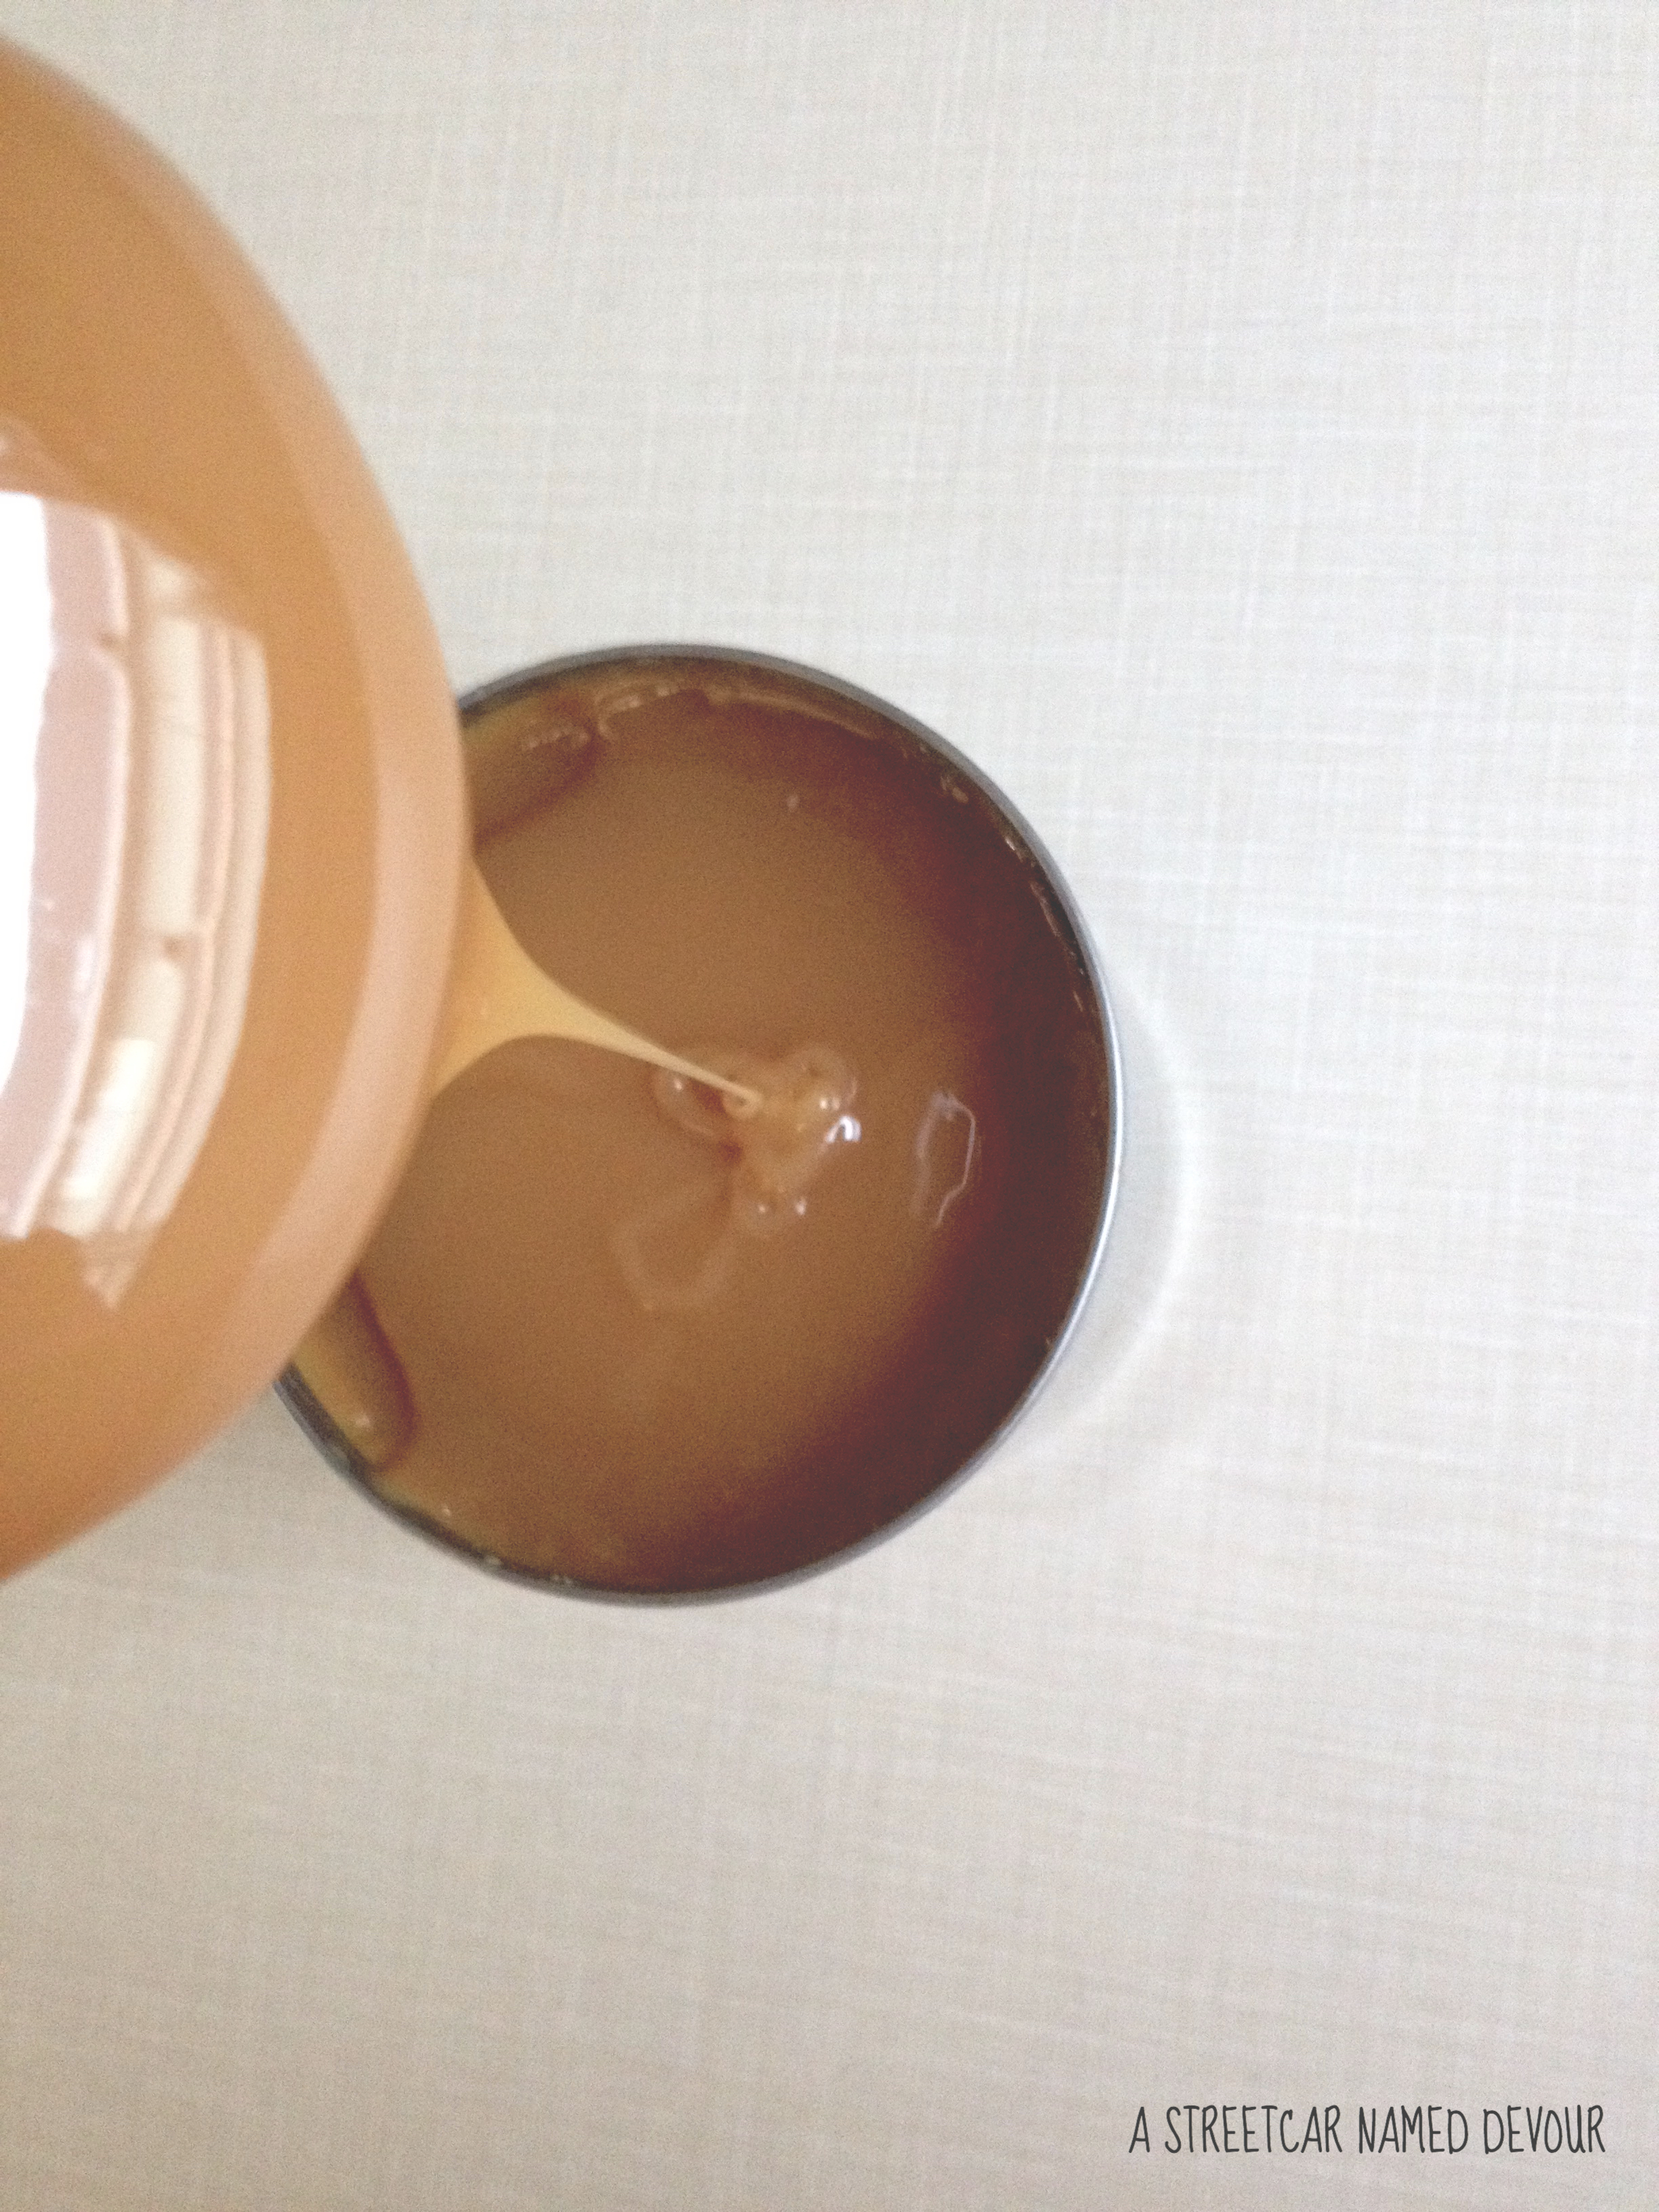
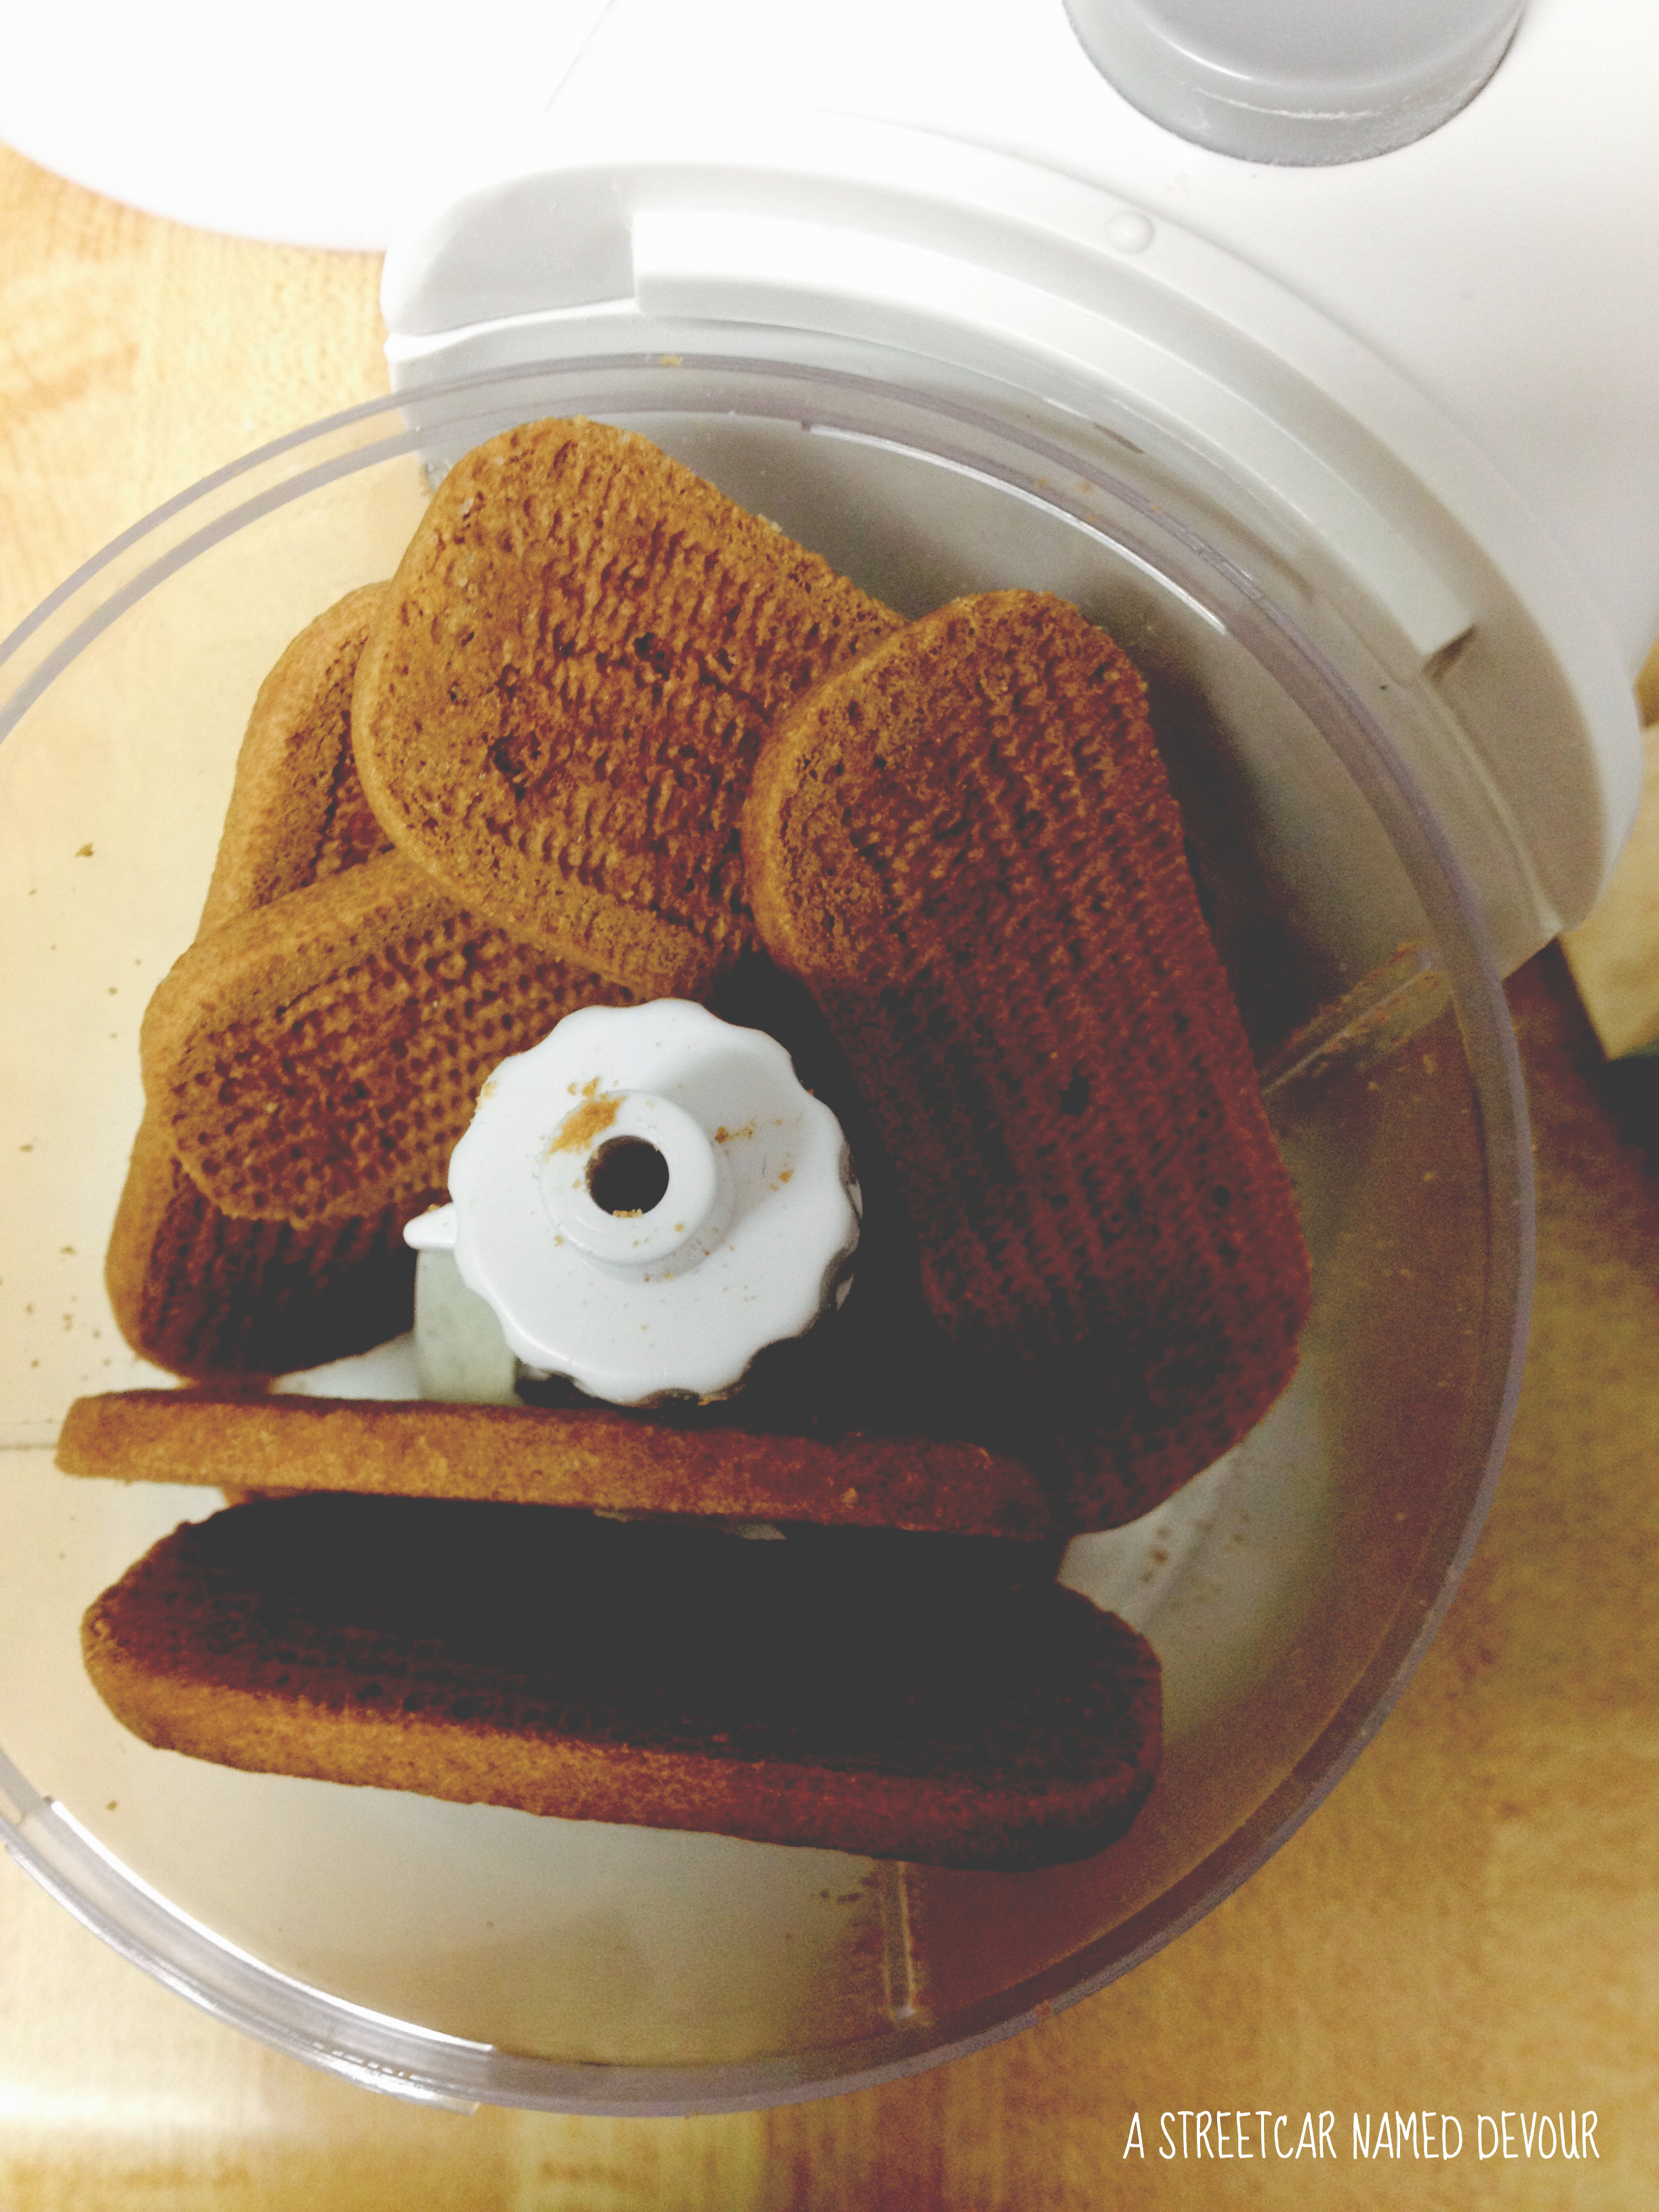
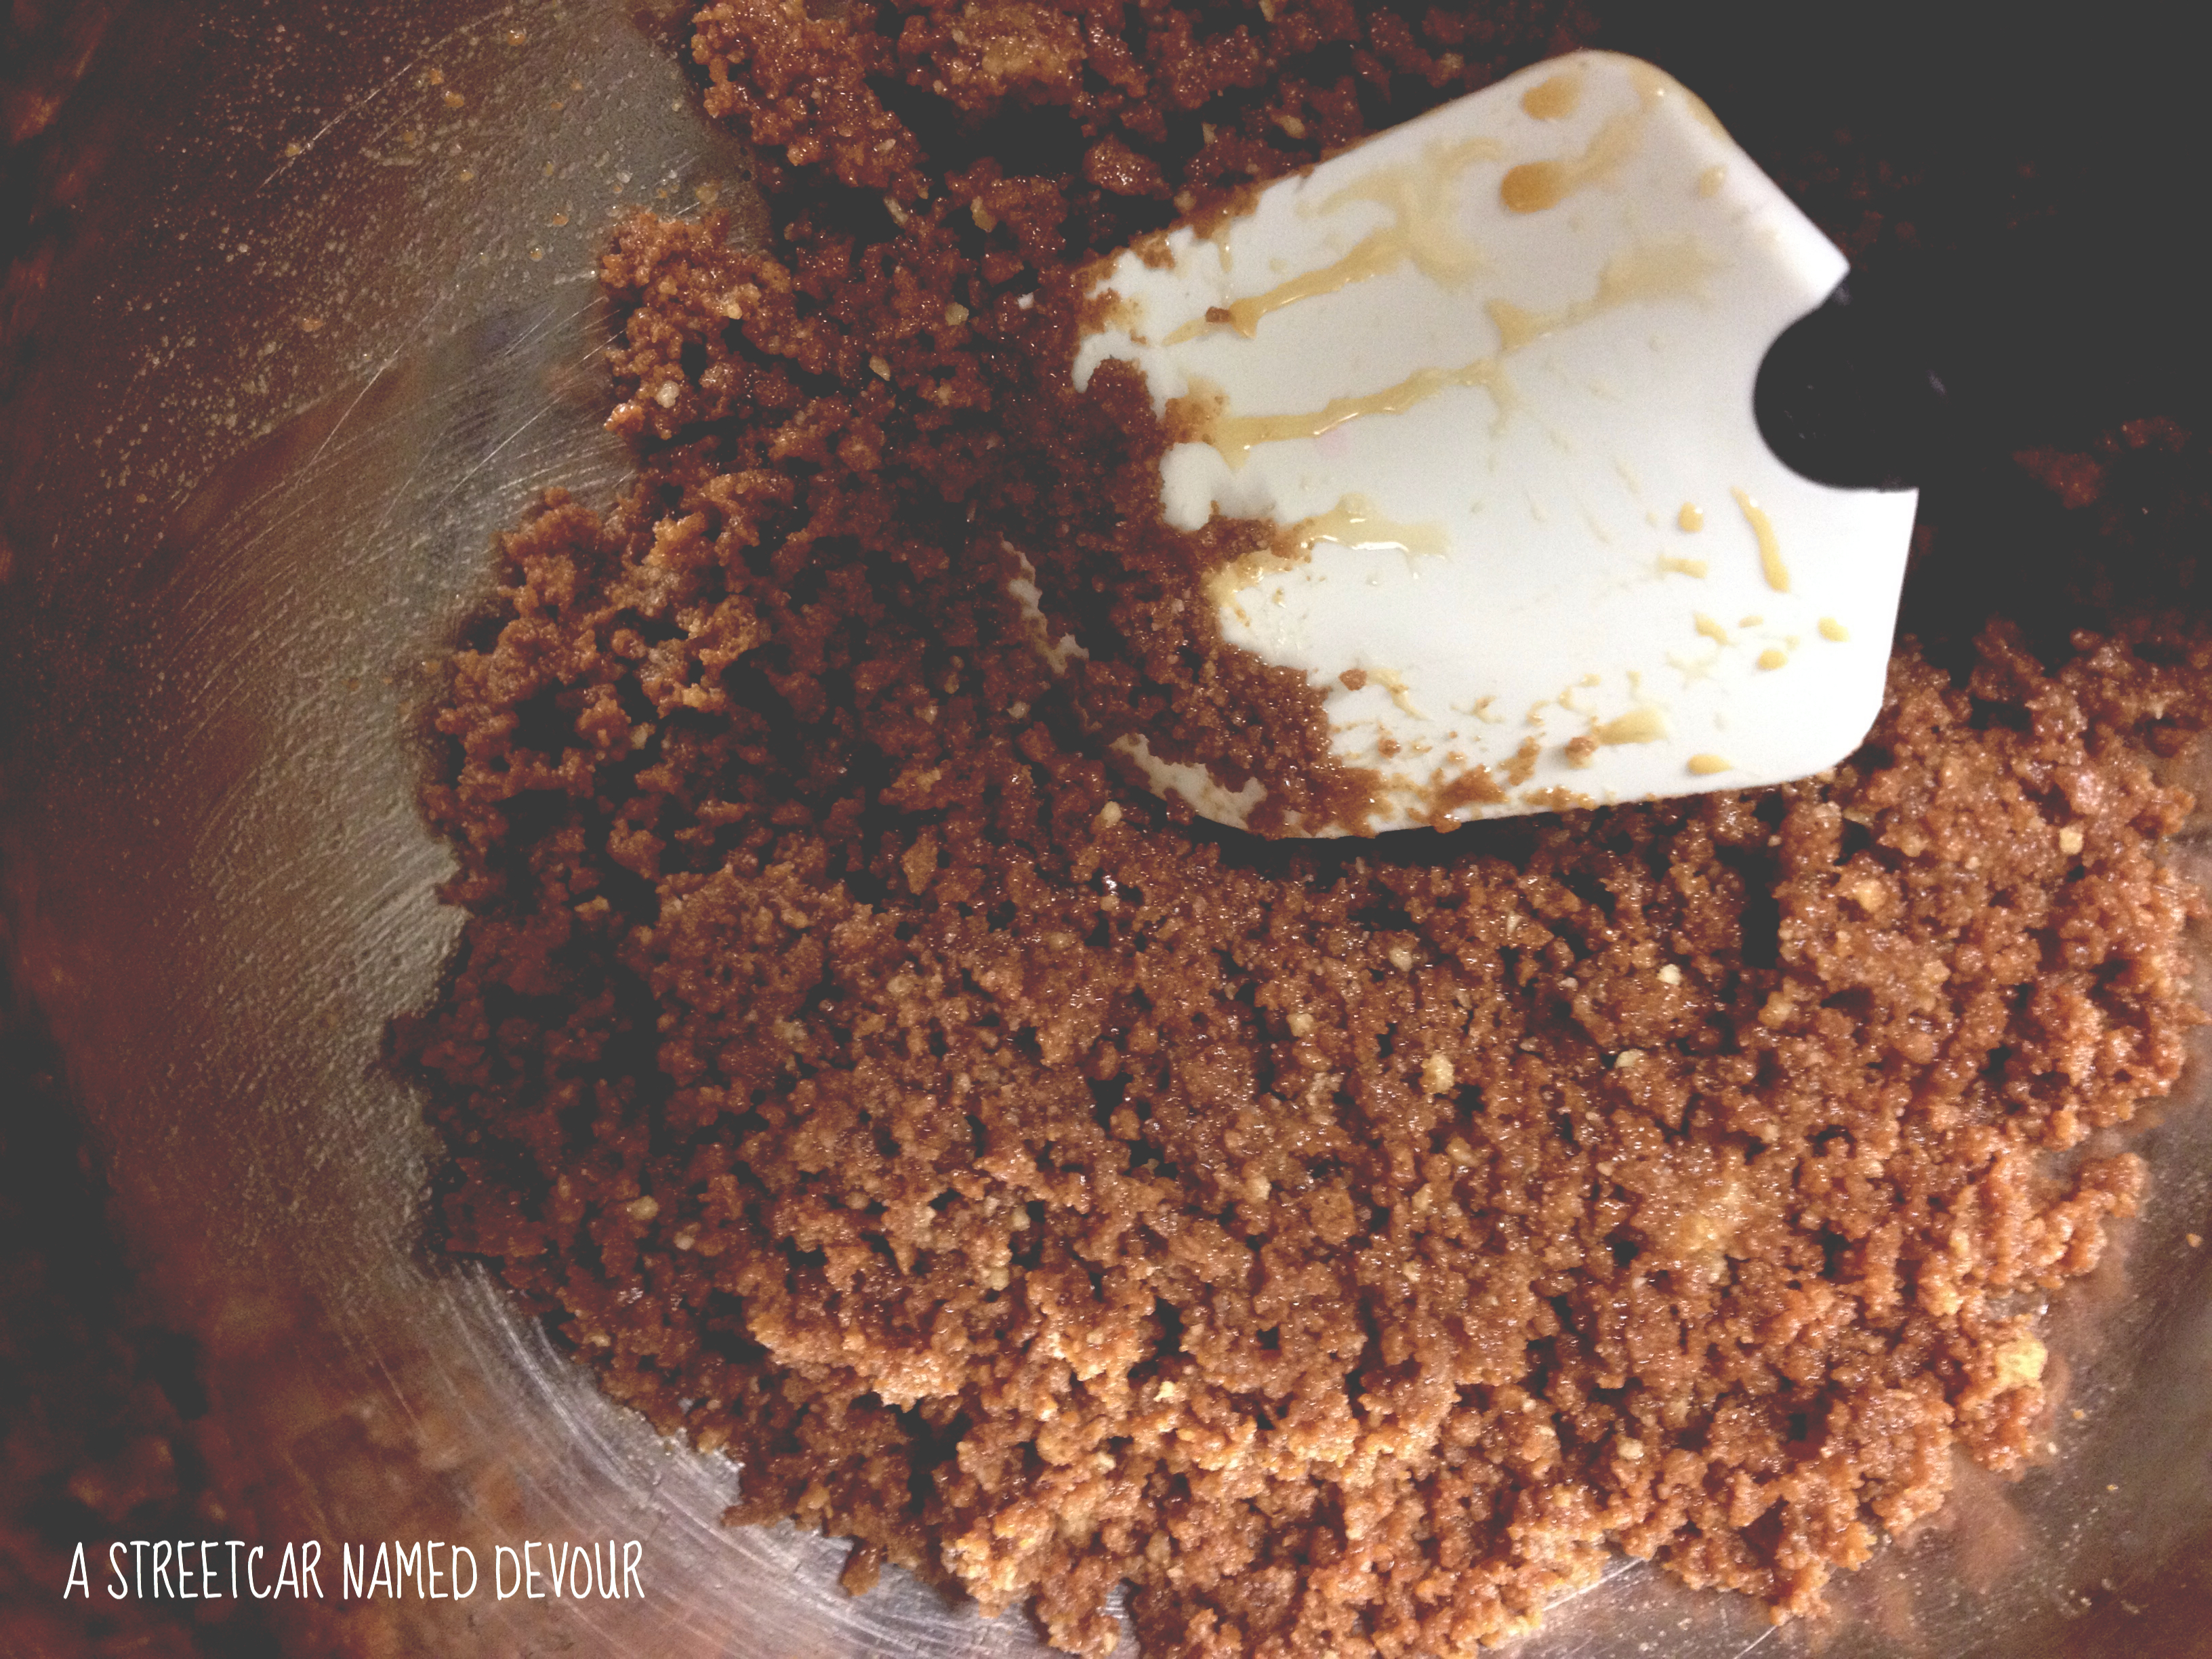
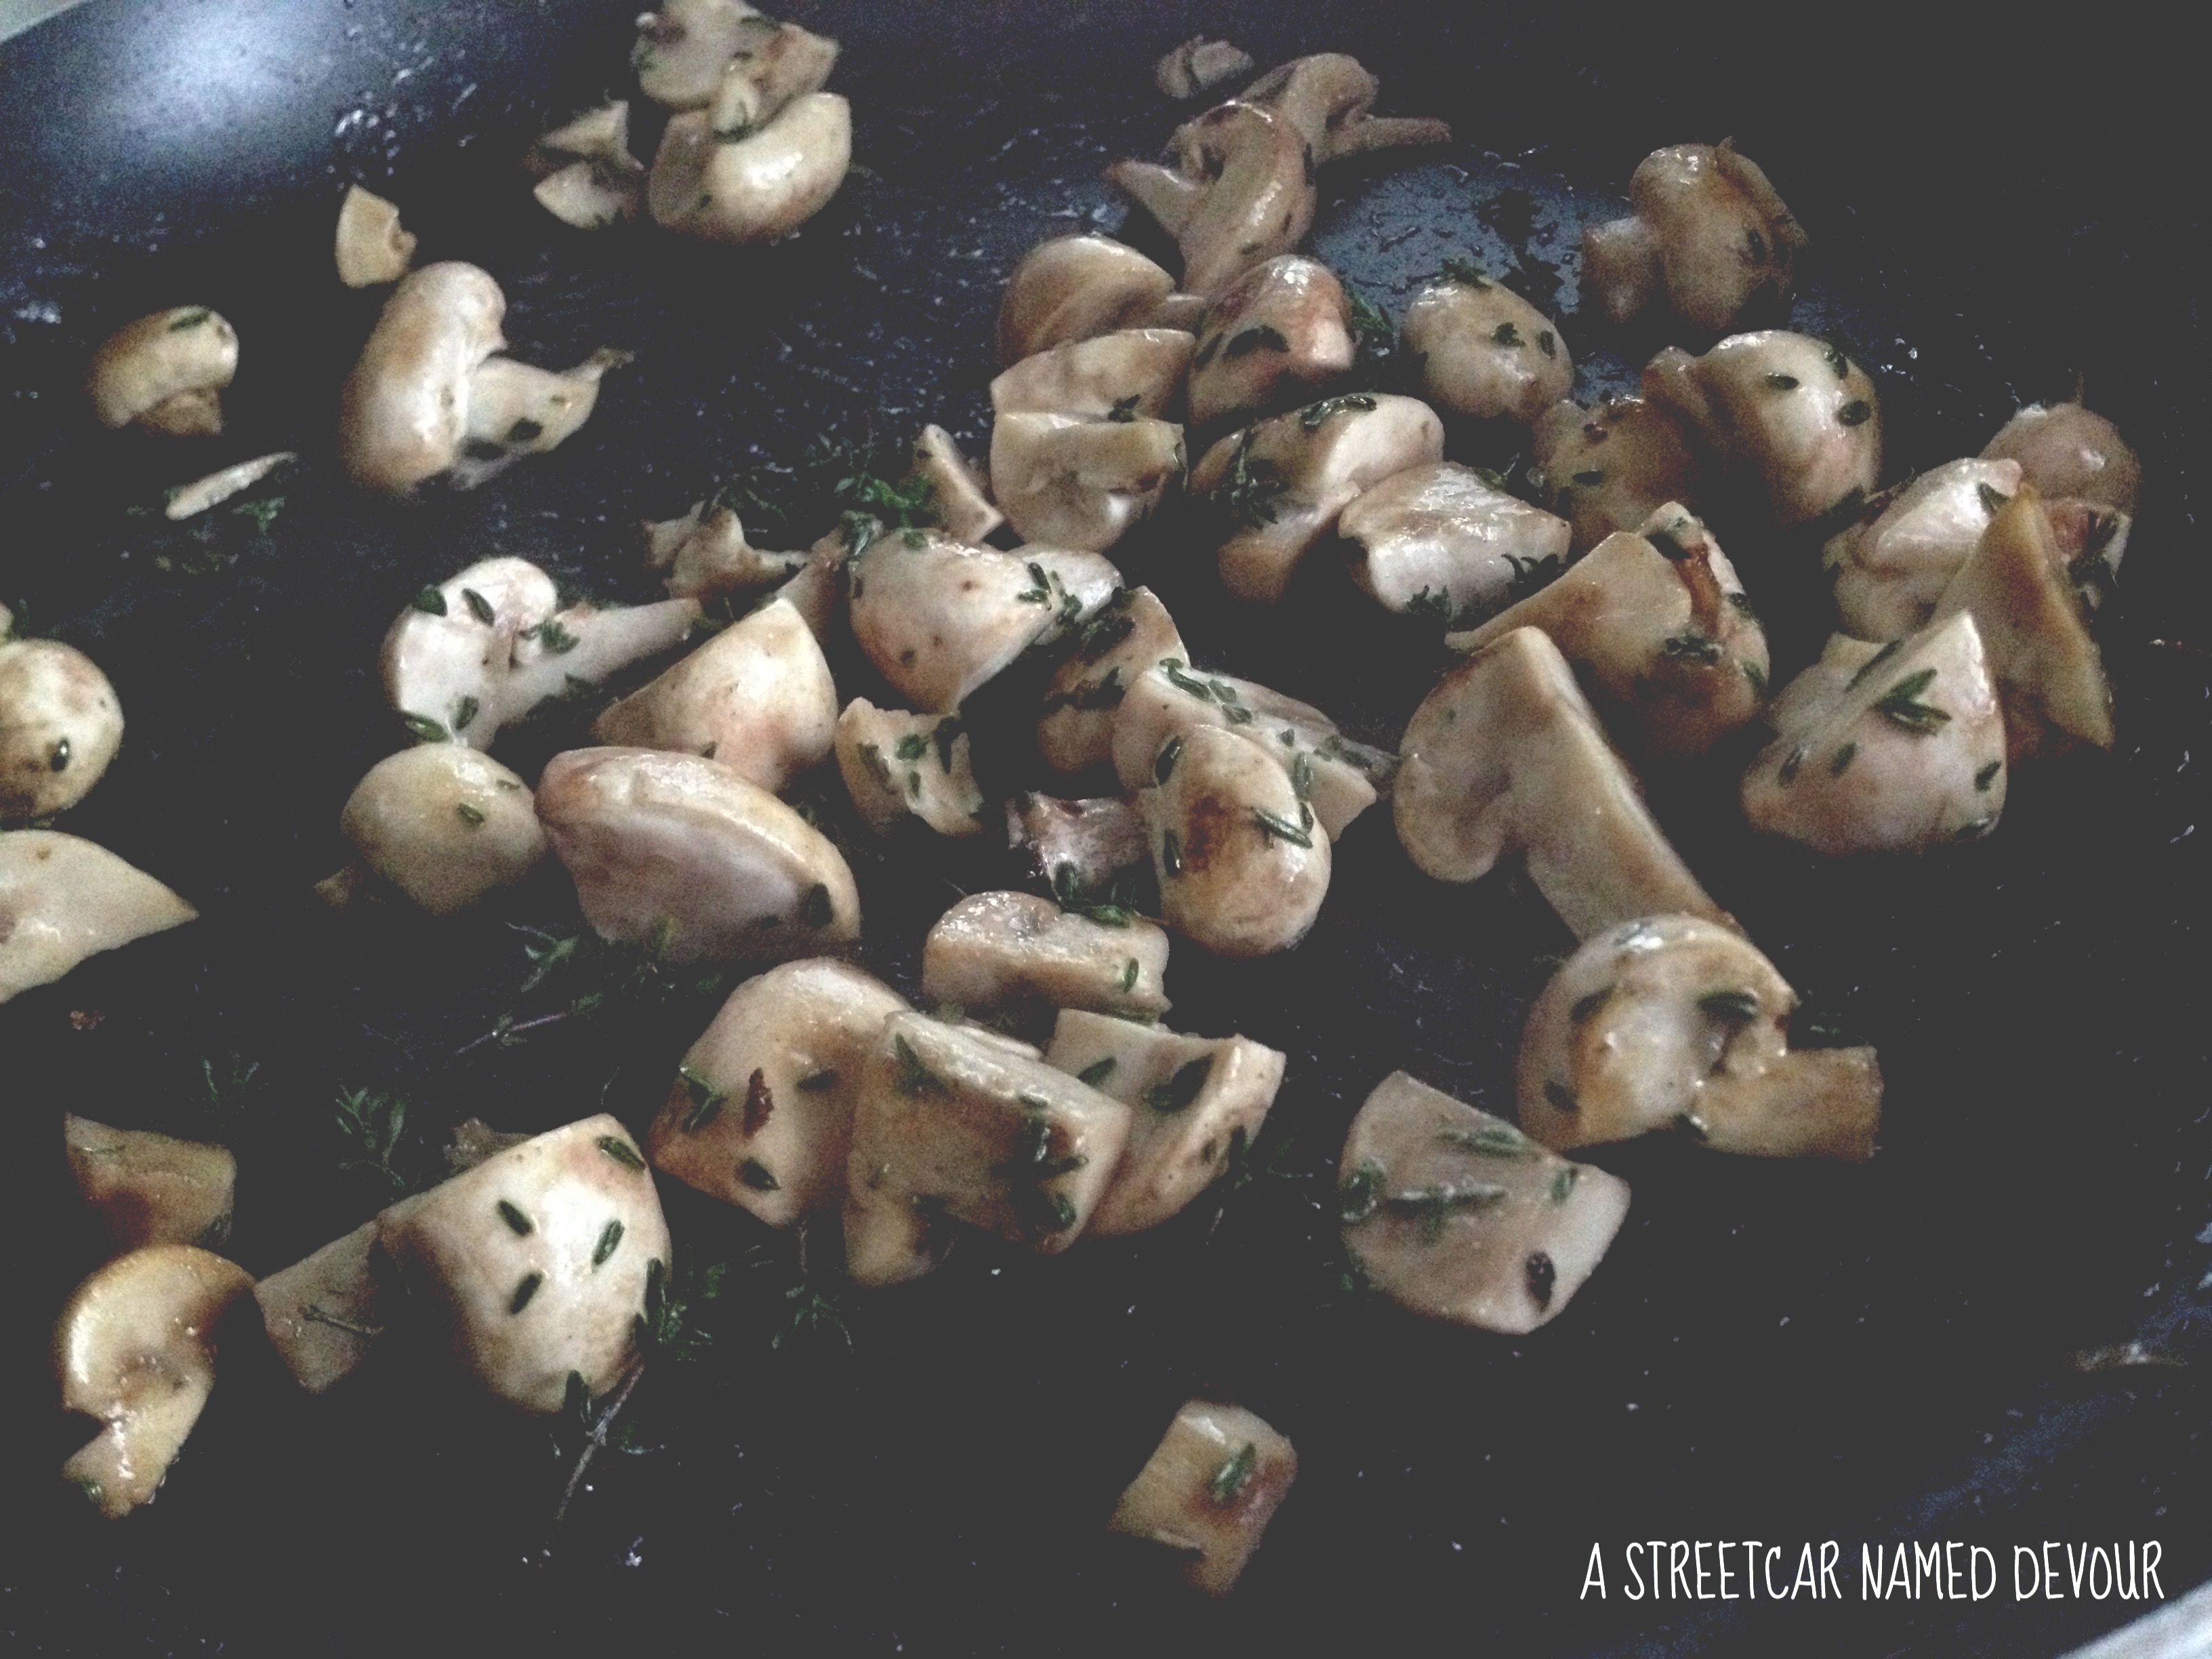
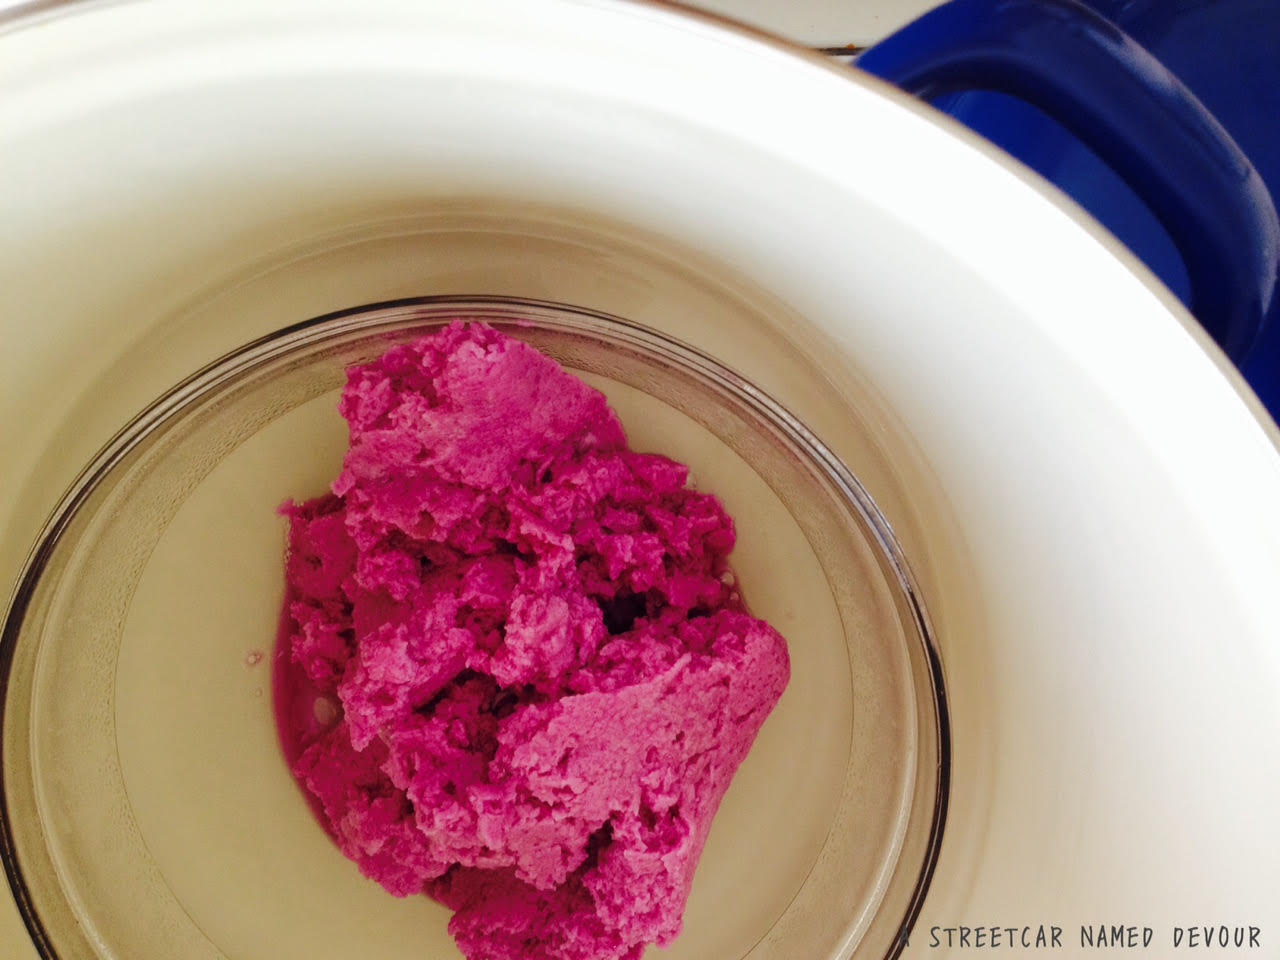
Toast the black sesame seeds in a non-stick pan over medium heat. Swirl the pan, making sure all sides are toasted evenly. Toast till fragrant. Turn off burner and set pan aside to cool. Place seeds in a mini processor or coffee grinder and blitz till completely ground. In a bowl, mix with your liquid sweetener. Set aside.

FOR THE DOUGHNUTS


INGREDIENTS
¾ cup milk, warmed to 100-110 degrees
3T active dry yeast

¼ cup sugar
2 cups AP flour, plus more for dusting
2T flaxseeds + 2 1/2T water mixed together
¼ cup black sesame paste
Fryer oil

FOR THE GLAZE
3T soy milk (or other dairy-free option)
Pinch of salt
2T vegan butter, melted
2T food-grade matcha powder
2 cups powdered sugar, sifted

METHOD
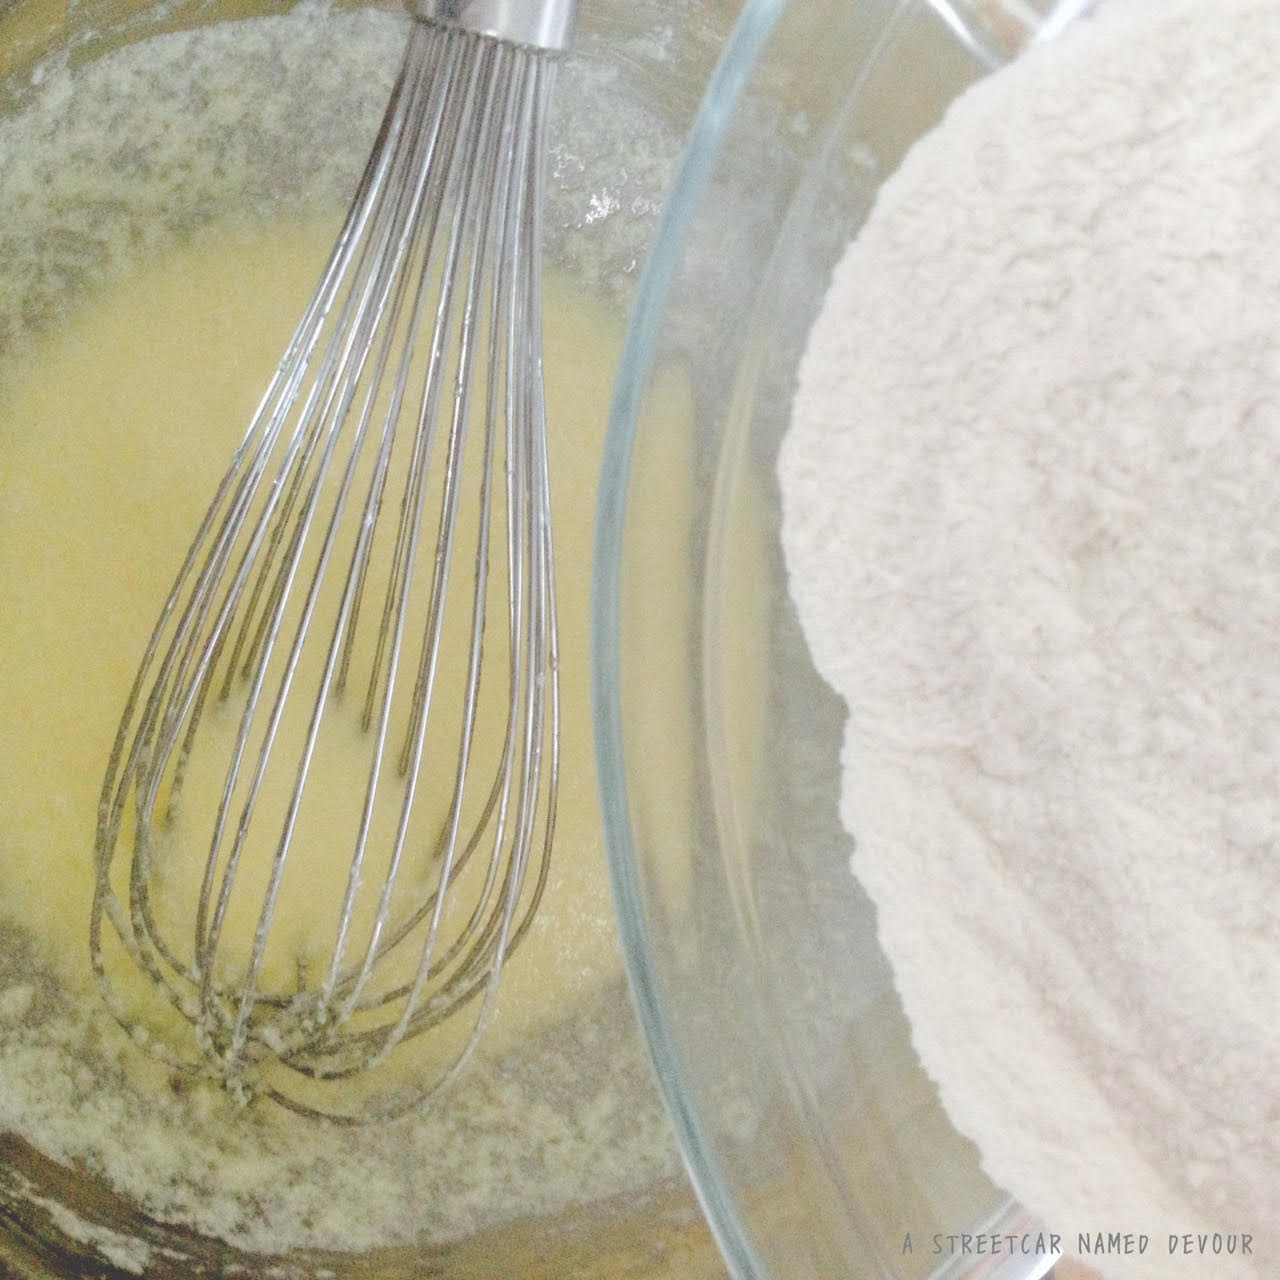
In a small bowl heat your milk to 100-110 degrees. Add in the yeast and 1T of sugar. Whisk to combine and allow to rest in a warm spot for about 10 minutes. There should be a layer of bubbles upon resting.

Processed With Darkroom

“I would like to introduce you to Christian Grey” -Vivian

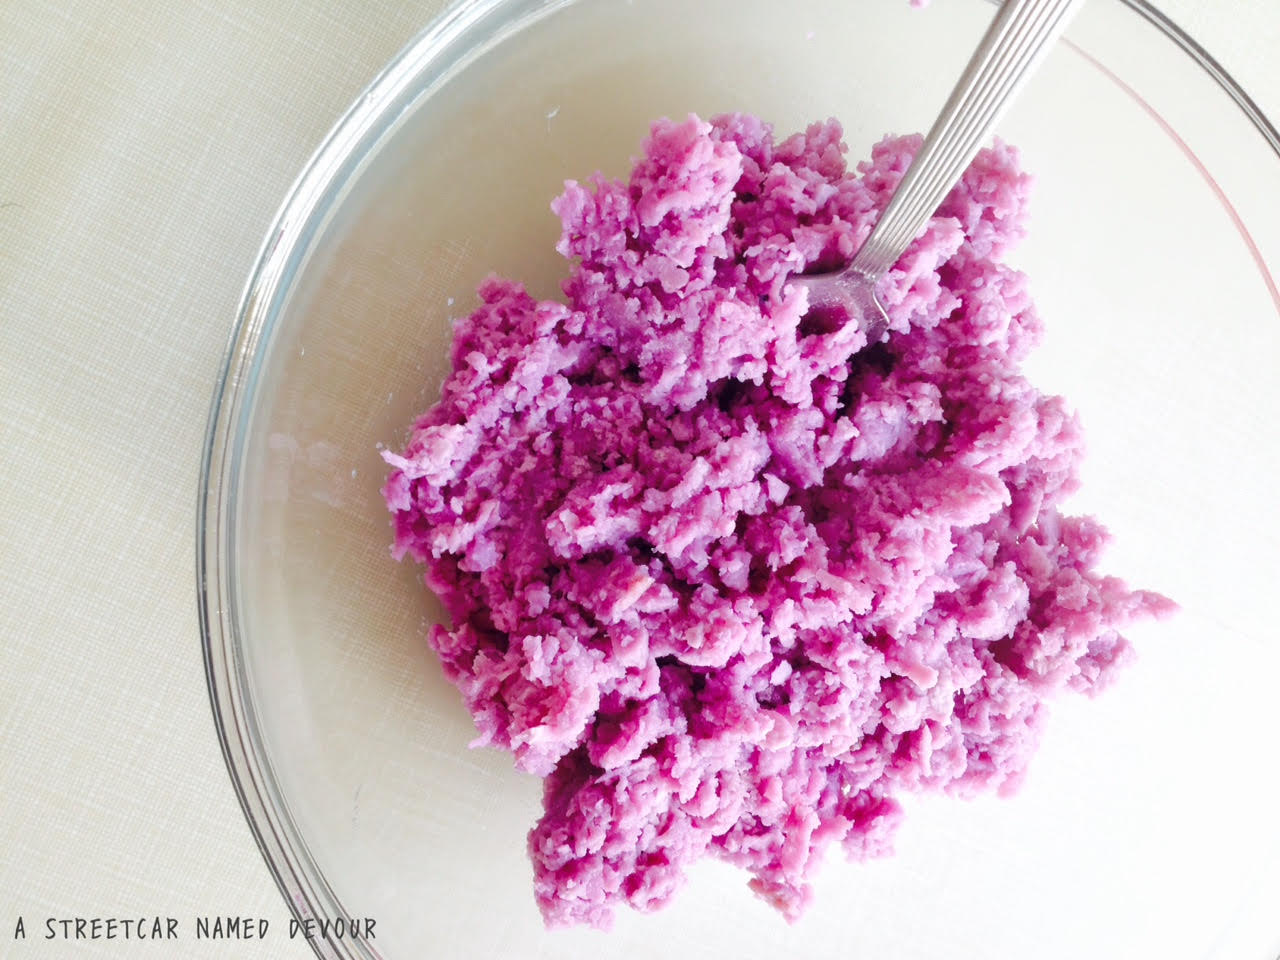
In a stand mixer with a dough hook attachment, add the sugar, flour, flaxseed, water, black sesame paste and bubbled yeast mix. Beat on low speed for about 5-7 minutes. It’s done once the dough is smooth.

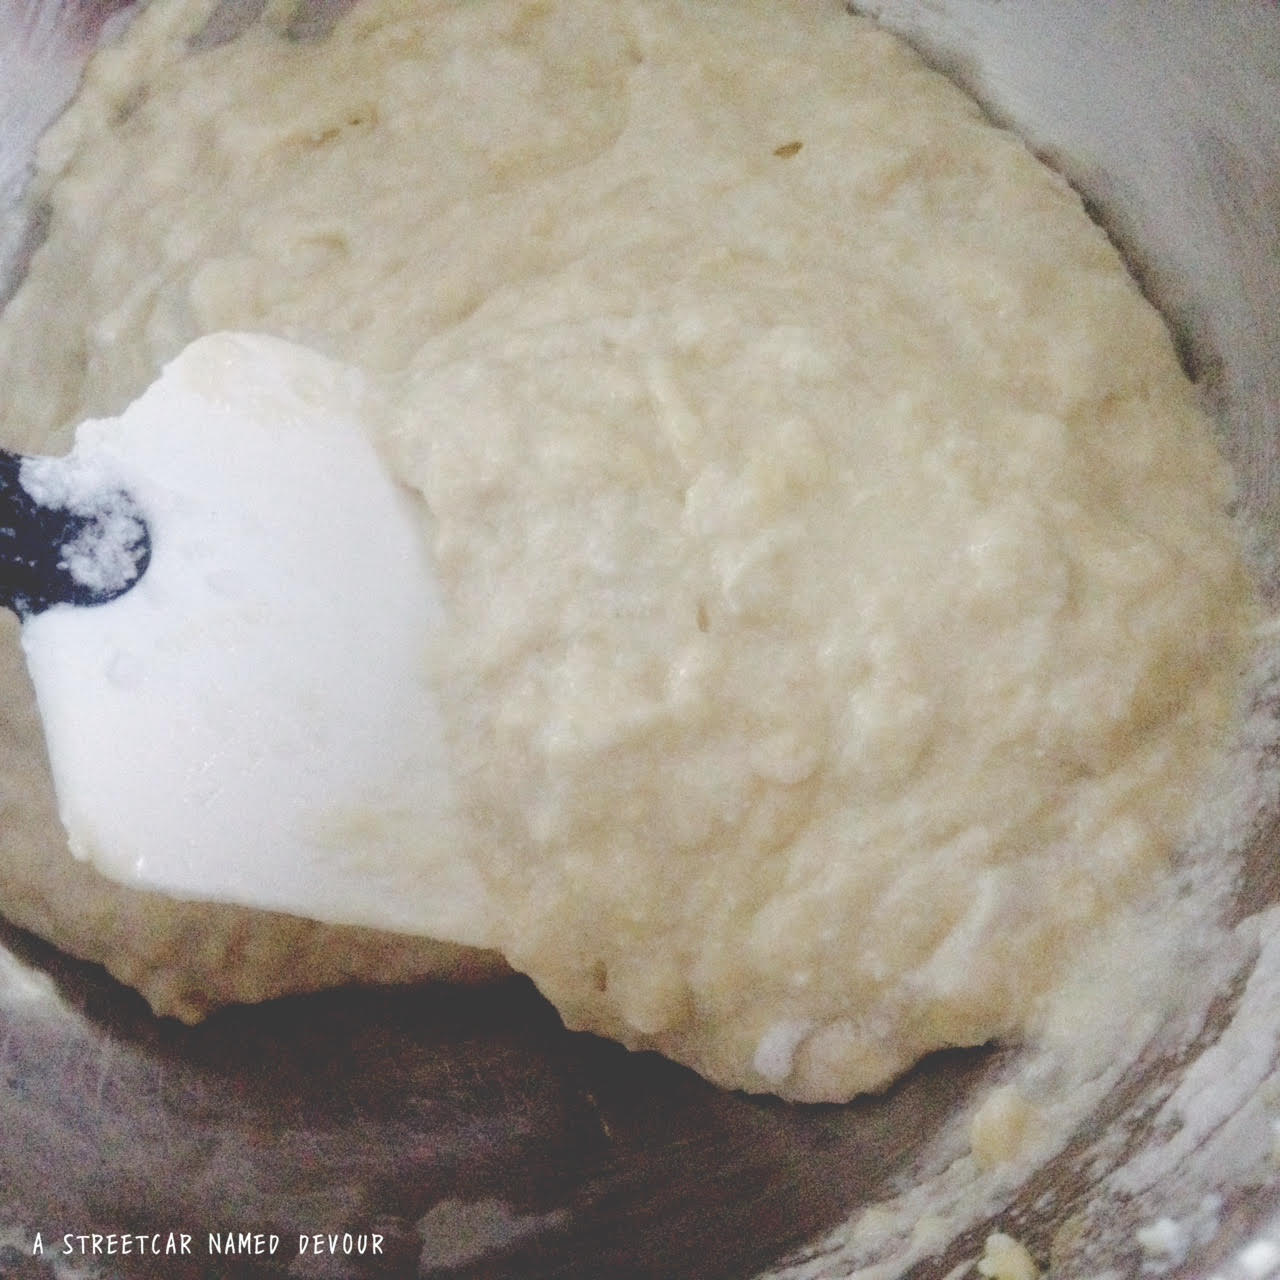
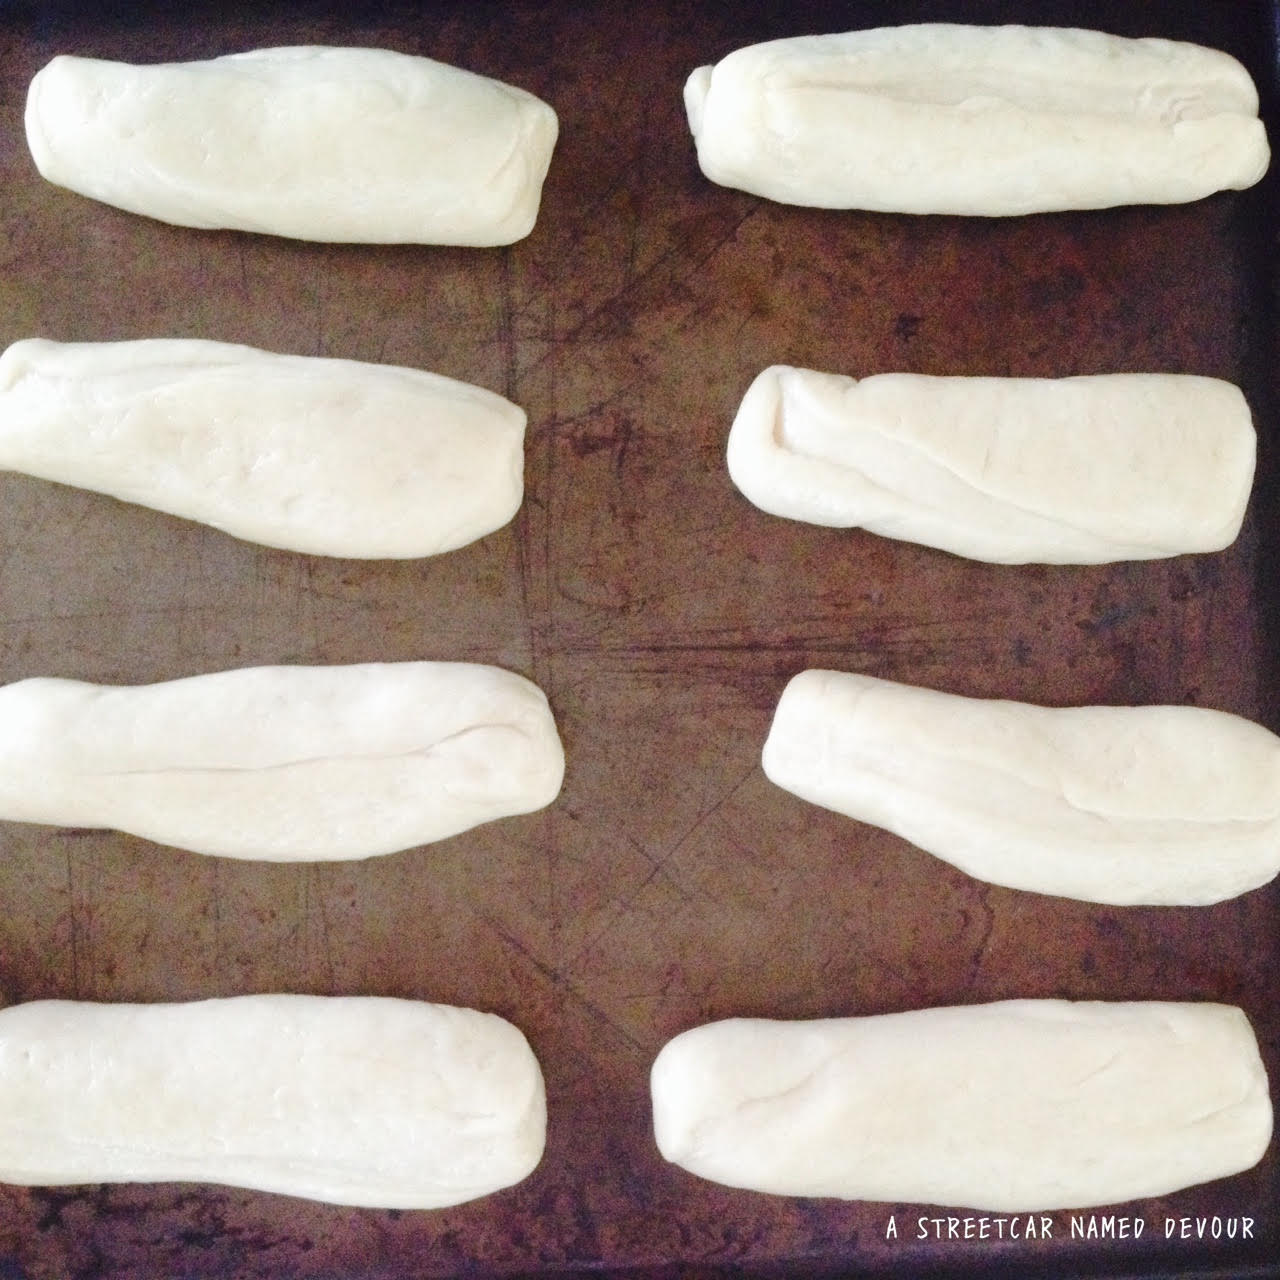
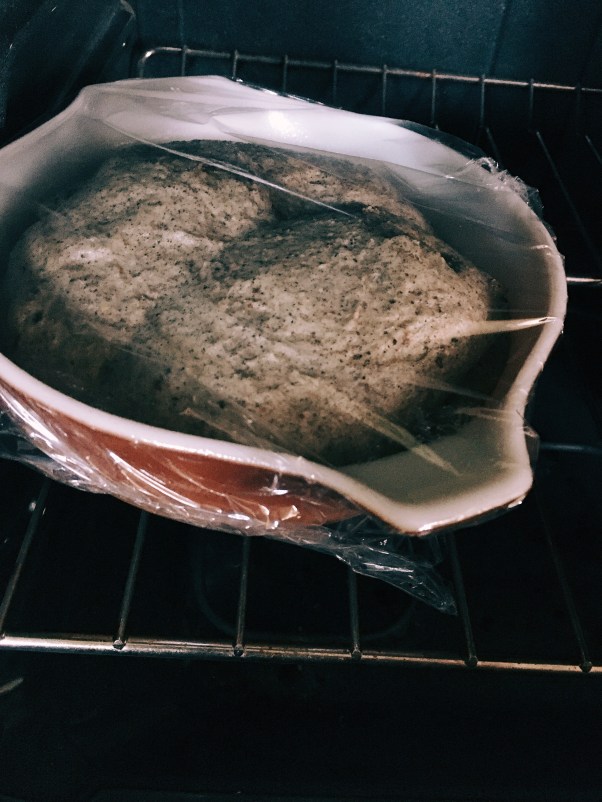
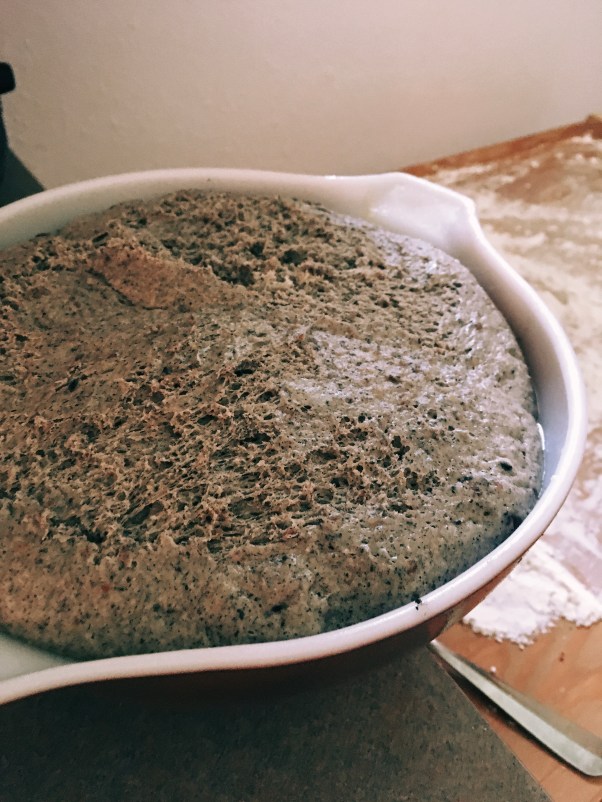
In a large lightly greased bowl, add the dough ball and secure with plastic wrap. Set the bowl aside where it’s warm. Dough should rest for about an hour (depending on your home temperature). You’ll know it’s ready when the dough has doubled.

Processed With Darkroom

“I do like the idea of romance.” -Carol

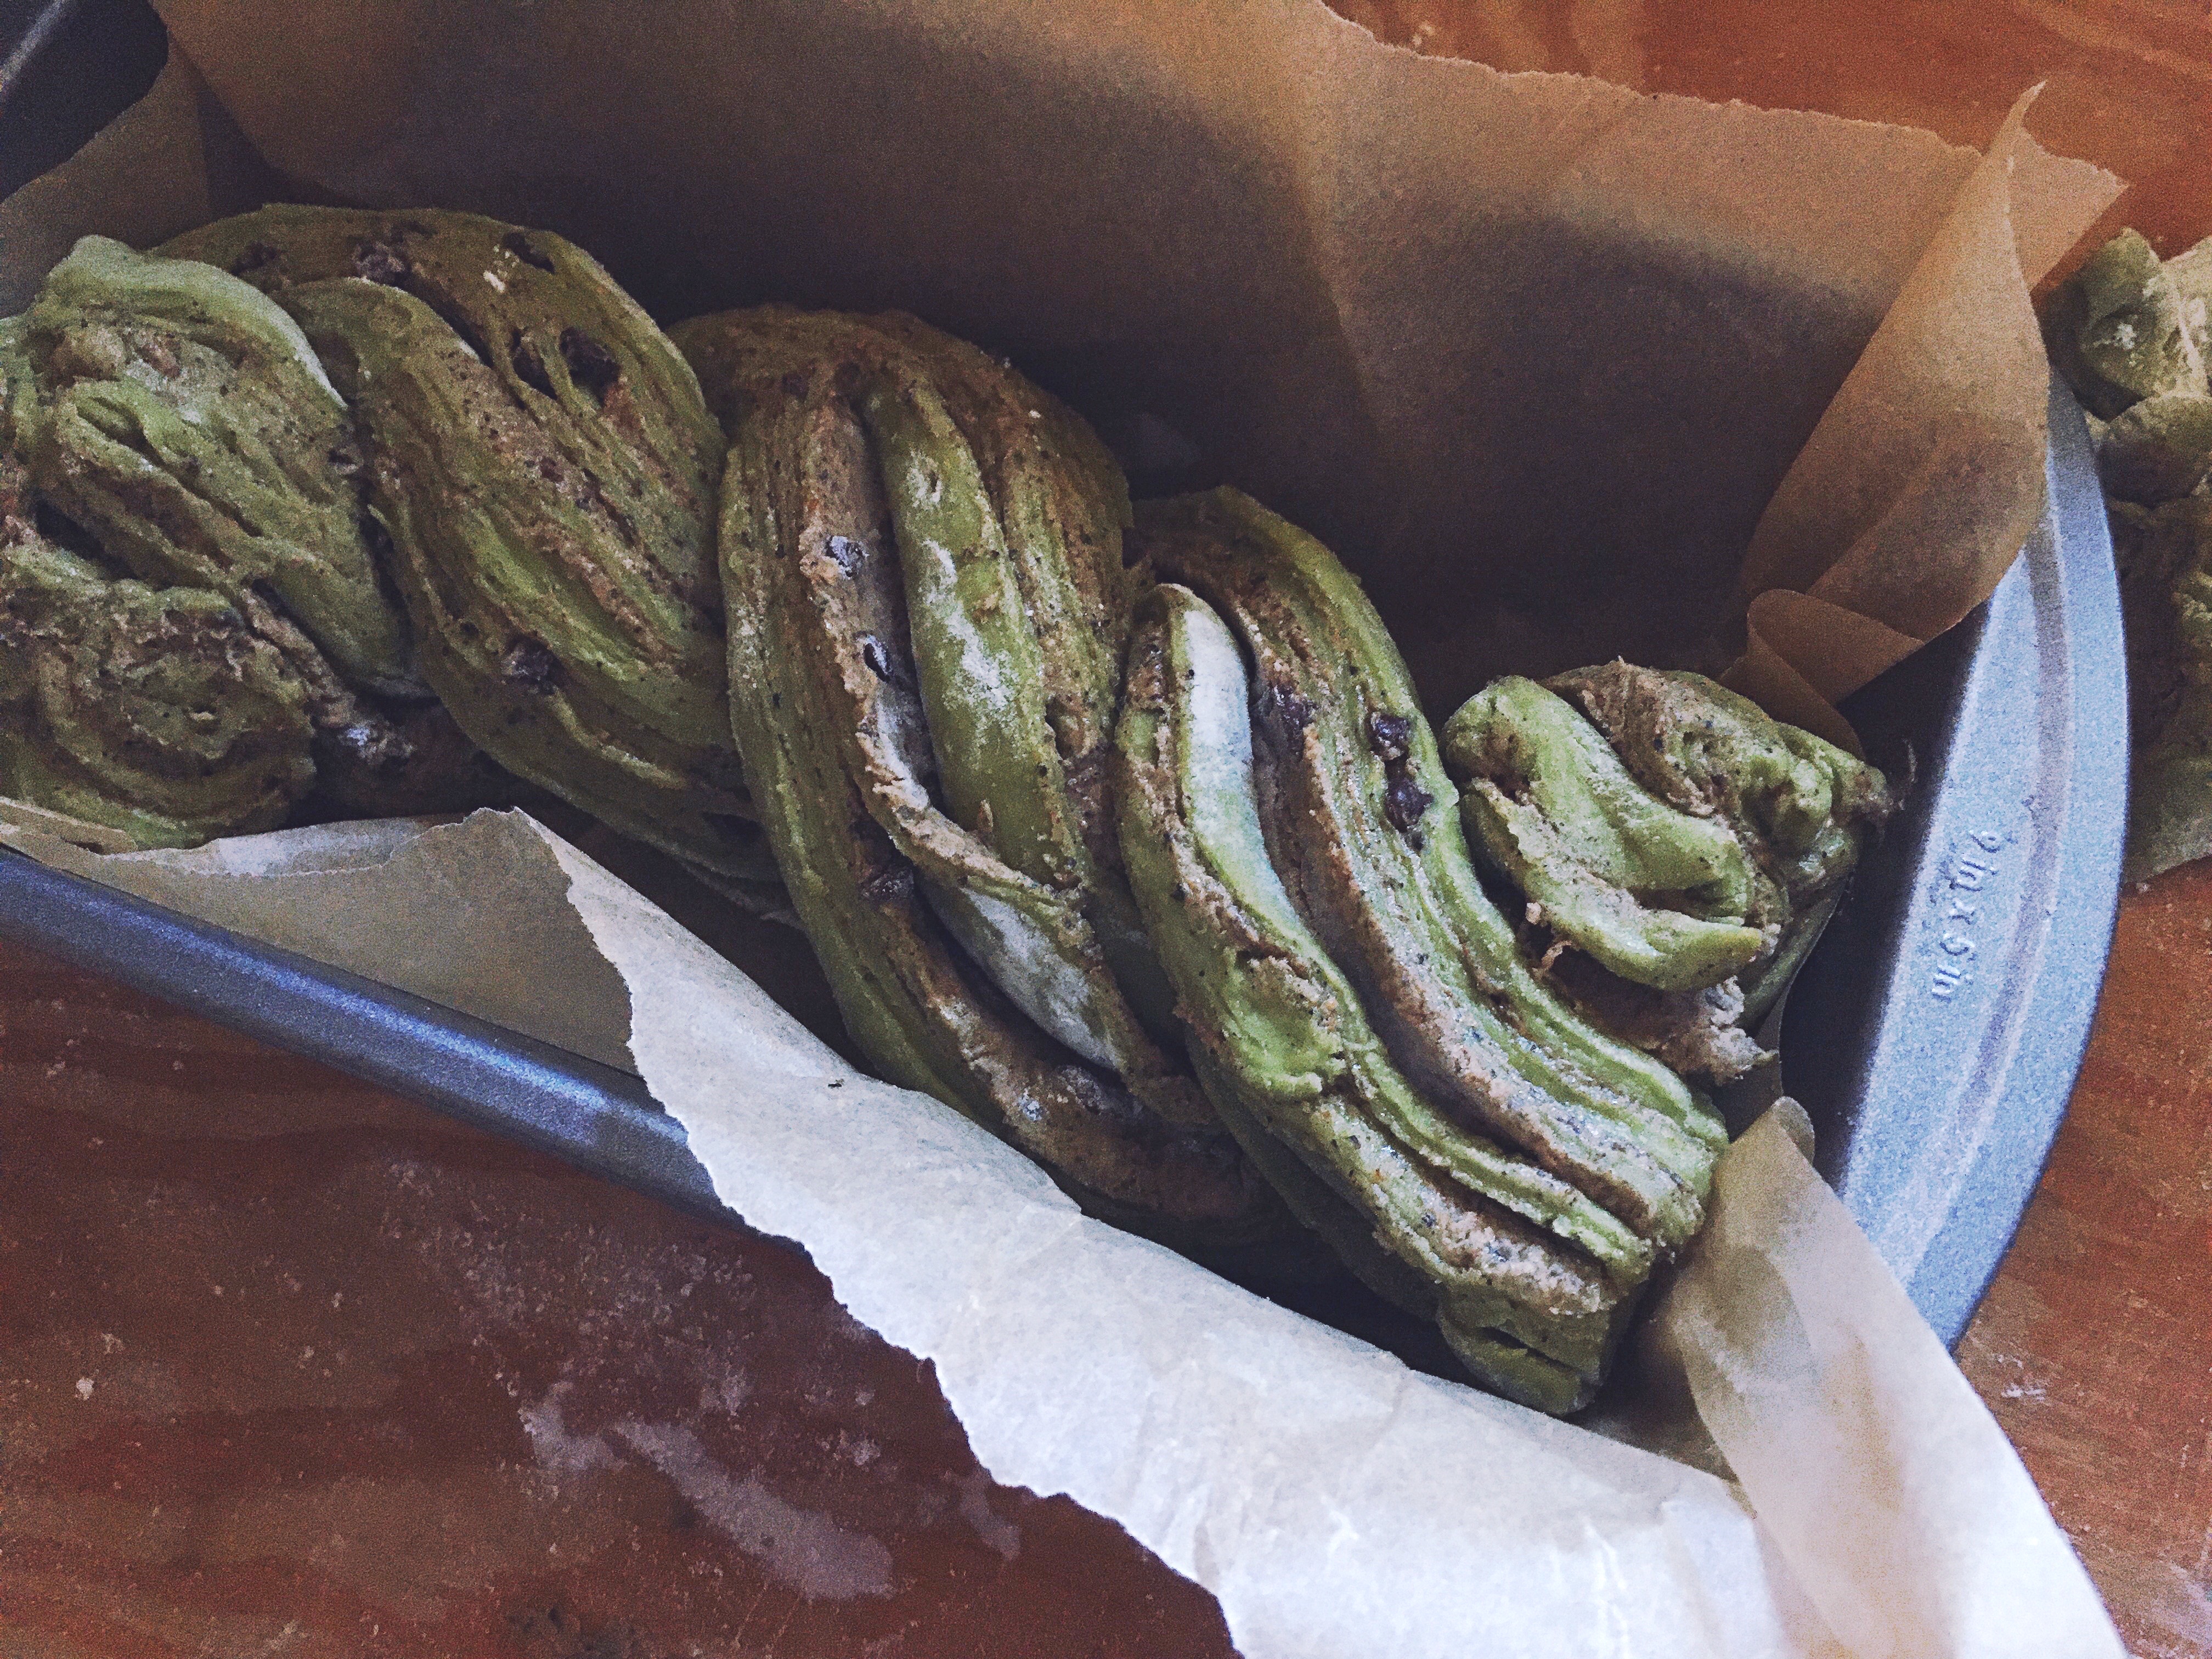
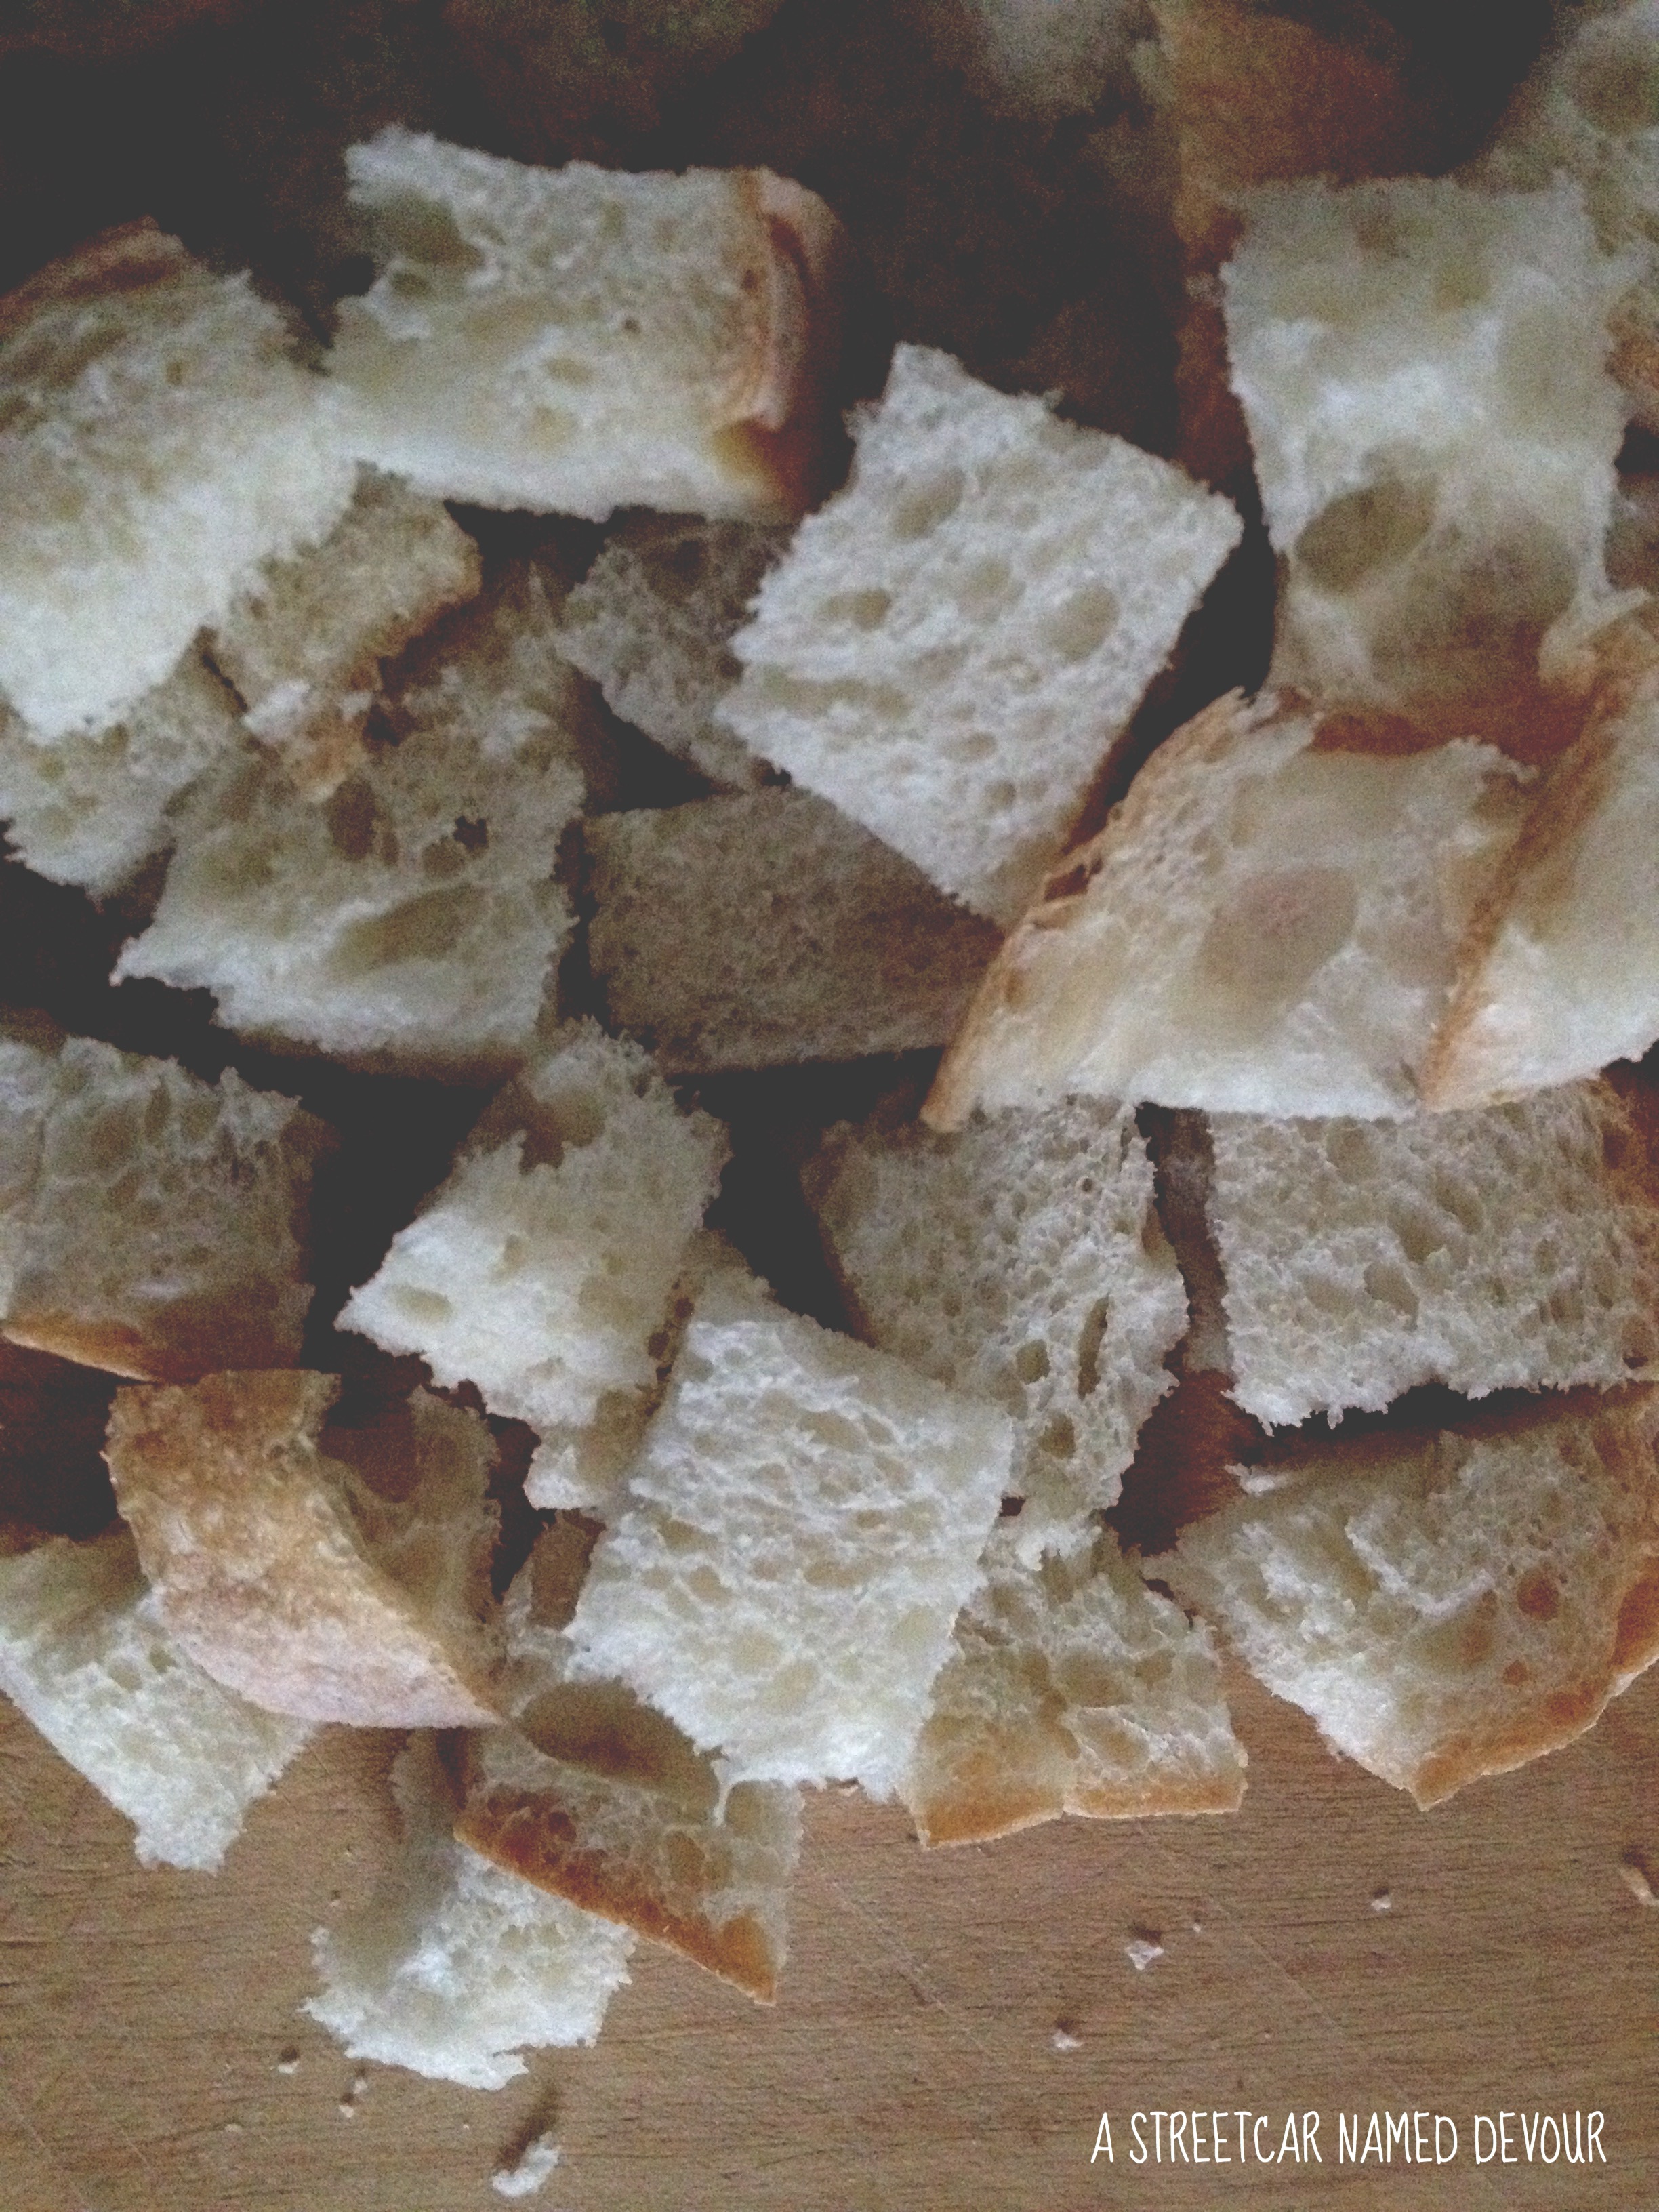
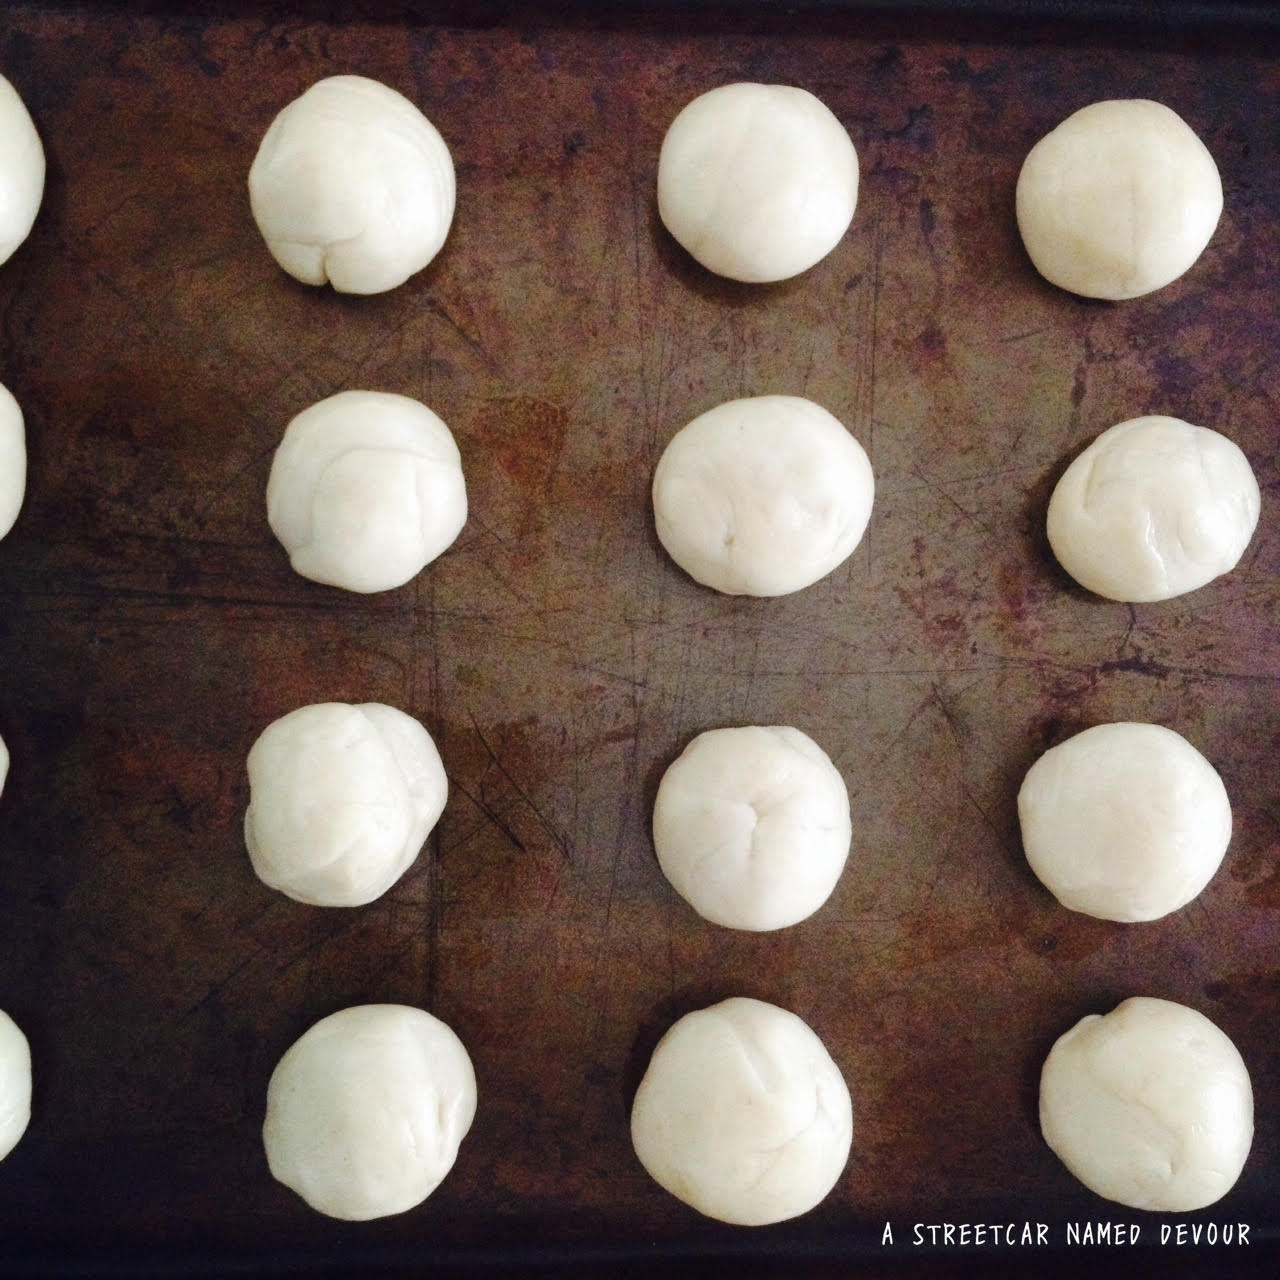
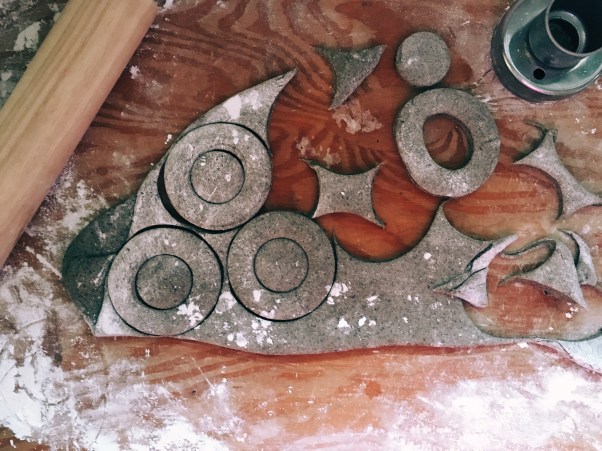
Turn your dough onto a lightly floured surface and knead for another 5 minutes. Then roll the dough to about 1-1.5cm thick. Use a doughnut punch cutter. Continue to roll out the dough scraps and punch out the doughnut rings till you have no more dough. You should get about 9-12 doughnuts in total.

Processed With Darkroom

“We are too old.” -Sharon

Processed With Darkroom

“But it does say right here, ‘for mature audiences'” -Carol

Processed With Darkroom

Yeah, that certainly sounds like us.” -Diane

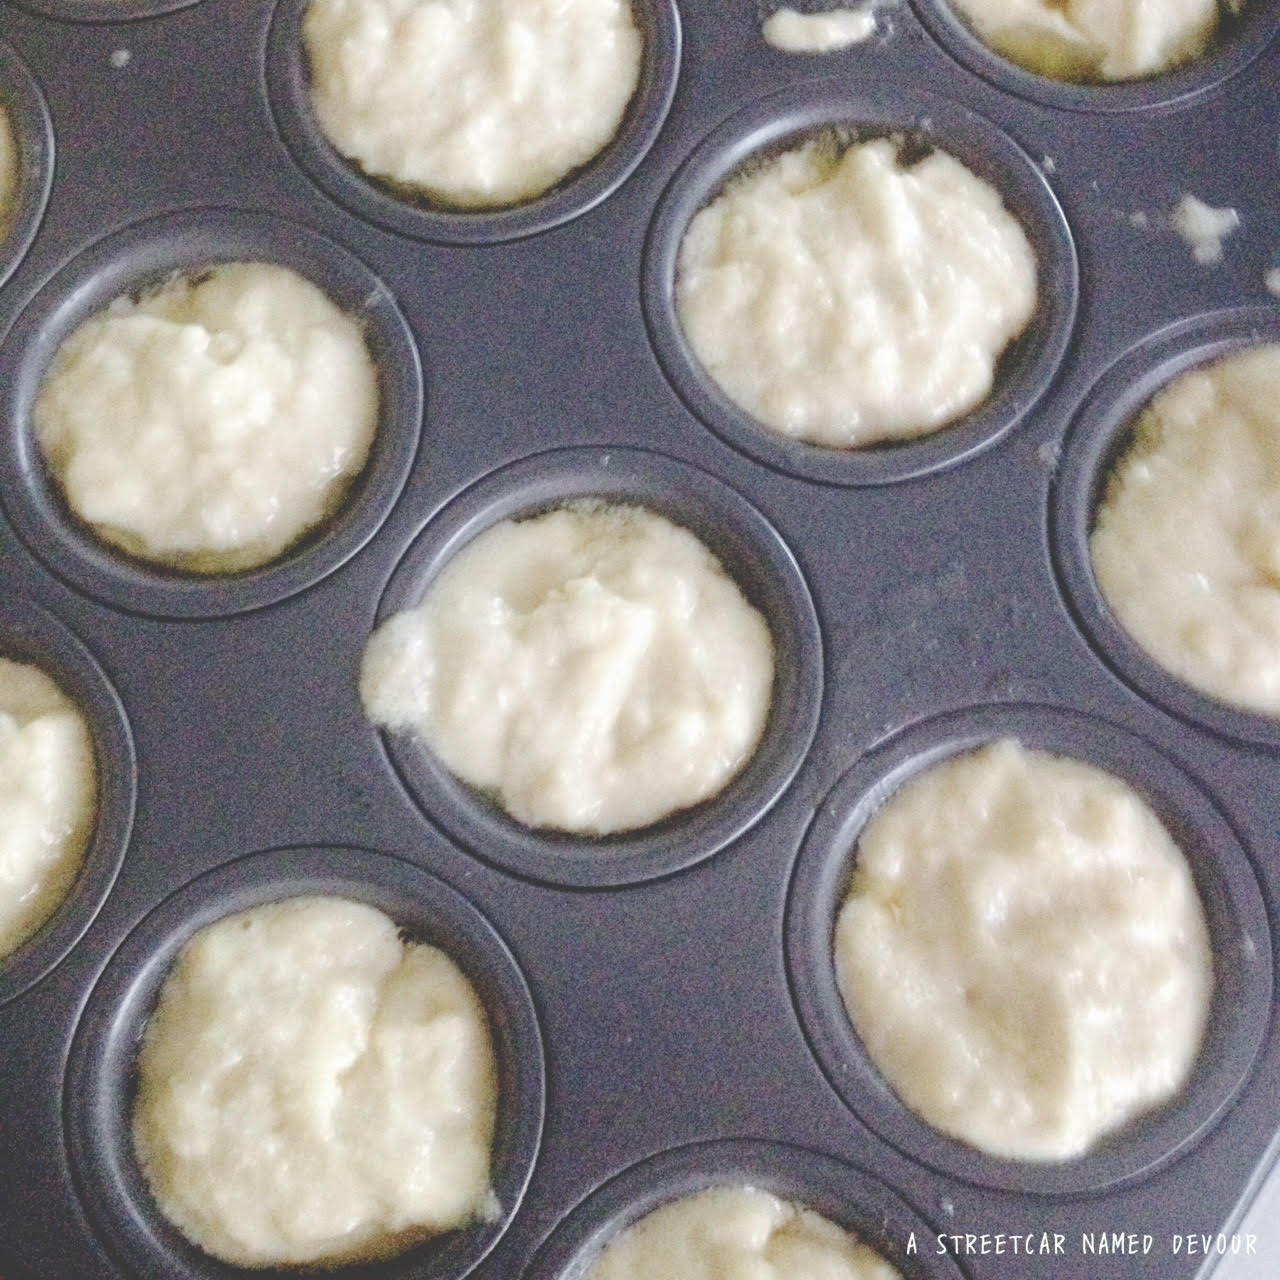
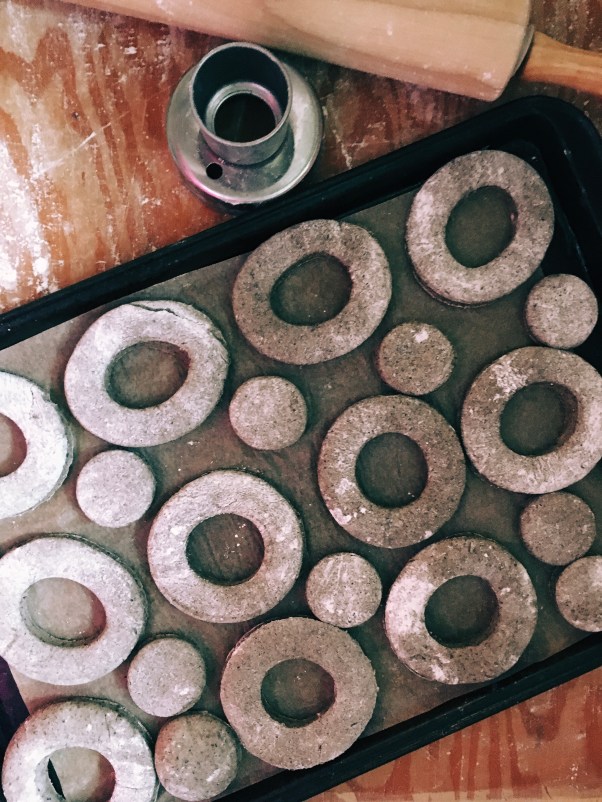
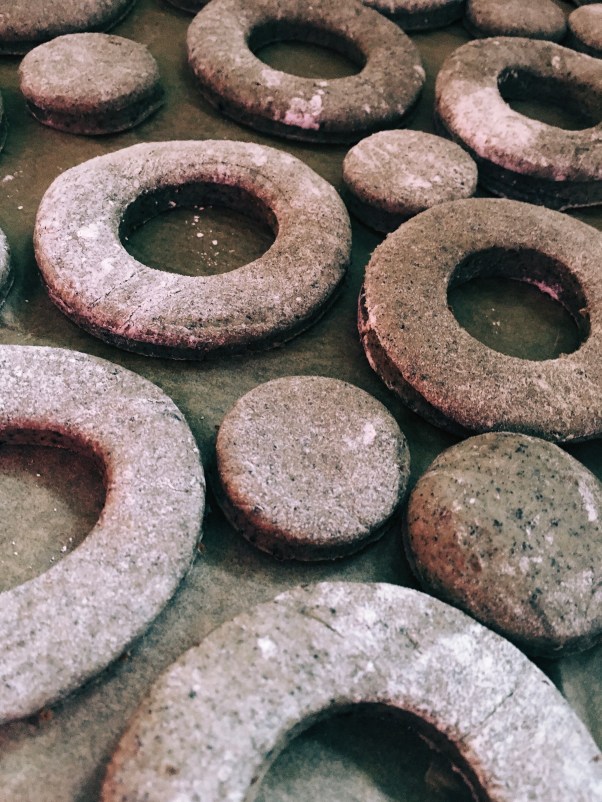
On a parchment-lined sheet tray place the cut out doughnut rings and holes, and top with plastic wrap on loosely. Put the tray somewhere warm to rest for 30 minutes to an hour. Dough should be doubled in size when it’s ready.

Processed With Darkroom

Stimulate your mind.

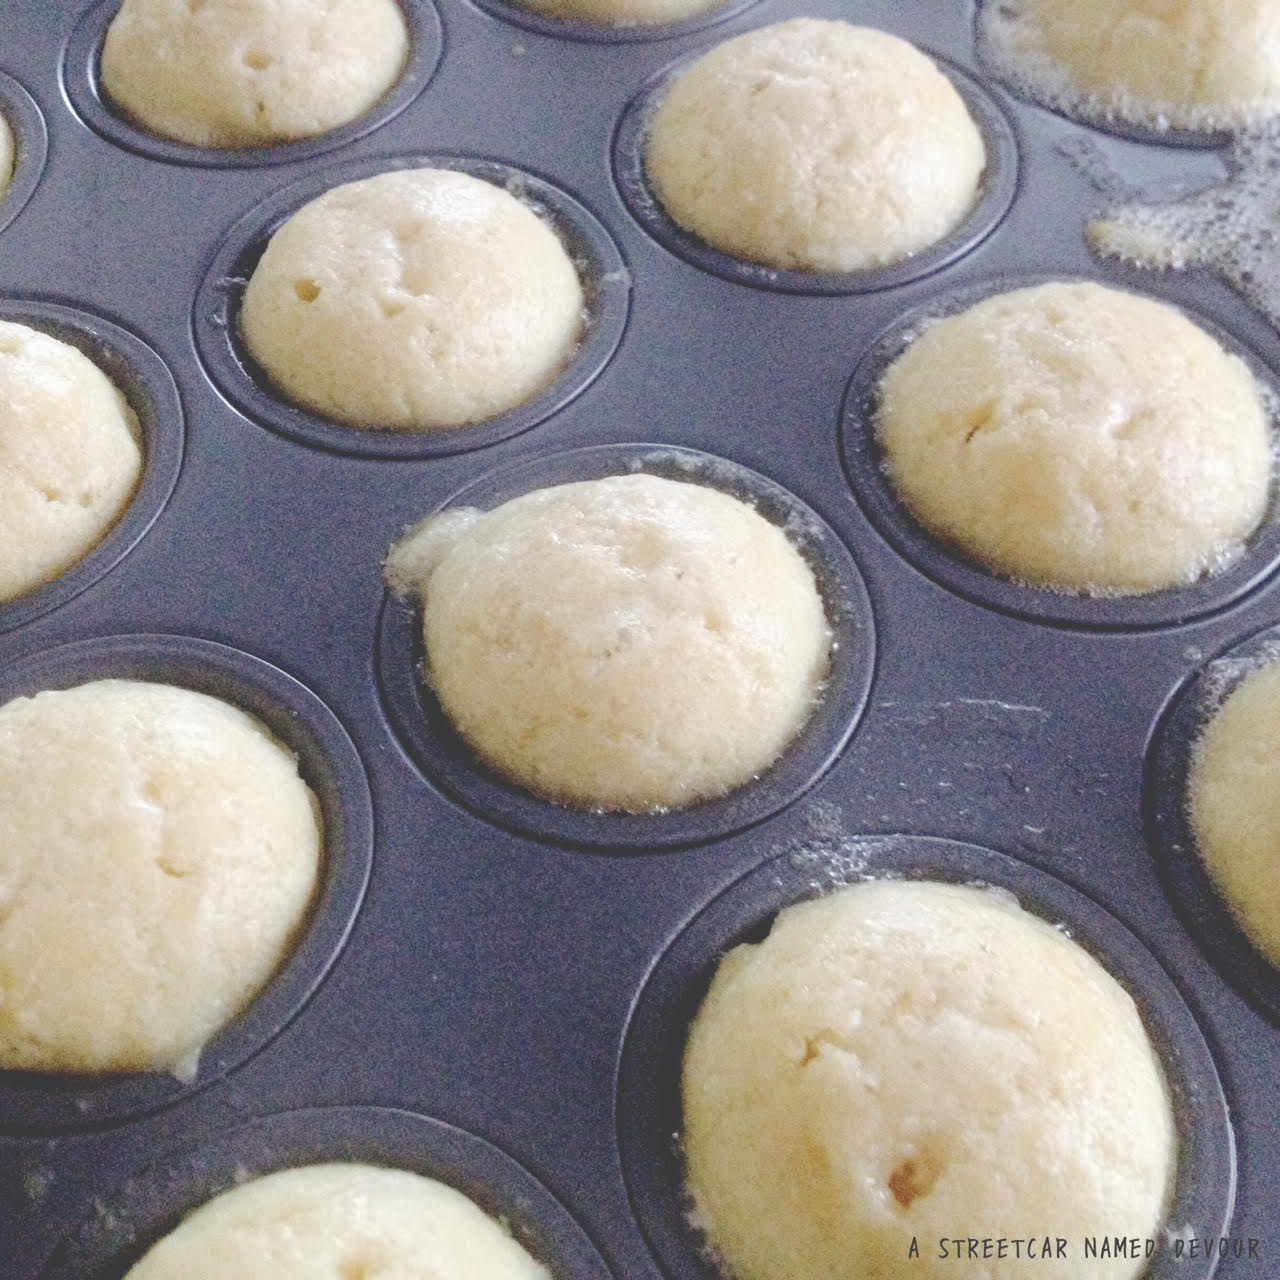
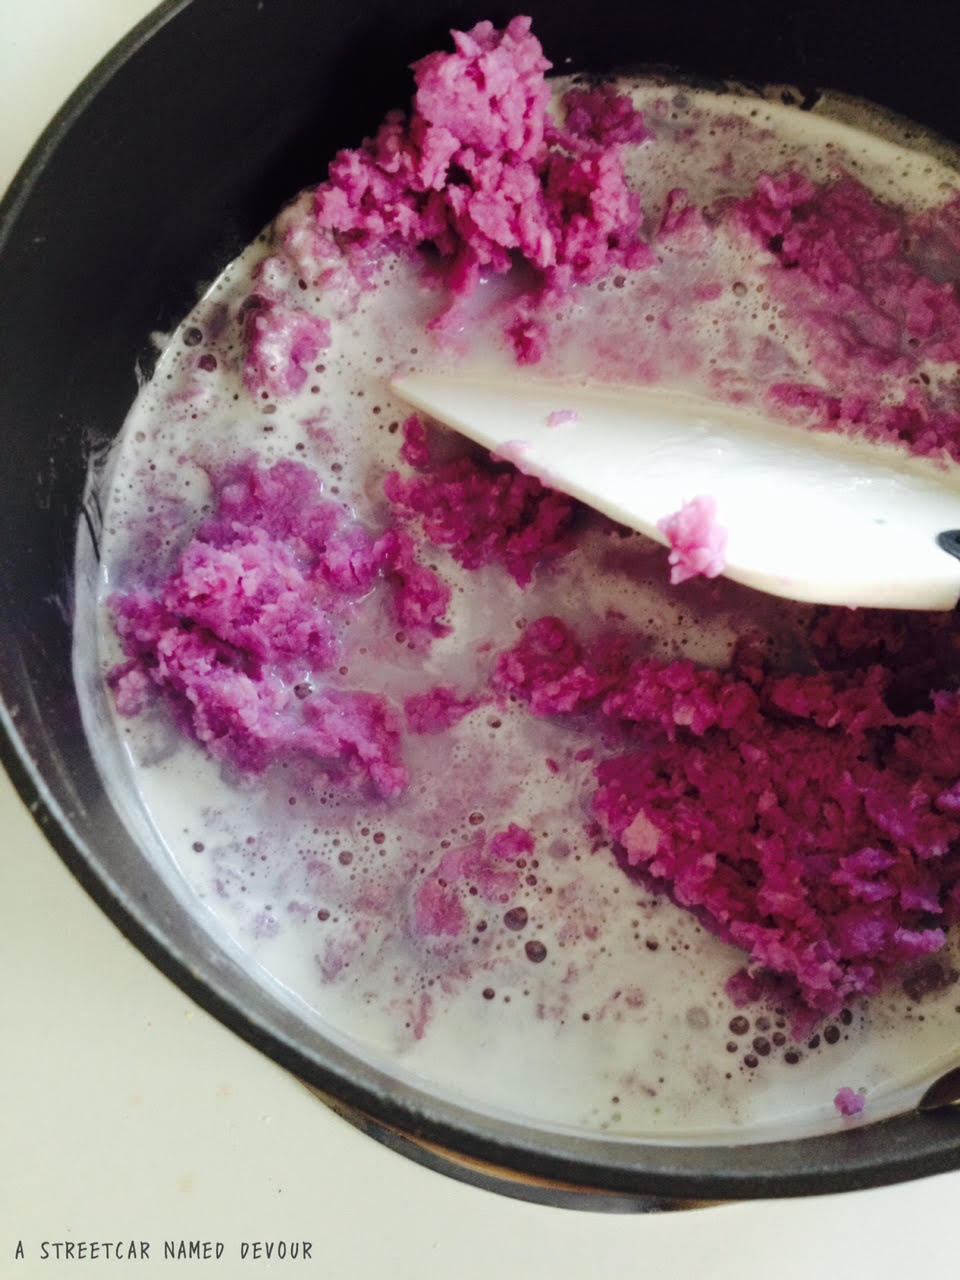
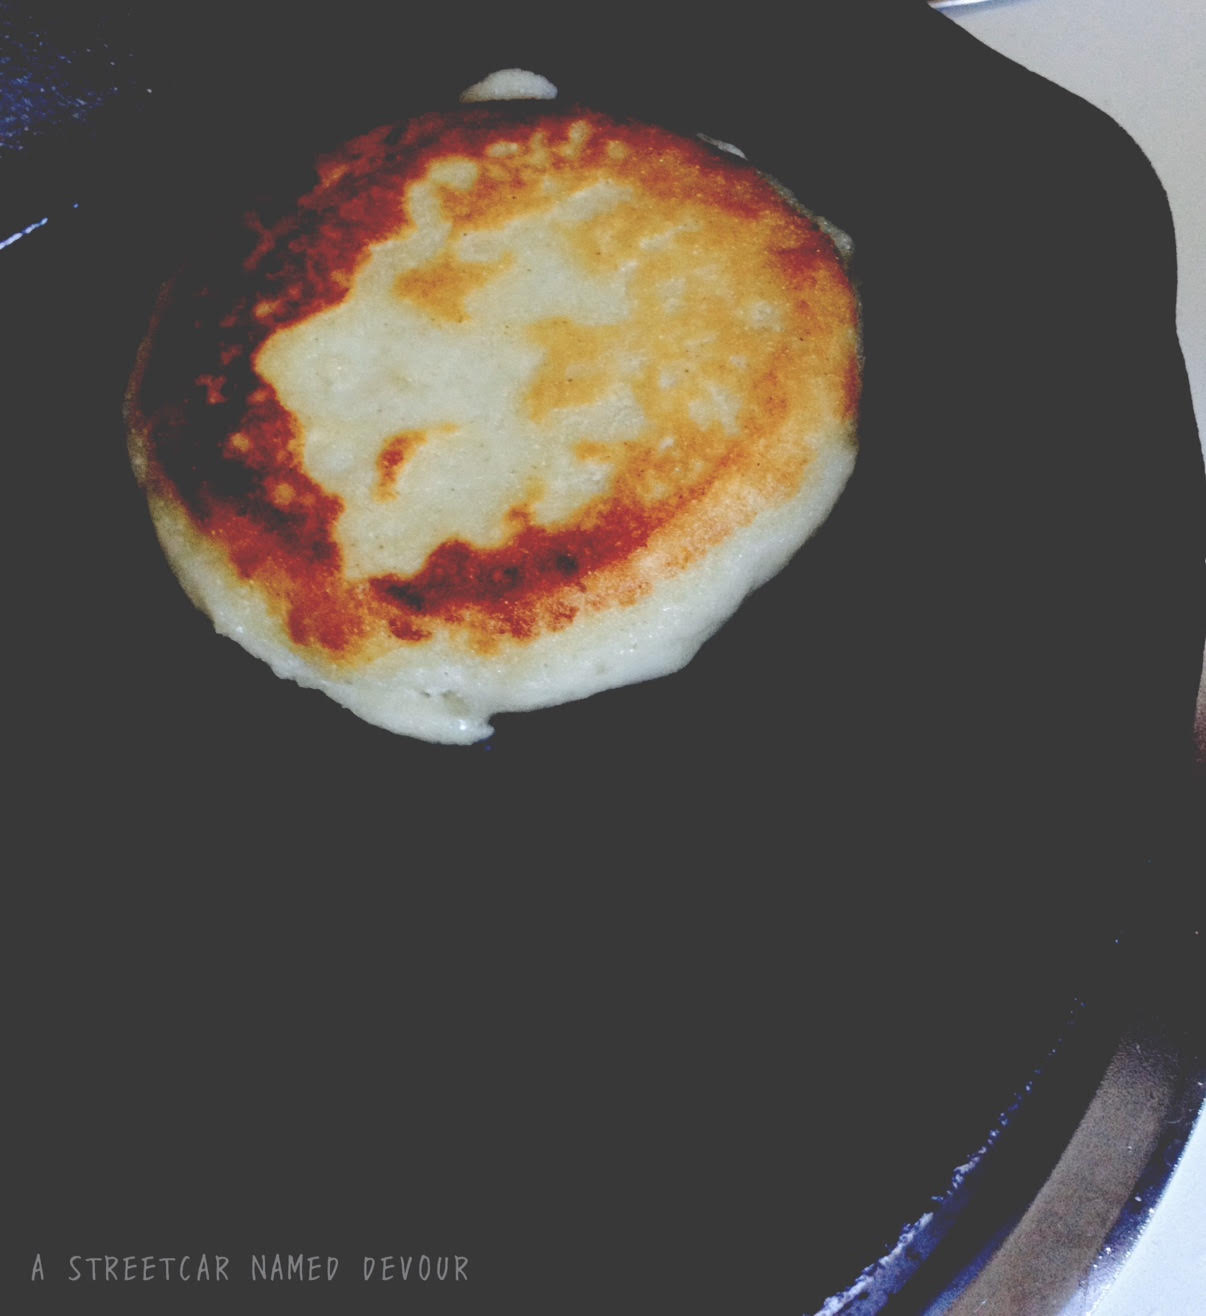
Fill your deep-fryer or a large sauce pan half way with oil over medium heat till it reaches 350°F. Fry the doughnuts but don’t overfill the pan. Flip after 30-50 seconds on one side and finish with 30 seconds on the other. I like using wooden chopsticks to do the flipping, but you can use a stainless steel spatula if you don’t chopsticks on hand. Doughnuts should be golden brown when they’re done.

Allow doughnuts to drain excess oil on a cooling rack lined with a larger sheet tray underneath. While doughnuts are cooling make the glaze.

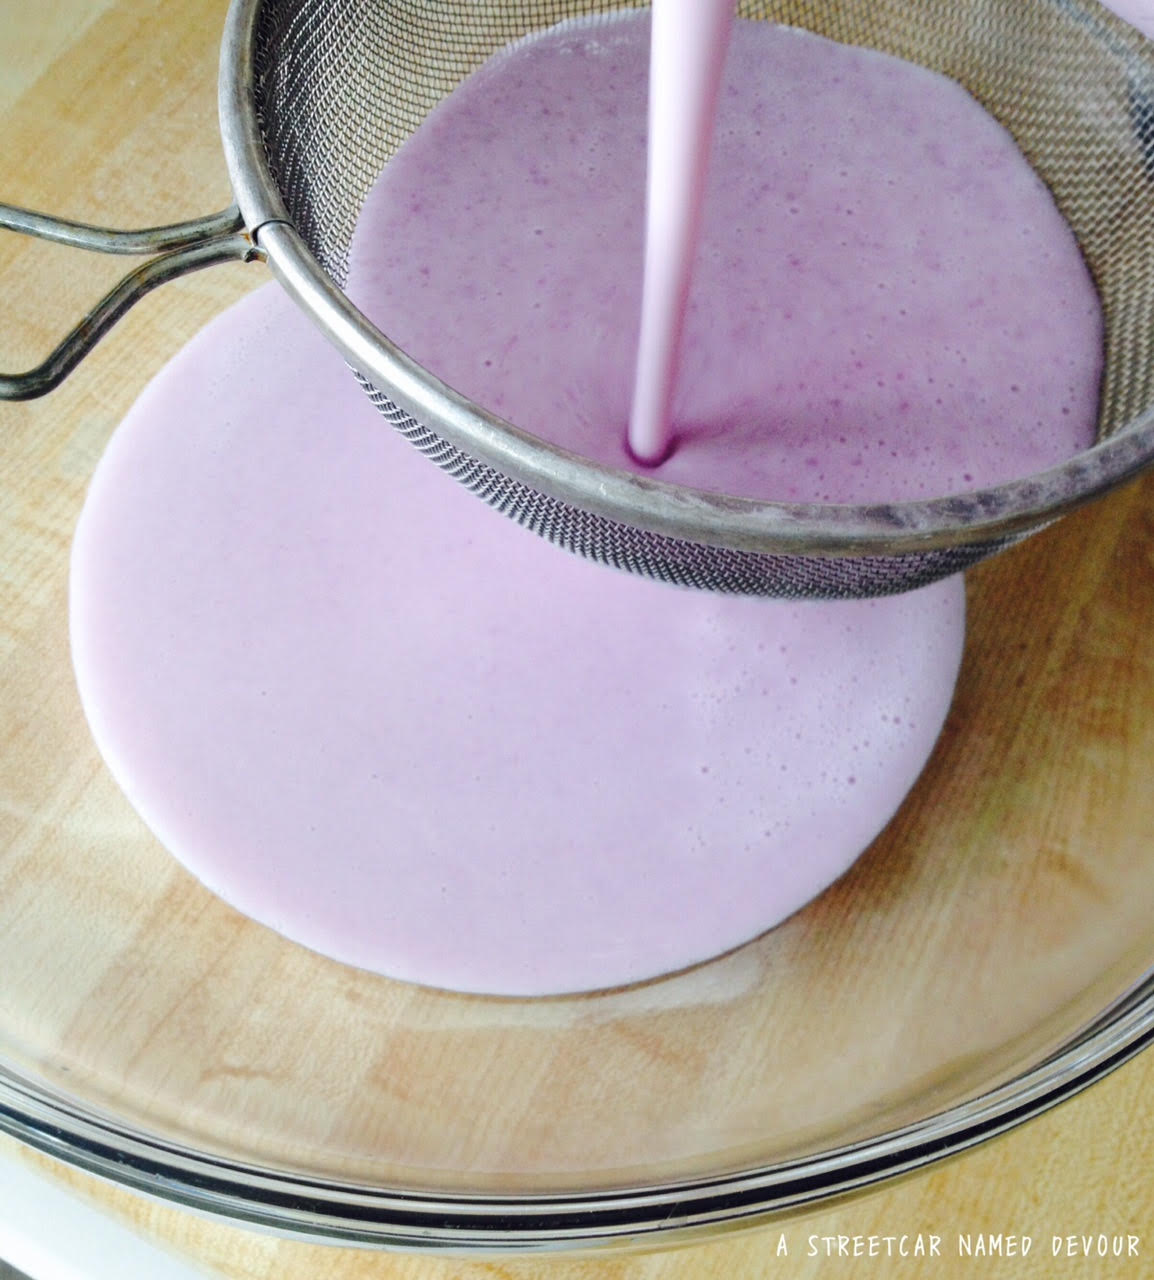
Add all ingredients in a medium-sized bowl. Whisk together till smooth and a think but pourable consistency. 

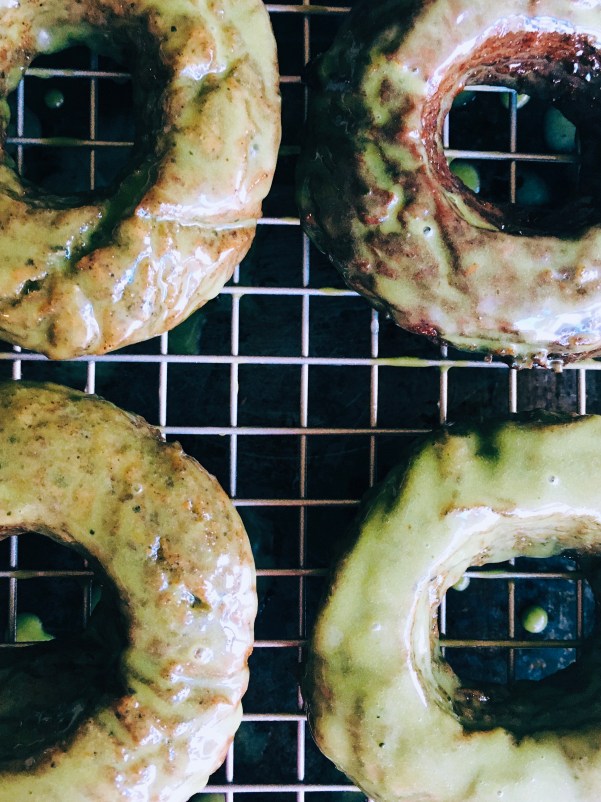
Dip the top of doughnuts in glaze and return to the cooling rack to drain and dry. Repeat with the rest of the doughnuts.

Enjoy. These are perfect with a cup of hot coffee, or my new favorite Dalgona coffee.

Processed With Darkroom

“Drink up. Hoist that glass. Happy reading, ladies.” -Vivian

Let’s Twist Again (Like We Did Last Summer)


I need to get back into yoga. My body is constantly telling me I need to stretch and to weight train more. The aches + soreness associated with having a job where I’m on my feet 10+ hours a day, where I’m going up and down stairs all day is taking its toll. I average anywhere between 3-5 miles in steps alone by just being in the confines of the building. (That’s upped to 5-8 miles a day during our peak season!) On busy summer days (where the restaurant averages 2-hour wait times and lines stretch around the block like the ones in Disneyland) my body is wrecked from moving up and down and all around. I’m a bit older now (40 is getting closer and closer!) and I’m not as spry as I once was. So I’ve decided that yoga and weightlifting is a priority in 2020.

Another priority? This matcha and black sesame + dark chocolate babka. It is as heavenly as it sounds. The deep nutty and cocoa aromas from the toasted, ground black sesame seeds, and the full-bodied slight umami flavors from the matcha powder with the bittersweet chocolate is a lovely taste combination.

Babka is a dense cake comprised of yeasted dough that’s filled, rolled and cut in half vertically, then twisted and baked to perfection. I highly recommend upping your baking game by trying this easy to follow recipe if you are new to the beauty that is babka. Of course, I veganized it, sourcing a handful of recipes and testing combinations of each one. The recipe below gave me the best results. Share your babka experiences, tips and tricks below!

VEGAN Matcha Babka With Black Sesame + Dark Chocolate Filling

Recipe slightly adapted from Fix Feast Flair + The Little Epicurean 

Yields 1 babka loaf

INGREDIENTS

FOR THE MATCHA BABKA DOUGH

  • 1/2 cup soy milk, plus extra for brushing
  • 3.5 g active dry yeast
  • 344 g all-purpose flour
  • 64 g non-dairy, unsalted butter (I like Earth Balance) at room temperature
  • 25 g coconut sugar
  • 2 flaxseed eggs (2T flax + 5T warm water)
  • 1/3 t pure vanilla extract
  • 2 T matcha powder, cook-grade
  • 1/2 t kosher salt
  • Oil for coating bowl

FOR THE BLACK SESAME SEED FILLING

  • 6 T non-dairy unsalted butter (like Earth Balance or Melt), room temperature
  • 1/4 c coconut  sugar
  • 1.5 T maple syrup
  • 4 T black sesame seeds, toasted lightly and coarsely ground
  • 1/2 c miniature dairy-free dark chocolate chips (I like Enjoy Life)

METHOD FOR THE  DOUGH

  1. Heat the milk till the thermometer reaches 100-110°F.
  2. Whisk the warmed milk and yeast in a medium-sized bowl. Then whisk in 1/2 cup of the flour. Allow the mixture to sit for 20 minutes.
  3. Combine the butter and sugar in a stand mixer with a paddle attachment on medium speed till light and whipped fluffy, about 2 minutes.
  4. Add in half of the flax eggs mixture for about a minute. Turn off the mixer and scrape down the sides of the mixing bowl with a rubber spatula. Add in the rest of the flax mix and whip on medium for another minute. Add the vanilla. Stir for 30 seconds.
  5. At the lowest speed, slowly add in the rest of the flour and matcha powder till almost combined, and then mix in the  yeasted milk for another minute. Then add the salt. Mix on low till the dough starts to pull away from the bowl and it’s fully incorporated. About 5 minutes.
  6. Lightly coat a large bowl with a neutral oil and place the dough in it. Cover with a clean towel and place in a warm area for about 1-2 hours, depending on the temp of your house. (You’ll want the dough to double in size.)

METHOD FOR THE BLACK SESAME FILLING

  1. Heat the sesame seeds over medium-high heat and toss occasionally till the seeds start to give off a toasted aroma (you’ll know it when you smell it). Turn off the heat.
  2. Place the seeds in a food processor, blender or coffee grinder till completely ground.
  3. Using a paddle attachment on a standing mixer, combine the butter, sugar, syrup, and  toasted sesame seeds. On medium speed, whip till combined. Place in the refrigerator till you’re ready to assemble the babka.

ASSEMBLY

  1. Once the dough has doubled in size, place it on a lightly floured surface. Roll it out starting in the middle and working your way out. Roll the dough to a 12×16 rectangle.
  2. Use an offset spatula to evenly spread the sesame filling into the dough. Sprinkle a generous layer of chocolate chips on top.
  3. Line an 8” x 5” loaf pan with parchment paper.


  4. Starting at the short end, roll the dough tightly. The seam should be at the bottom of the roll.
  5. Cut the ends off of both sides using a sharp serrated knife.

  6. Gently cut the roll in half lengthwise, from top to bottom.
  7. With the cut sides up, twist the halves over and together. Cross the left end over the right, and then carefully lift the right side over the left again. Repeat till all sides are intertwined.
  8. Carefully place the dough twist into the prepped pan. Cover with a clean towel and let rise for about 45 minutes.
  9. Preheat oven to 350°F
  10. Remove towel. Brush the babka with soy milk.
  11. Place in the preheated oven for 25-35 minutes (depends on your oven) and till a skewer inserted in the middle comes out clean.
  12. When done, carefully remove from oven and allow to cook for about 15 minutes on a cooling rack before serving.

A Miracle Worker

aguaditolede
I don’t get sick too often. Maybe once or twice a year, tops. So when I do get sick all hell breaks loose. I simply hate getting sick and avoid it like, say, the plague.

Blame it on over-exhaustion, not getting enough sleep, working too much. Whatever week-long illness it was, it was completely unbearable. I had this unstoppable cough that seemed to worsen at night while in bed trying to sleep. The incessant coughing led to a sore throat and muscle pains in the abdomen; it was like I was doing nonstop crunches, but no 6-pack to show for.

What I needed was a miracle. Or Miracle Max.

mm1

My regimen to nurse these ailments included daily vitamins, Emergen-C, so much orange juice, a hot elixir comprised of honey, fresh lemon juice, ginger, cinnamon, cayenne and turmeric. (It does the trick and nicely coats the throat.) But what really helps is a chicken soup of some kind. I had purchased a whole chicken and decided to make this Peruvian Aguadito soup quite reminiscent of the ones I used to enjoy at the L.A. Peruvian mini-chain, El Pollo Inka, that I used to frequent. The soup only gets better with a squeeze of the restaurant’s cilantro-chile sauce.

This Aguadito is a miracle worker, a magician, or brujo–the Miracle Max of soups. It has magical powers, I think, bringing you back to life. So much so that I felt increasingly better every time I consumed it (I ate the whole thing over the course of a week).

mm2

mm3

unnamed-2

I butchered the whole chicken into 10 pieces (halving the breasts) and kept the leftover bones to make stock for another time. The base of the recipe is usually mild, but I needed an extra kick of heat to help clear my nasal passages, and replaced with whole jalapeños for the typical serrano.

Make this the next time you start to have the ill feels. And once you start feeling better, have fun storming the castle.

mm4

Peruvian Aguadito Chicken + Rice Soup
Recipe slightly adapted from A Cozy Kitchen
Serves 4-10

INGREDIENTS
2 bunches cilantro, stems discarded
12 garlic cloves, peeled
2 medium-sized jalapeños, stems discarded
10 cups chicken stock
3 Tablespoons extra-virgin olive oil
1 whole chicken, skin-on and bone-in, butchered into 10 pieces (2 drumsticks, 2 wings, 2 thighs, 2 breasts halved into 4 pieces)
1 medium-sized red onion, julienned
2 teaspoons ground cumin
1 teaspoon cayenne
1/3 cup long grain rice
1 can corn, drained
1/2 cup fresh lime juice
salt and pepper, to taste

METHOD
Purée the cilantro, garlic, jalapeños, and 1/2 cup of the chicken stock in a food processor or blender.

Heat 2 tablespoons of the olive oil in a large stock pot over medium-high heat. Add the chicken pieces, skin side down and season with salt and pepper, cooking for 5-10 minutes or till lightly browned. Turn and sear the other side for an additional 5 minutes. Once all sides are nicely seared, remove from the pot and set aside.

Add the remaining tablespoon of olive oil and add the onions and sauté till translucent. About 5-7 minutes. Add in the cilantro-garlic and jalapeño purée. Stir for 3 minutes to incorporate. Add in the rice, cumin and cayenne, stir for 2 minutes.

Slowly pour in the stock, stirring to incorporate. Bring to a boil, then add in the chicken pieces. Turn down the heat to low, add the corn and allow to simmer for 30-40 minutes.

Finish with the lime juice and season with salt and pepper to taste.

unnamed-1

unnamed-5

(Editor’s Note: All movie screenshots in this story are property of Act III Communications and Twentieth Century Fox.)

Pie, Actually

Image-1

The first time I had heard the words “Banoffee Pie” were when Keira Knightley’s character, Juliet muttered them in the 2003 film, Love Actually. 

loveactually2-21

“Banoffee pie?” she asked.

“No, thanks.” said Mark.

“Thank god. You would’ve broken my heart,” she sighed.

Such irony in that scene, as he was so secretly in love with her.

After watching the movie for the first time in 2004, I immediately investigated this “banoffee pie.” Ban (banana) offee (toffee). What I discovered, a British treat with a crisp, buttery crust, tender bites of banana and dulce de leche, and a soft, pillowy whipped cream topping. The combination is all too irresistible.

IMG_7586

Banoffee Pie
Recipe slightly adapted from Jamie Oliver
Serves 4-8

INGREDIENTS
4.1 ounces butter, melted
8.1 ounces Speculoos cookies (or digestive cookies), crushed into fine crumbs
1 can (10.5 ounces) condensed milk
1 1/2 cups whipping cream
2 large bananas, sliced 1 1/2 inches thick, on a bias
pinch salt
1 small bar of dark chocolate, finely chopped

METHOD
Make the dulce de leche. First, remove the label on the can. Take the upopened can and place into deep pot and completely immerse the can in water. The can must be completely submerged in the water or it will explode.

Turn the heat on the stove to medium-high. Cover the pot and once the water begins to boil, turn down to a gentle simmer. Set a timer for 1.5 hours, checking frequently to make sure the can is completely covered in water, and pouring in more water if needed.

After 1.5 hours, using a long pair of tongs, carefully flip the can upside-down and return back to the simmering water. Add more water to the pot if needed. Set another timer for 45 minutes. When done, carefully remove the can from the water and allow to cool in room temperature for about 30 minutes before opening. Set aside.

IMG_7598

Mix the melted butter with the cookie crumbs in a bowl. Place the mixture into a pie tin, pressing down to ensure the crust is evenly distributed. Place into the refrigerator for 1 hour.

IMG_7599

IMG_7601

IMG_7602

While the crust sets, whip the cream in a mixing bowl with a whisk till soft peaks form. Don’t over-mix. Set aside.

After the crust has set for 1 hour, spread the dulce de leche over the base of the crust evenly.

IMG_7605

Layer on the sliced bananas. Add a pinch of salt to the bananas.

IMG_7604

IMG_7606

Then frost the top with the whipped cream.

IMG_7607

Sprinkle the top of the pie with the chopped chocolate. Place into the refrigerator to set for at least an hour. Serve.

IMG_7608

IMG_7587
IMG_7589
IMG_7590
IMG_7592 IMG_7593 IMG_7595

(Editor’s Note: All movie screenshots in this story are property of Universal Pictures.)

DINING IN…

fslede
A pet peeve of mine: When stores begin selling their holiday decorations months before the holiday has even come close. (Can we just celebrate Halloween and Thanksgiving first, please?) It’s annoying, really. I don’t even want to think about Christmas in October when I’m trying desperately to put together my last-minute Halloween costume. Let’s keep them separated, people.

Another pet peeve of mine: Playing Christmas music in October. Or November.

Just stop.

I appreciate the wanting to get into the holiday spirit deal, but I just can’t justify listening to Bing Crosby singing “Santa Claus is Coming to Town” 100 times before Christmas. I just can’t. And as much as I love Mariah Carey’s “All I Want For Christmas Is You”, I don’t want to hear it every single day leading up to Christmas.

I can’t.

I like to wait a good four to three weeks before the holiday to get everything done. That includes shopping, getting the tree, decorating, and watching all of my usual holiday favorites (The Holiday, Love Actually, Home Alone, Hook, Bad Santa, Bridget Jones’ Diary, and While You Were Sleeping).

And The Family Stone. With an all-star cast–Diane Keaton, Sarah Jessica Parker, Dermot Mulroney, Luke Wilson, and Craig T. Nelson, to name a few, The Family Stone circles around the Stone clan during Christmastime.

IMG_7378

The story starts off with the Stone’s prodigal son, Everett, (Mulroney) who brings his uptight, conservative girlfriend, Meredith Morton (Parker), with him to his family’s New England home for the holidays. Everett intends (albeit a bit skeptical) on proposing to her with his mom Sybil’s ring (Keaton), but is met with a bit of resistance from Sybil, who also has a terminal illness, and disapproves of her eldest son’s choice for a wife. None of the family approves of Everett’s girlfriend, either, and gives her a hard time at every opportunity they can. (Except Ben, played by Wilson, who shares a connection to Meredith.)

When Meredith sends an emergency SOS to her sister Julie (Claire Danes) to come stay at the Stones’ home with her for support, things get interesting when Julie arrives, and her growing mutual attraction to Everett cannot be denied. These star-cr0ssed siblings endure a few fights, misunderstandings and an engagement ring stuck on someone’s finger. Uh-oh.

IMG_7345

IMG_7339

One of the more pivotal scenes in the movie is when Meredith plans to make her family’s traditional “Morton Strata”, a savory bread pudding, on Christmas Day for the Stone’s. But things quickly turn upside-down, quite literally.

IMG_7402

IMG_7406

IMG_7405

IMG_7422

Without further giving away anymore spoilers, I encourage you to watch this heartwarming movie.

IMG_7418

IMG_7380

IMG_7384

IMG_7385

IMG_7389

This week’s post is dedicated to Meredith’s Christmas Strata, which includes mushrooms (even though Everett is allergic to them…oops!). Perfect for Christmas morning, make this recipe a day-ahead, as it’s important for the bread to absorb all of that custardy goodness.

IMG_7322
Meredith’s Christmas Strata with Swiss Chard, Mushrooms and Gruyère

Recipe slightly adapted from NYT Cooking
Serves 6

INGREDIENTS
½ pound stale bread, sliced about 3/4 to 1-inch thick cubes
6 Tablespoons unsalted butter, cut into pats
2 1/2 cups milk
1 ¾ cup mushrooms, quartered
1 cup cooking greens stemmed and cleaned (Swiss chard, kale or spinach)
2 garlic cloves, minced
½ cup Mozzarella cheese, grated
½ cup Gruyère cheese, grated
1/4 cup Parmesan cheese, grated
3 Tablespoons extra virgin olive oil
3 Tablespoons fresh thyme, picked and chopped
 3 Tablespoons Kosher salt
1 Tablespoon red pepper flake
4 large eggs
½ teaspoon salt

METHOD
Lightly butter a 2-quart baking dish.

IMG_7324

In a large pan, toast the bread cubes lightly in 2 Tablespoons of the butter. Place in a large bowl, and toss with 1 cup of the milk. Set aside.

Sauté the mushrooms in 2 Tablespoons of the butter, then add in the thyme. Remove from the pan and into the bowl with the bread and milk.

IMG_7326

Using the same pan, heat another 2 Tablespoons of the butter over medium-high heat, and add the cooking greens.

Stir for about 5 minutes, then add the garlic. Cover the pan, and allow the steam to cook the greens till it has completely collapsed, about three minutes. Uncover and stir, season with salt and red pepper flake.

IMG_7328

Remove from the pan, roughly chop and transfer to the bowl with the bread and mushrooms. Add the cheeses, and mix to incorporate. Arrange in the buttered baking dish.

IMG_7330

Beat together the eggs in a separate bowl, add in the remaining milk. Then pour over the bread mixture. Press the bread down into the custard mixture. Cover with foil and place into the refrigerator overnight.

On the next day, preheat the oven to 350 degrees.

Place in the oven, and bake 45 to 50 minutes, until puffed and golden brown. Remove from the oven, and serve hot.

IMG_7317

IMG_7304

IMG_7306

IMG_7312

IMG_7308

IMG_7311

(Editor’s Note: All movie screenshots in this story are property of Twentieth Century Fox.)

No Contest

thaichowlede

Thai food has become my comfort food. It’s the cuisine I crave on the regular. It’s become a big problem.

At work we had an open call “Salmon Chowder Contest” that would run on our menu at the restaurant if it was chosen to be the winner. This is the soup I made for the contest.

I decided to base my recipe off of one I made last year for my Tom Kha Gai soup. It’s not your traditional chowder, but it’s crazy delicious. Like, it’s really good. Trust me.

Forget tradition and try this! You won’t be disappointed.

Coconut Salmon Chowder
Yields 2 quarts

FOR THE CHOWDER

INGREDIENTS
2 nubs medium-sized galangal, peeled and sliced*
1 stalk lemongrass, white part only, sliced thin
5 kaffir lime leaves
6 Thai bird chiles
1 Tablespoon coconut oil
1 yellow onion, julienned
2 cups Yukon potatoes, peeled and medium-diced
3 cloves garlic, minced
2 cans coconut cream
2 cups vegetable stock
1 pound salmon, skin-off, cut into medium-sized cubes
1/8 cup fish sauce
2 Tablespoons granulated sugar
1 cup Thai basil, picked and minced
1 cup cilantro, picked and minced
1 lime, zested and juiced
salt and pepper, to taste
*galangal is a rhizome from the same family as ginger, used primarily in Thai, Lao and Vietnamese cooking. Find it at your local Asian supermarket.

METHOD
Place the first 4 ingredients in a food processor and process to a paste. Heat the oil in a saucepan over medium heat and add the paste, stirring till fragrant; about 5 minutes. Add the onions and saute till lightly browned. Add the potatoes and garlic and stir for a minute.

Turn down the heat and add the coconut cream and stir. Stir in the fish sauce and sugar, and bring to a gentle simmer, then add the salmon and simmer for an additional 5 minutes or till salmon is cooked.

Add the cilantro, Thai basil, lime zest and juice. Season with salt and pepper. Top with a healthy drizzle of Thai basil oil. (Recipe below).

thaichow1

FOR THE THAI BASIL OIL
Yields 2 cups

INGREDIENTS
2 cups Thai basil, packed
2 cloves garlic, peeled
1 3/4 cups olive oil
1/4 teaspoon salt

METHOD
Blanch the basil leaves in boiling salted water for 20 seconds. Remove the basil and shock in an ice water bath. Add in the garlic and olive oil. Process in a food processor till fully combined.

Store in an airtight container overnight in the refrigerator. Not he next day, strain the oil through a fine-mesh sieve, discarding the leaves.

thaichow2

thaichow3

Eat Like a Viking

streetcaraebleskivlede
Much of the history surrounding the origin of the Danish aebleskive is shrouded in mystery—and to some, in ancient Scandinavian folklore. Legend has it that during the days of the Vikings, after the warriors returned home, hit hard in battle (many poorly wounded and hungry) mixed together flour with milk, and cooked the batter inside the hollows of their iron shields and horned helmets (which, too, were dented and broken) over an open fire.

The result: A delicious golf ball-shaped cake, golden on the outside and fluffy in the middle.

Today, aebleskiver (plural) which roughly translates to “sliced apples” are enjoyed by just about anyone in every corner of the world. Topped simply with powdered sugar, filled with delicious lingonberry jam, or dipped in a creamy lemon curd—the possibilities with these apple-shaped delights are endless. For my first solo (and best!) attempt at aebleskiver-making (I can briefly remember a short lesson on making them in culinary school), I decided to pair a simple aebleskive recipe with an of-the-moment curd. While we’re still in a weird transitional season from late-fall to winter fruits, I made a delicious pomegranate-lemon curd that pairs perfectly with this recipe.

Cooking with a special aebleskiver pan makes this recipe so much easier, but I used a mini muffin pan, and it worked out PERFECTLY.

unnamed-14
Aebleskiver (Danish Pancakes)

Yields 16
Recipe slightly adapted from Serious Eats

INGREDIENTS
1 cup all-purpose flour
1/2 teaspoon baking powder
1/2 teaspoon salt
2 Tablespoons sugar
2 eggs, separated
1 cup half and half
4 Tablespoons unsalted butter, melted

SPECIAL EQUIPMENT
Aebleskiver pan (found in select cooking supply stores, like Sur La Table)
or, use a mini muffin pan (which I did.)

METHOD
Whisk together the AP flour, baking powder and salt, then set aside. In a larger bowl, whisk together the egg yolks, milk and 3 tablespoons of the melted butter until just-combined. Slowly stir in the dry ingredients with a rubber spatula, don’t overmix, as it should be slightly lumpy.

aebleskivbatterstreetcar

In the bowl of an electric mixer with a whisk attachment, beat the egg whites till stiff peaks form,  about 5 minutes. Then fold in the whipped egg whites into the lumpy batter.

aebleskivstreetcar

If you have an aebleskiver pan, place the pan over medium-high heat. Add the remaining 1 tablespoon of butter evenly to each well of the mold, and once the butter starts to bubble, add 2 heaping tablespoons of batter. Allow the aebleskiver to cook till the bottoms are golden, about 4 minutes, then flip and continue cooking till the tops are golden brown, about 3 minutes. Transfer cooked pancakes to a plate covered with foil to retain heat. Repeat steps till the rest of the pancake batter is used.

aebleskivpanstreetcar

If you DON’T have an aebleskiver pan, preheat your oven to 350 degrees and place a mini muffin pan into the oven to heat up. Once your oven is up to temperature, remove the muffin pan and add the remaining 1 tablespoon of butter into each mold well, then add about 2 heaping Tablespoons of pancake batter into each well. Place into the oven and allow the aebleskiver to cook till the bottoms are golden, about 3 minutes. Once you see that the bottoms are golden, remove from the oven and flip each pancake onto the other side.

aebleskivstreetcarcooked

Raise your oven’s temperature to 425 degrees, and once heated up, place the aebleskivers back into the oven to finish cooking for another 3-5 minutes, till golden brown. Once done, immediately transfer the cooked aebleskiver to a plate covered with foil to retain heat, and repeat the steps till the rest of the batter is used.

Garnish with Pomegranate-lemon curd. (Recipe here)

aebleskivballsstreetcar

aebleskivpatternstreetcar

aebleskivstreetcarstyled

Bao Down

baodownlede
Gua Bao
is a Taiwanese street food, comprised of a steamed bun, braised meat, and other fillings. I was first introduced to these teeny-tiny bites of delight while I worked for a food truck in San Francisco. Every weekend our truck met with other food trucks at Fort Mason hosted by Off the Grid, a Bay Area-based food and music event planner of sorts, bringing together only the best local food trucks at different venues weekly throughout the Bay. Off the Grid events were super fun to work because we were always busy and we got to meet some really awesome and talented people in the food truck community. One of my favorite trucks that I became a huge fan of was Chairman Bao, food truck that specialized in gua bao. A light and fluffy steamed bun with a tender, crisp slice of pork belly, with a nicely pickled crunch of daikon. So many excellent flavors all in one bite. You can’t help but want more.

This week I put my own spin on gua bao with braised pork belly, sweet pickled papaya and spicy pickled cucumbers.

unnamed-2

FOR THE BUNS
Recipe slightly adapted from Food52
Yields 16

INGREDIENTS
1 Tablespoon active dry yeast
1 cup water, room temperature
2 1/8 cups flour
3 Tablespoons granulated sugar
1 1/2 Tablespoon nonfat dry milk powder
1/2 Tablespoon Kosher salt
1/4 teaspoon baking powder
1/4 teaspoon baking soda
1/4 cup reserved pork fat, room temperature (you can use bacon or pork belly fat)

METHOD
Set up a stand mixer with a dough hook. Place the yeast and water together and mix just to incorporate to activate the yeast. Let it sit for 10 minutes. Then add in the flour, sugar, milk powder, Kosher salt, baking powder, baking soda and fat and mix on low for about 10 minutes. After the mixing cycle, your dough should be gathered into a ball. Place the dough ball in a lightly oiled medium-sized bowl, wrapped in plastic wrap. Keep the bowl in a warm area of your kitchen and allow the dough to rest for about 1 hour to 1 hour and 30 minutes, or until the dough has doubled in size.

unnamed-7

Once the dough has rested and risen, transfer it onto a lightly floured work surface. Use a sharp knife to divide the ball in 2 equal-sized pieces.

unnamed-10

Then divide each half into 4 equal-sized pieces, making 8.

unnamed-11

Roll each piece into mini logs, then cut each log in half, making 16 pieces total.

unnamed-12

Each piece should weigh about 25 grams each and be about the size of a Ping-Pong ball. Then roll each piece into a ball and place on a baking sheet. Loosely wrap the sheet tray with plastic wrap and allow to rise for a half-hour.

unnamed-13

After the buns have rested, use a rolling pin to roll each ball into a 4-inch-long oval. Brush each bun lightly with oil, and lay a chopstick horizontally across the center of the oval and fold it over onto itself to form a bun. Gently pull out the chopstick, leaving the bun folded, and place it onto a sheet tray, allow all the rolled out buns to rest for another 45 minutes.

unnamed-16

Set up a steamer on top of your stove. Steam your buns in batches so the steamer isn’t overcrowded, and steam them for about 8 to 10 minutes. Quickly remove each bun and place on a sheet tray to cool.

unnamed-14

The steamed buns can be used immediately or kept frozen in Zip-Lock bags for up to 2 months. Reheat the frozen buns on a stove top steamer for about 3 minutes, or until soft and warmed all the way through.

FOR THE FILLING
Recipe slightly adapted from Serious Eats
Serves 4-8

INGREDIENTS
1/2 pound slab skin-on pork belly
1 Tablespoon olive oil
1 clove garlic, minced
1 stub ginger, peeled and minced
3 each star anise
2 each Thai chili
2 Tablespoons brown sugar
1/4 cup Asian rice wine
1/2 teaspoon Chinese 5 Spice
1/2 cup dark soy sauce
1/4 cup light soy sauce
3 cups water

METHOD
Heat a nonstick or cast-iron skillet on medium-high. Once hot, place the pork belly into the pan and allow to sear for 5 minutes (or until light golden brown) before turning the belly onto the other side. Allow to sear for another 5 minutes, flipping the belly till all sides are seared nicely.

unnamed-15

Remove the belly and place onto a plate. Lower the heat to medium, then add the oil, garlic, ginger, and chilis. Toss for 2 minutes. Then add the star anise and brown sugar. Stir for a minute then deglaze with the wine. Stir till the sugar is melted.

Add the rest of the ingredients and stir thoroughly. Return the belly to the pan and turn down the heat to low. Carefully cover the pan with a lid or aluminum foil. Allow to braise for at least 1 hour. Check the belly for tenderness after 1 hour. Cook till fork tender.

unnamed-17


FOR THE PICKLES

unnamed-9

Spicy Pickled Cucumbers
Yields 1 cup

INGREDIENTS
1 large English cucumber, thinly sliced
1 1/2 cups rice wine vinegar
1/3 cup sugar
1 Thai chili, julienned
1 Tablespoon Kosher salt
2 teaspoons red pepper flakes
2 teaspoons black sesame seeds

METHOD
Heat the vinegar, sugar, chili, salt, pepper flake and sesame seeds in a small pan till boiling. Place the sliced cucumbers in a Mason jar or deli cup, then pour the boiling brine into the jar then cover. Allow to sit in room temperature for an hour, then keep in the refrigerator.

Sweet Pickled Papaya
Yields 2 cups

INGREDIENTS
1 small green papaya, cored and thinly sliced
1/2 cup rice wine vinegar
1/2 cup granulated sugar
1/2 cup water
1 teaspoon Kosher salt

METHOD
Bring the vinegar, sugar, water and salt to a boil until the sugar is dissolved. Pour the brine into a Mason jar or deli cup with the papaya. Cover tightly and allow to sit in room temperature for 1 hour. Then keep in the refrigerator.

Pickles can be used once cooled, and stored in the refrigerator for up to 3 weeks.

unnamed-1

TO ASSEMBLE
16 steamed buns
braised pork belly, sliced into 16 pieces
hoisin sauce
spicy pickled cucumbers
sweet pickled papaya
1/4 cup cilantro leaves

METHOD
Place a slice of the pork belly into the bun, smear a little hoisin sauce on the pork. Put 3-6 cucumber slices and about 3 tablespoons of papaya on top of the pork. Sprinkle with cilantro leaves. Enjoy!

unnamed-3

baodownstyledlast

baodownend

Sir Mix-Mix A-Lot

unnamed-3

My first memory of devouring halo-halo (pronounced hollow-hollow, and Tagalog for “mix-mix”) was at an early age at Magic Wok, a Filipino restaurant in L.A. close to where I grew up. (The restaurant is luckily still around, but it’s now called Crispy House, I highly recommend checking it out if you’re ever in L.A.) The food was soooo good; the best Filipino food I’ve ever had–crispy pata (fried pork belly), Shanghai lumpiang (Chinese-style deep-fried egg rolls), chicken adobo (braised chicken in herbs, vinegar and soy sauce), pancit bihon (stir-fried rice noodles), and of course, the house special halo-halo, a shaved ice/ice cream dessert with milk, Spanish flan, and various beans. Yes, beans. As in, frijoles.

the inspo: Halo-halo at Magic Wok circa 2012

the inspo: Halo-halo at Magic Wok circa 2012

Anthony Bourdain tried it for the first time on his show, Parts Unknown, and described it as, “It makes no goddam sense at all; I like it,”  and “it’s oddly beautiful.”

The standout part of halo-halo is the bright purple scoop of ice cream gracing the top of the ice-cold glass, called ube, a naturally-hued purple yam. Yes, yam. Yes, it’s purple. And it’s delicious.

Alone the beans, milk, ice cream, flan, shaved ice, and chunks of jackfruit and various jellies, are odd, but once mix-mixed, the blend of savory, sweet, creamy, caramel and sometimes tangy work perfectly well together. It actually works.

The key to enjoying halo-halo to its fullest is doing exactly what its name asks: mix! And mix! Use a long spoon to mix all the layers of ingredients together.

I haven’t had legit halo-halo in a few years, but during a recent trip to the local Asian market, I stumbled upon a quart of Magnolia’s Ube ice cream. I quickly added it to my basket and enjoyed it at home. I wanted to recreate the halo-halo that reminds me of the ones I had at Magic Wok with my family. Here’s my take on Filipino halo-halo, with homemade ube ice cream and Spanish-style flan!

==

unnamed-1

FOR THE ICE CREAM

Ube Ice Cream
Yields about 2 quarts
Recipe slightly adapted from Rot In Rice

INGREDIENTS
16 ounces (1 package) ube, grated purple yam*
1 1/2 cups whole milk
1/2 cup coconut milk
3/4 cup granulated sugar
2 1/2 cups heavy whipping cream
2 Tablespoons Kosher salt
(*Cook’s Note: Ube/grated purple yam can be found at your local Asian market.)

unnamed-5

METHOD
If your ube is uncooked (as most are in the package) steam it in a double boiler for about 20-30 minutes.

unnamed-6

Carefully remove the cooked ube and mash it with a fork.

unnamed-7

In a large sauce pot, heat the sugar and milks over medium-low heat till just-summering. Add in the mashed ube and mix till completely incorporated.

unnamed-8

Place the mixture into a blender or stick blender and purée till smooth. Mix in the heavy cream and salt.

unnamed-9

Strain the mixture through a fine mesh sieve to remove the grainy bits. Discard those bits. Place the ice cream base into the refrigerator for at least 6 hours, preferably overnight.

unnamed-10

Place the ice cream base into your ice cream maker bowl, and follow the manufacturer’s instructions.

unnamed-11

unnamed-14

Enjoy!

FOR ASSEMBLING THE HALO-HALO

Halo-Halo
Serves 4

INGREDIENTS
Spanish flan (recipe HERE)
Ube ice cream (recipe above)
1 can evaporated milk
4 cups crushed or shaved ice
1 jar Halo-Halo mix*
(Cook’s Note: Halo-Halo mix can be found at your local Asian market.)

unnamed-2

unnamed-13

unnamed-16

METHOD
Gather 4 sundae or chalice glasses (I used a tulip-style one). Add a scoop of the ice in each, then add a layer of the halo-halo mix.

unnamed-12

unnamed-17

Layer on another scoop of ice and halo-halo mix after that till you reach about 1/3 to the rim.

unnamed-18

Cut the flan into quarters and place a wedge on the top of each glass with 1-2 scoops of ube ice cream. Top with enough evaporated milk to cover a 1/4 to the rim.

unnamed-20


Recreating: Pica Pica’s Arepas

arepas lede a streetcar named devour
The Mexican Gordita.

The El Salvadorian Pupusa.

The Venezuelan and Colombian Arepa.

Each are comprised of a corn flour-batter mix, shaped into a disc, fried in oil and stuffed with various fillings.

They all sound strikingly similar, but most will argue, are quite different. (Just ask a Venezuelan how their arepas compare to that of a Colombian’s, or vise-versa, and you will get strong disagreements from each party.)

While in the past I’ve enjoyed a Gordita or two or 10, and have had quite the experience being a human pupusería, I hadn’t stumbled upon Arepas until my recent trip to San Francisco a few weeks ago. My awesome, longtime friend  and hostess Amber, took me to this amazing Venezuelan restaurant in the Mission called Pica Pica Arepa Kitchen. It is FAN (freaking!) TASTIC. I can’t even begin to describe how delicious the sweet corn, cake-like arepas, filled with hearty shredded beef pabellón, fried plantains, black bean purée and queso fresco were. I was in Arepa heaven. If such a heaven exists, I was definitely in it.

arepa inspo a streetcar named devour

The sweetness of the yellow corn viuda (Spanish for “widow” referring to an unfilled arepa) is most excellent on its own, but when paired with the various fillings, it becomes this flavor explosion in your mouth–the sweetness from the viuda and plantain, the salty from the pabellón and queso fresco and the gentle acidity from the guasacaca. Every inch of your tastebuds are satisfied, wanting more and not knowing when, (or how) to stop.

I had long (actually not quite that long, more like a week after) daydreamed of my rather virginal Arepa experience, wanting more. So I made my best attempt at recreating these delicate bellezas del cielo.

arepas 2 a streetcar named devour

Venezuelan-Style Arepas
Serves 3-6
Arepa dough recipe slightly adapted from Mommyhood’s Diary blog

FOR THE AREPAS (VIUDAS)
4 cups of water, room temperature
2 teaspoons Kosher salt
3 Tablespoons granulated sugar
3 cups Harina P.A.N (precooked white corn meal. Look for the “P.A.N” as it’s very different from the harina used in pupusas and gorditas.)
2 teaspoons vegetable oil

METHOD
In a medium-sized bowl add the water, salt and sugar. With a whisk, mix until the salt and sugar is dissolved. Slowly add in the Harina P.A.N. Using your hands, mix the dough, breaking any clumps with your fingers. Allow the dough to rest 5 minutes to thicken up.

unnamed-5

While you’re waiting, heat a non-stick griddle pan or cast-iron skillet over medium heat. Then add the oil to the dough, working the dough with your hands for about a minute. The arepa dough should be firm but not cracking when formed. If the dough is too soft add a little more of Harina P.A.N or more water if it’s too hard.

unnamed-7

Form dough balls and flatten them gently into discs until they’re about 1/2-inch thick. Immediately place the discs over your preheated pan and cook the arepas for 5-7 minutes on each side or until lightly golden brown. Repeat till all dough has been used. Serve immediately with your choice of fillings.

unnamed-2

FOR THE AREPAS RELLENAS (Filled arepas)
2 Tablespoons olive oil
1 medium onion, julienned
2 1/2 pounds flank or flat iron steak
1 cup (8 ounces) canned tomato sauce
2 teaspoons dried oregano
Salt and pepper, to taste
1 large ripened plantain, peeled and sliced into 1/2-inch pieces on a bias
6 Arepas vuidas
3 Tablespoons butter
1/2 of small wheel Queso Fresco, crumbled
1 cup Guasacaca Salsa*

For garnish
2 small green onions, julienned (green and whites)

METHOD
Rub a generous amount of salt and pepper to both sides of your steak. Preheat a large cast-iron skillet over medium heat. Add in the oil, and when the oil begins to slightly haze, add the steak.

Cook each side for about 3 minutes, or until lightly browned. When both sides are gently seared, using a pair of tongs, remove the steak and place onto plate to rest. Keeping the heat still on medium, add the onions  and sauté till onions are translucent. Then add the tomato sauce, stirring well. Add the oregano and season to taste with salt and pepper. Lower heat to low and allow to simmer for about 20-25 minutes to thicken.

unnamed-3

While your sauce is simmering, and after resting your steak for at least 15 minutes, slice your steak into even 1/4-inch slices. The steak should be at a nice rare pink.

unnamed-4

When your sauce has thickened up, immediately turn off the heat and throw in the sliced steak. The residual heat of the sauce will further cook the meat just a tad.

In another medium-sized non-stick pan or skillet, heat a Tablespoon of oil on medium.

unnamed-8

unnamed-5

Place the sliced plantains in the skillet, cooking each side for about 3 minutes each or until nicely browned and caramelized. Immediately remove from the pan and into a paper towel-lined plate to absorb excess oil.

unnamed-6

Next, gather all filling ingredients together.

unnamed-10

When ready to assemble, split each arepa in half horizontally with a knife. Butter each side of the still-warm arepa. Fill the bottoms of each arepa with the plantains, then layer on the steak, and a heaping spoonful of guasacaca salsaqueso fresco crumbles and green onion garnish.

Serve immediately. (Knife and fork optional, but highly recommended!)

a streetcar named devour arepa lede 3

a streetcar named devour areas lede 2