The Little Lowboy That Could

unnamed-11

I’ve been really getting into the whole DIY-decor movement lately, thanks to my amazing interior designer friend, Mel, who I work design jobs with frequently.

A few weeks ago while I was working with Mel, we were driving back from a shopping venture for a client, and I complained how I have been looking arduously for the perfect vintage-style lowboy dresser to no avail. And then, two blocks later, Mel pointed to the street, “Look!” and there it was, like the heavens had heard my prayers–an abandoned lowboy dresser.

We immediately pulled the truck over. And then I exclaimed,
“And I want 100-million dollars and a hot young boyfriend!”

(Can’t knock a girl for trying, eh?)

unnamed-2

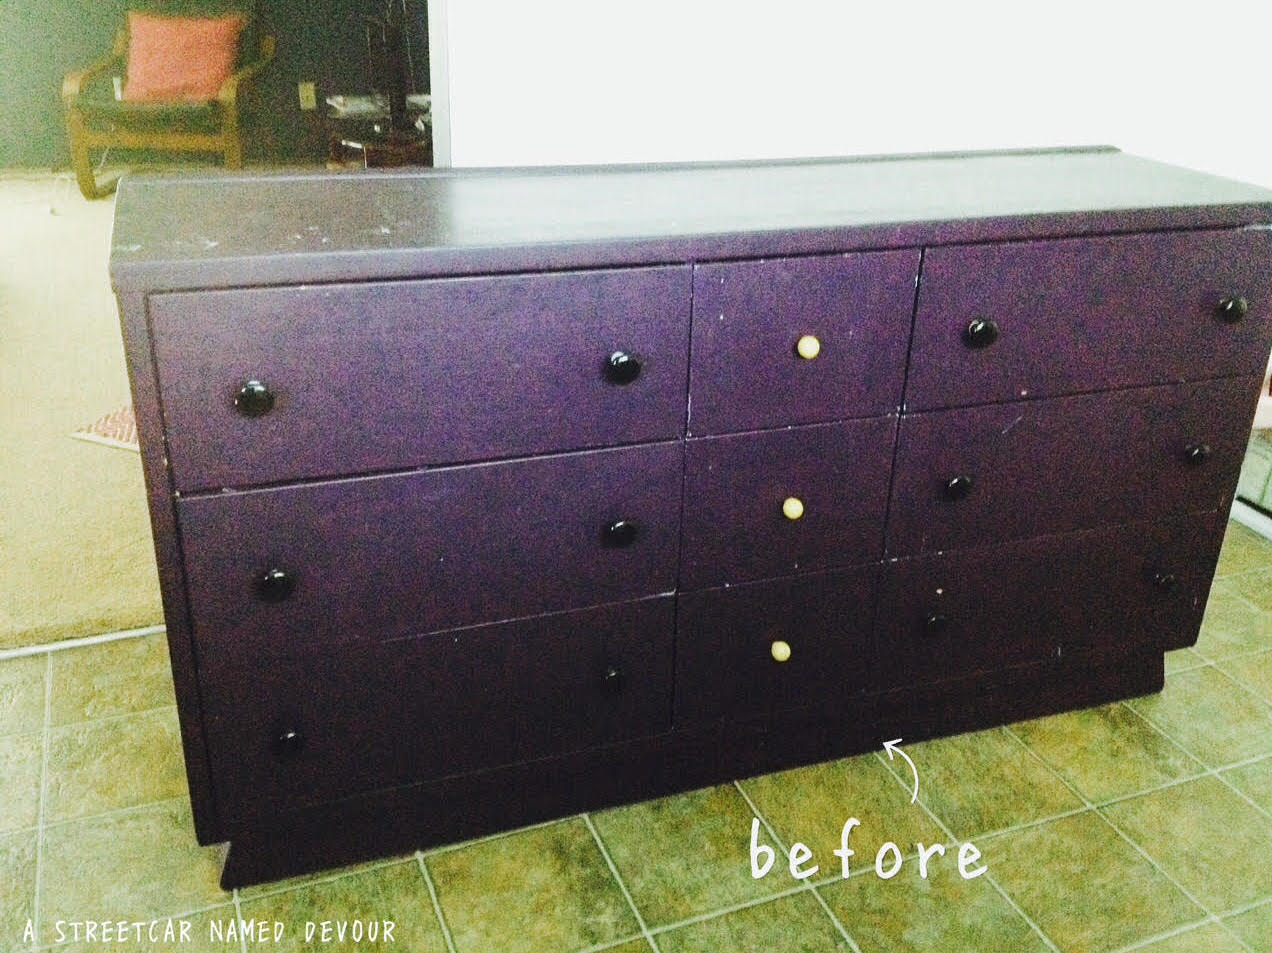
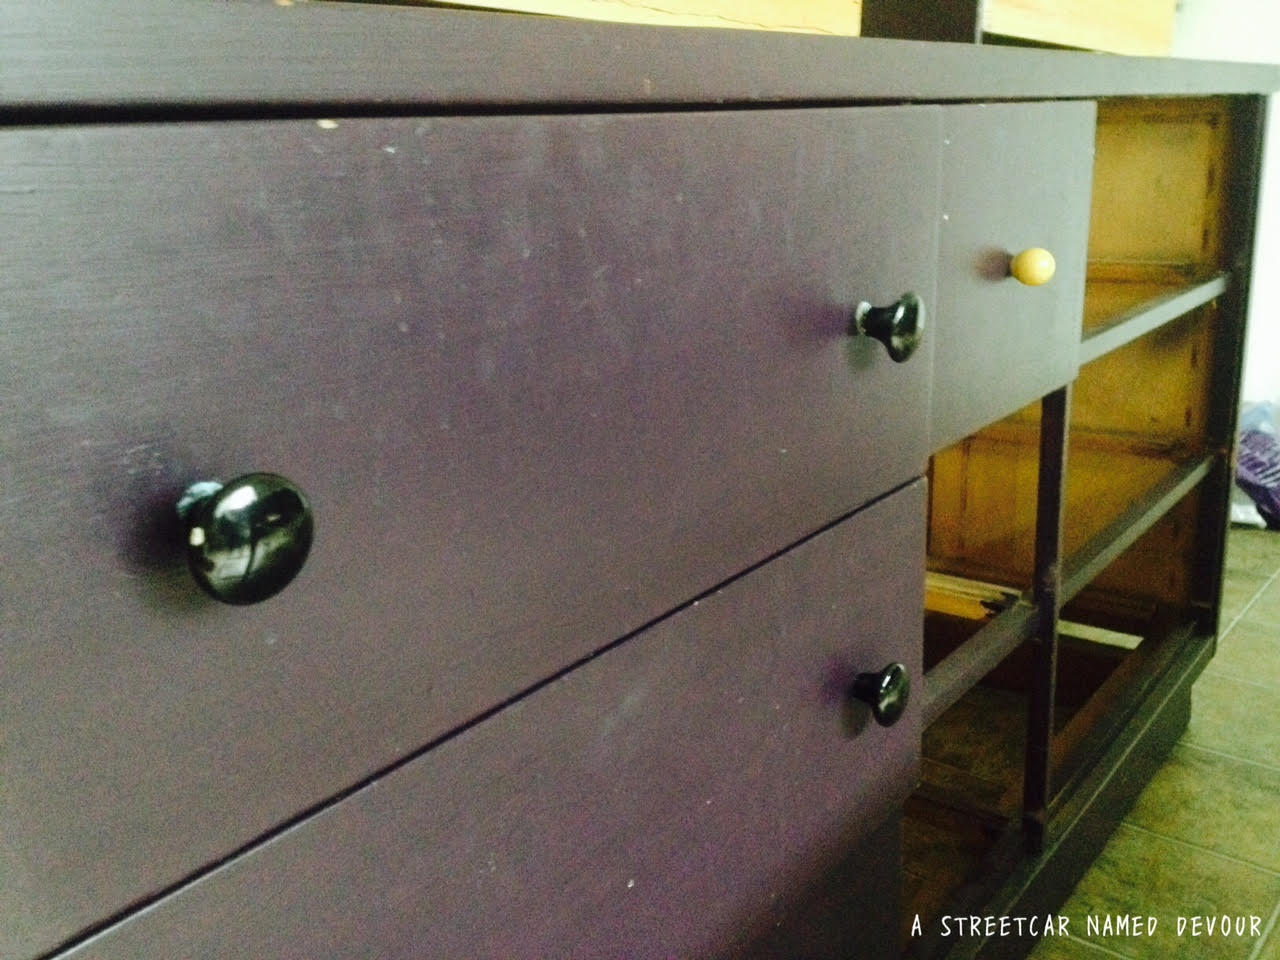
The dresser, clearly in bad shape, was an icky deep grape purple color with dated drawer pulls and scratches all over. The top of the dresser was warped and disconnected from the rest of the piece, and the inside of the drawers were lined with a 1960s-style floral print. But what made the dresser so beautiful to us was the base; it was clearly one-of-a-kind.

unnamed-1

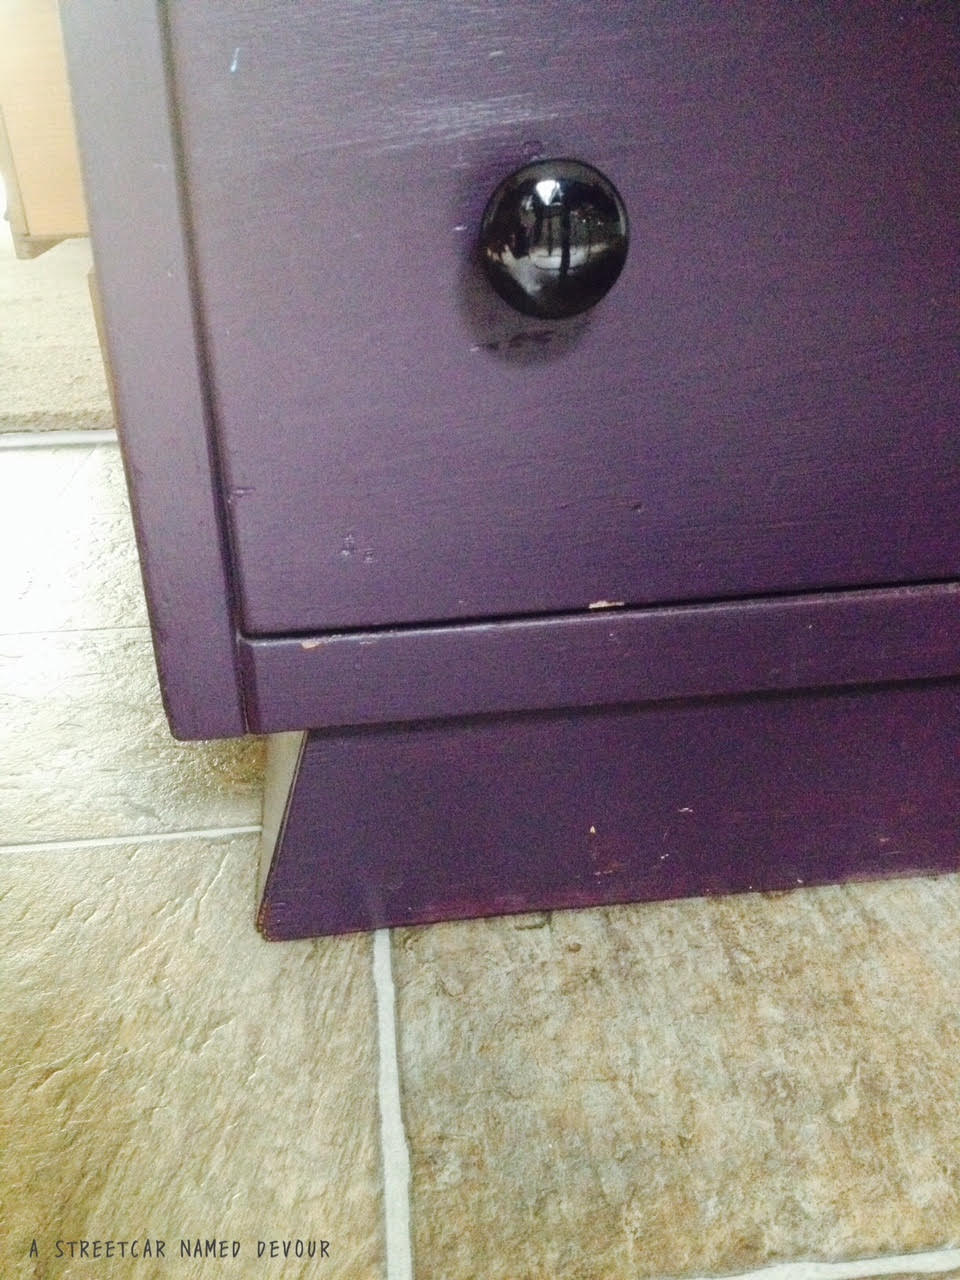
It had beautiful bones and I wanted to take it home. At the risk of sounding cliché: One man’s trash is another man’s treasure, right?

unnamed

So Mel and I loaded up her truck (thank god she has a truck!) and headed to my apartment to drop of my little orphan lowboy.

A few days later, I headed to the hardware store and picked up some supplies: a roller, angled paintbrush, tinted primer, a water-based semi-gloss paint from Benjamin Moore (Caribbean Azure) and some plastic floor linings in case of spillage. My friend, Chris let me borrow his power-sander, so I immediately got to work on sanding down the entire dresser.

After removing most of the paint and sanding out the rough edges, I wiped off the excess paint residue bits and put on a coat of the tinted primer. (My paint guy and I decided it was the best bet for me to achieve the color I wanted, as the former base color was very dark.)

unnamed-3

unnamed-4

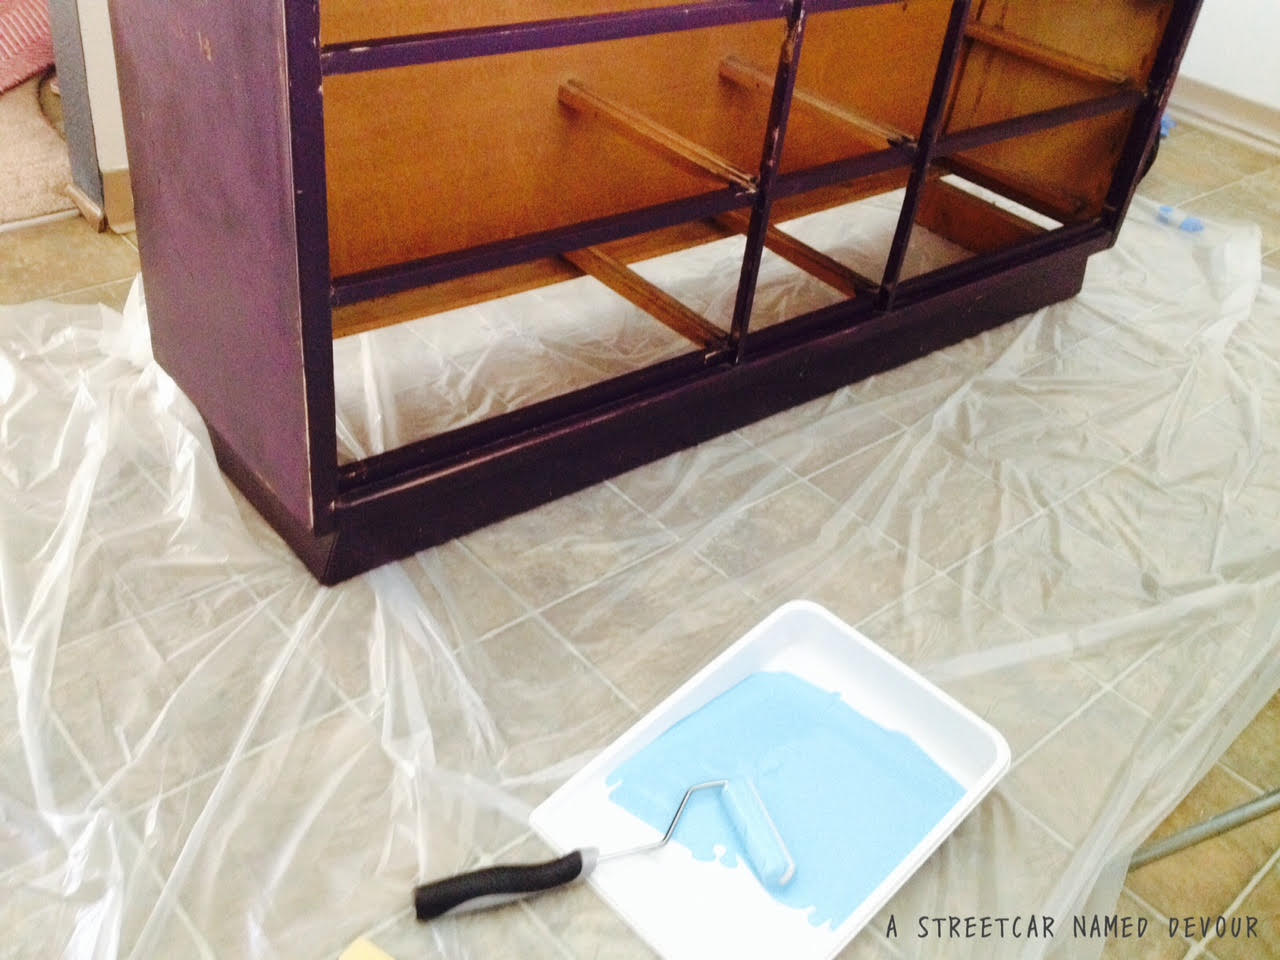
I let the primer dry overnight and then got to work on putting on the base coat. I used the roller mostly, and touched up the hard-to-reach spots with the angled paintbrush. I allowed the paint to dry overnight before adding the second coat. After painting on the second (and luckily, final!) coat, I allowed it to dry one more night.

After Mel’s recommendation, I headed down to Hippo Hardware, this super rad three-story building that houses hundreds of vintage hardware pieces: from drawer pulls, vintage doorknobs, porcelain bathtubs, and lighting fixtures. (If you didn’t already know: Hippo Hardware is also the site of the infamous scene in the Jackass movie where Dave England goes inside the store and takes a dump in one of the vintage toilets on display.)

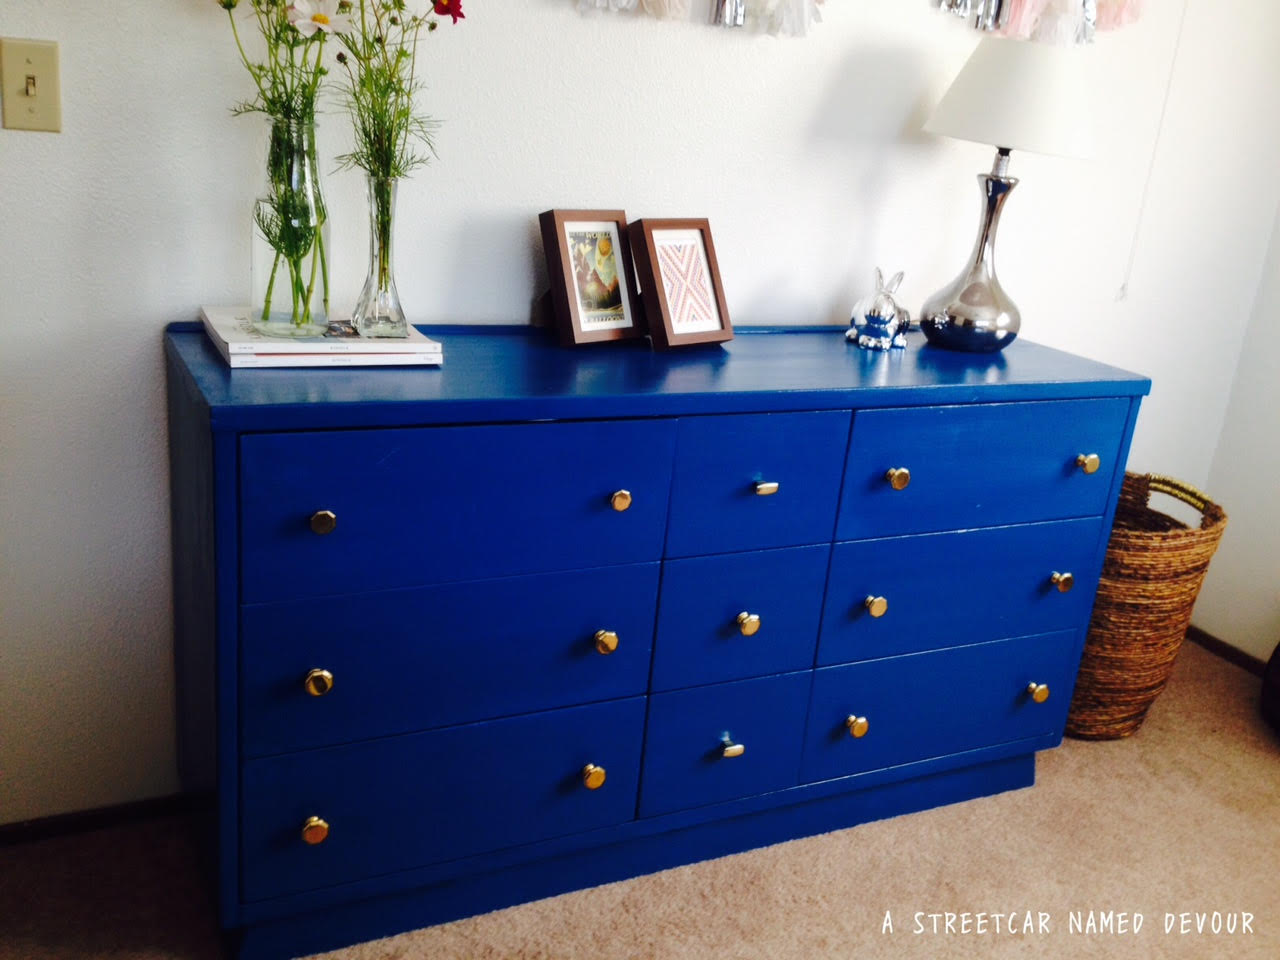
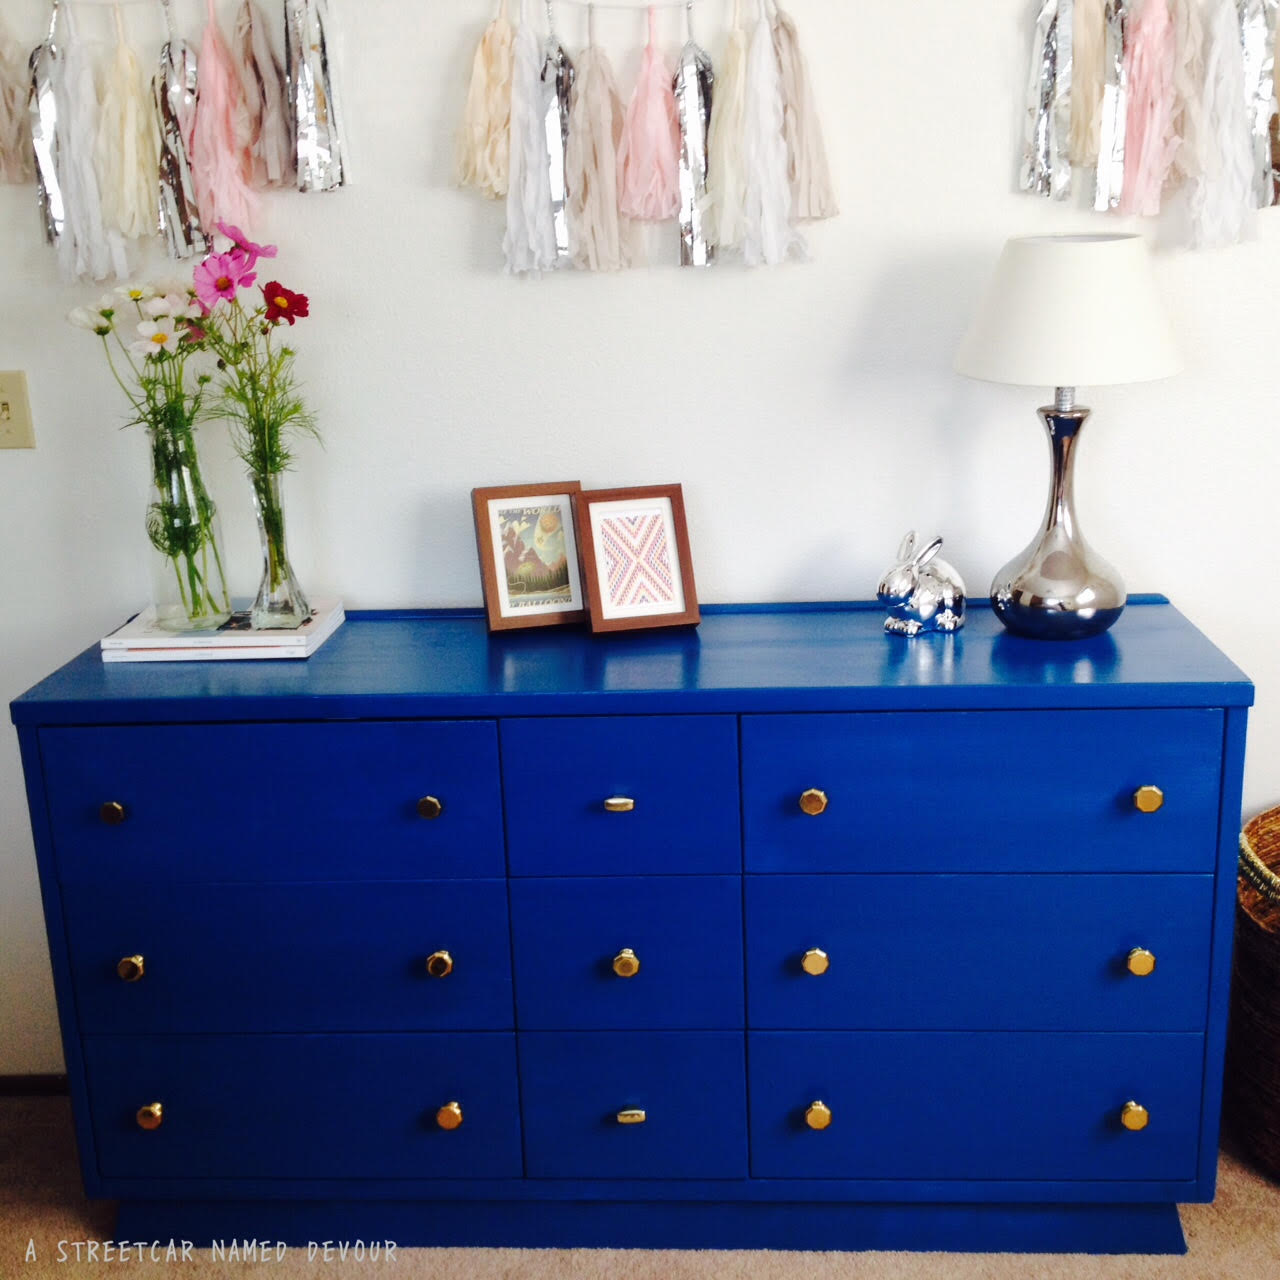
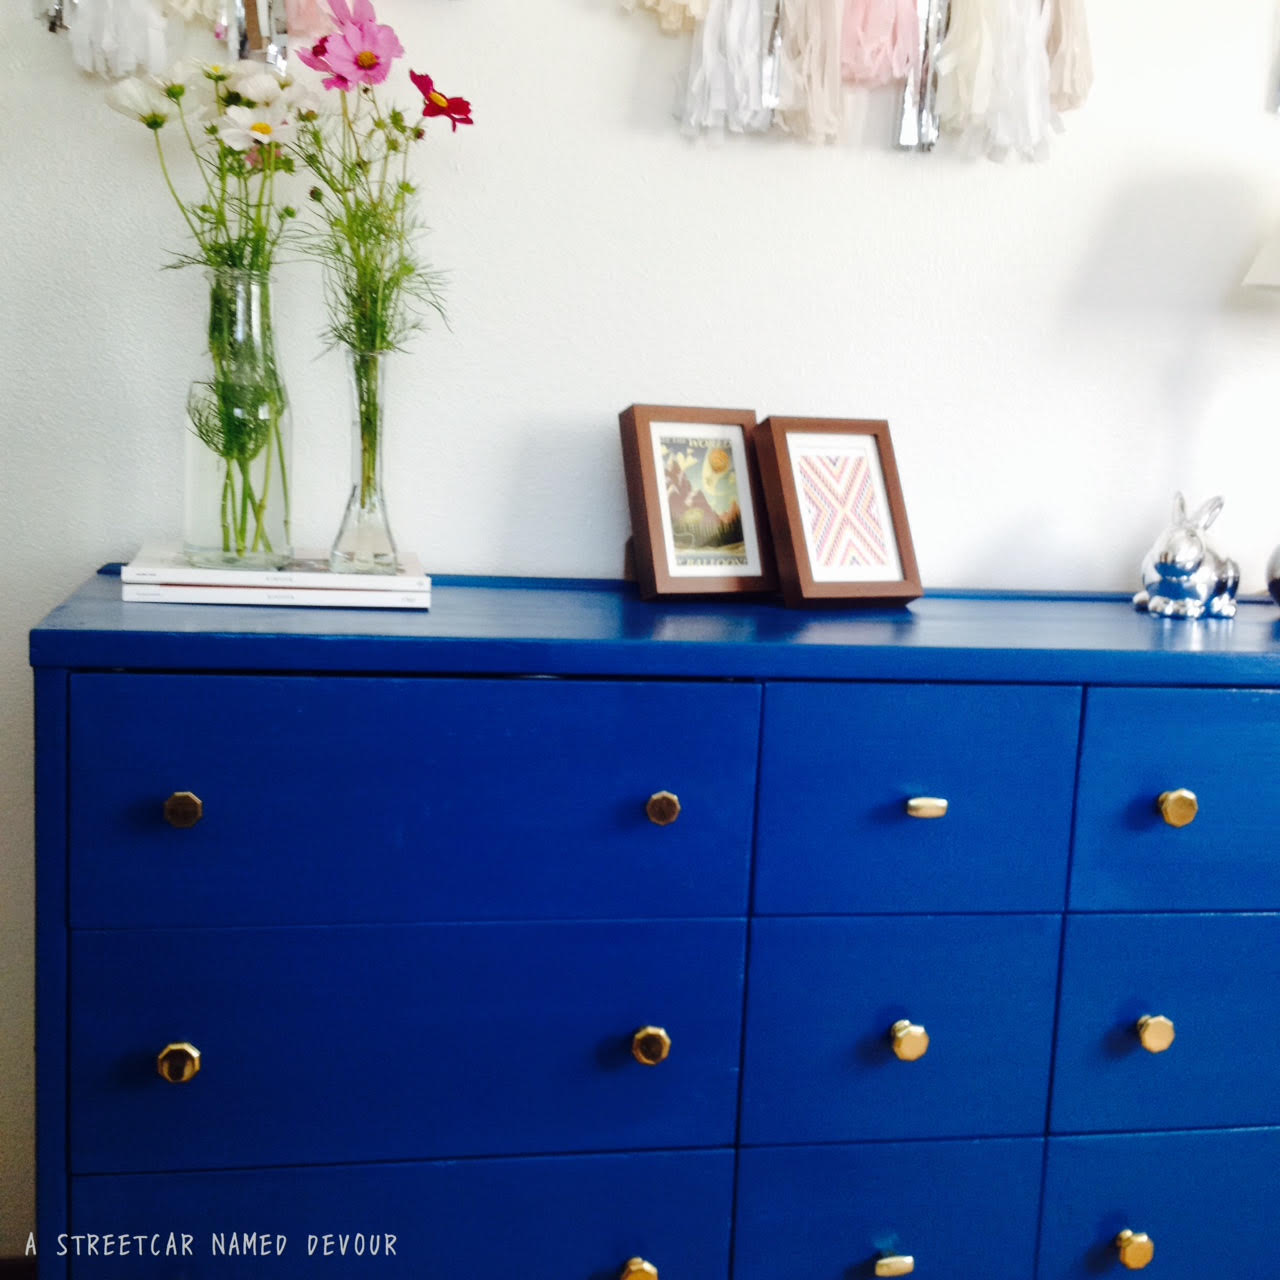
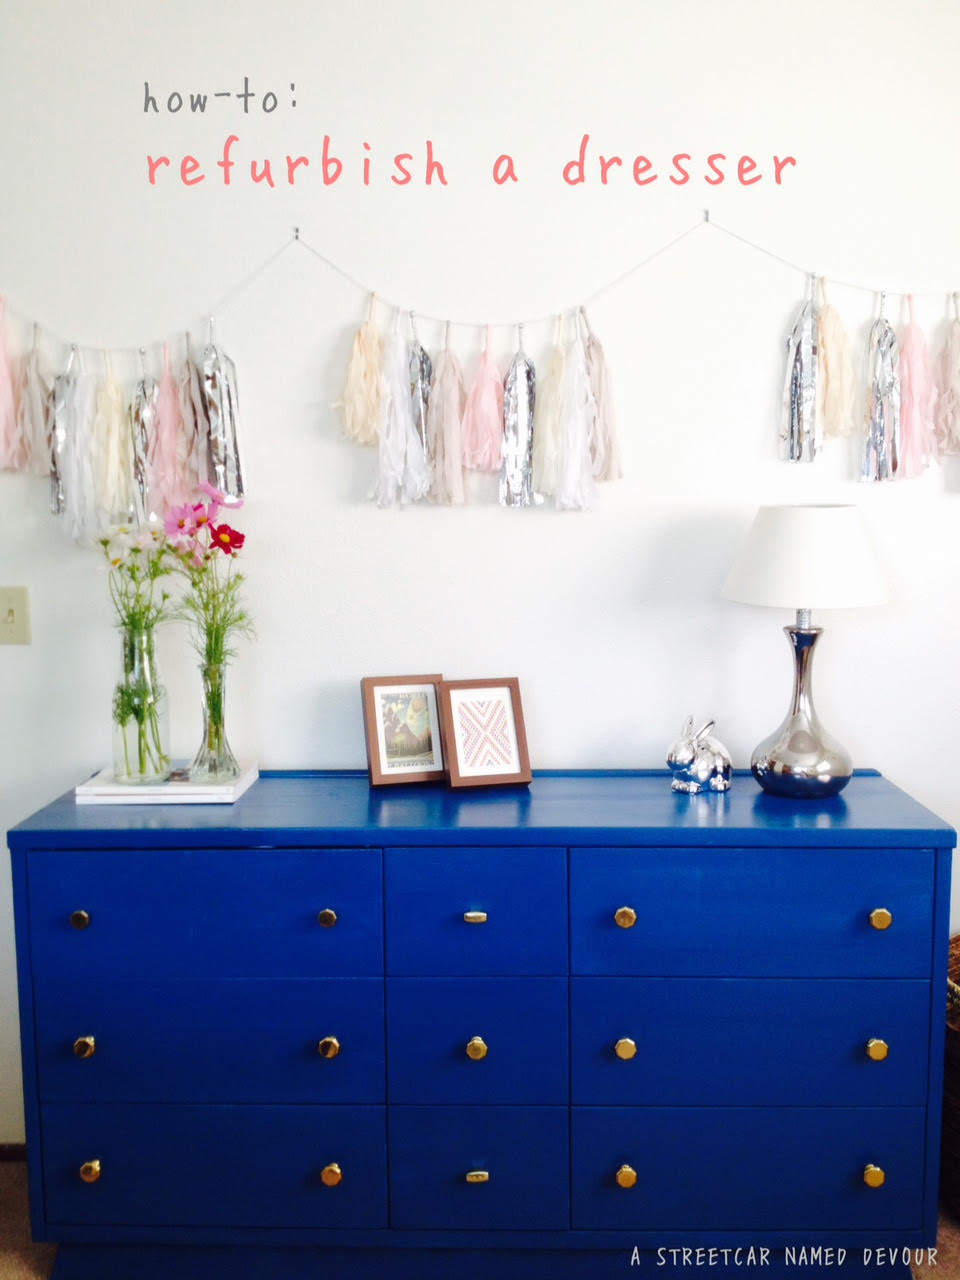
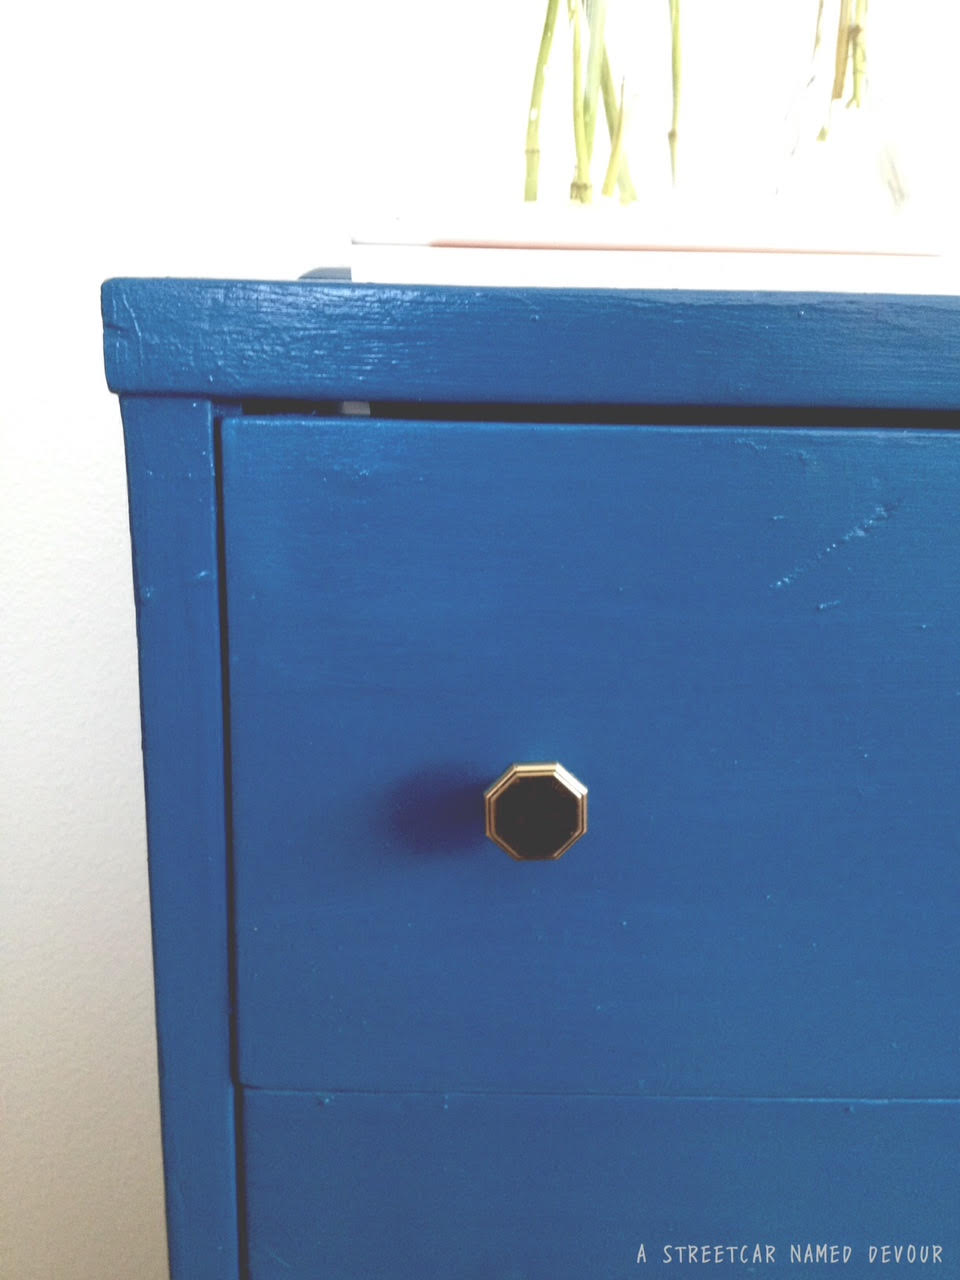
Anyway, the store has an entire section with drawers and boxes full of vintage drawer pulls. I knew I wanted them gold ’cause how well the blue and gold would look together. After scouring through every box of pulls they had, I finally found 13 gold, mid-century, hexagon-shaped pulls. They were GORGEOUS! Finding the same type of drawer pull wasn’t an easy task, but I was thrilled when I found these. I needed two more pulls and found a pair of contrasting yet cute gold pieces.

unnamed-7

I then headed to Target to grab some cleaning supplies, wood surface cleaner, and snagged a roll of Con-Tact paper to line the insides of the drawers. The print I found was adorable, and contrasted well with the color of the dresser.

unnamed-6

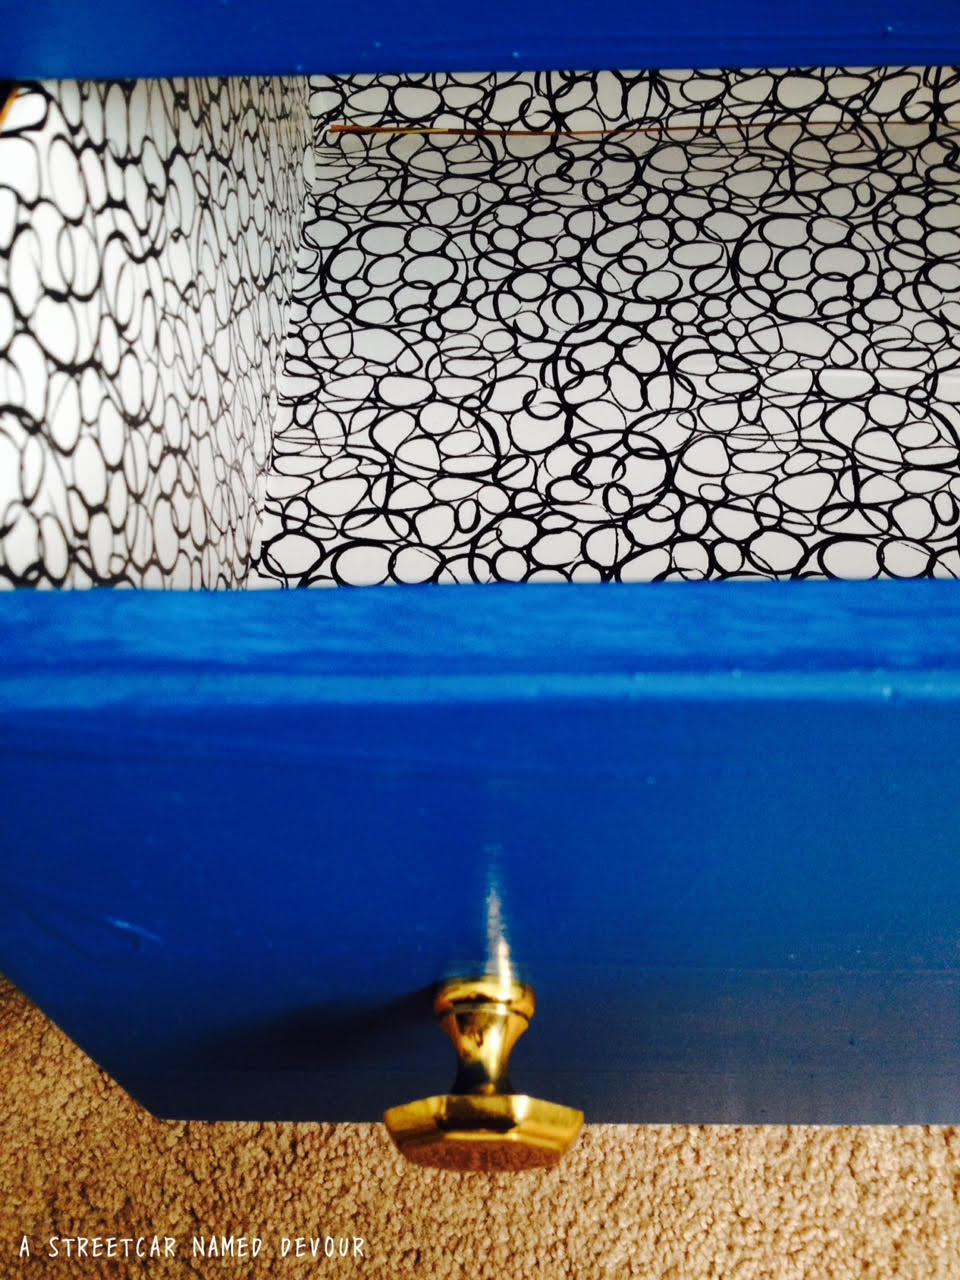
After thoroughly cleaning the inside of the dresser, the drawers, and lining the insides of the drawers, I put in the new drawer pulls. It turned out PERFECTLY. I’m so happy with the result, and the final price tag: $104! Not too shabby for a vintage dresser found on the side of the road, huh?

unnamed-12

unnamed-5

unnamed-8

unnamed-9

unnamed-10

Recreating: Pica Pica’s Arepas

arepas lede a streetcar named devour
The Mexican Gordita.

The El Salvadorian Pupusa.

The Venezuelan and Colombian Arepa.

Each are comprised of a corn flour-batter mix, shaped into a disc, fried in oil and stuffed with various fillings.

They all sound strikingly similar, but most will argue, are quite different. (Just ask a Venezuelan how their arepas compare to that of a Colombian’s, or vise-versa, and you will get strong disagreements from each party.)

While in the past I’ve enjoyed a Gordita or two or 10, and have had quite the experience being a human pupusería, I hadn’t stumbled upon Arepas until my recent trip to San Francisco a few weeks ago. My awesome, longtime friend  and hostess Amber, took me to this amazing Venezuelan restaurant in the Mission called Pica Pica Arepa Kitchen. It is FAN (freaking!) TASTIC. I can’t even begin to describe how delicious the sweet corn, cake-like arepas, filled with hearty shredded beef pabellón, fried plantains, black bean purée and queso fresco were. I was in Arepa heaven. If such a heaven exists, I was definitely in it.

arepa inspo a streetcar named devour

The sweetness of the yellow corn viuda (Spanish for “widow” referring to an unfilled arepa) is most excellent on its own, but when paired with the various fillings, it becomes this flavor explosion in your mouth–the sweetness from the viuda and plantain, the salty from the pabellón and queso fresco and the gentle acidity from the guasacaca. Every inch of your tastebuds are satisfied, wanting more and not knowing when, (or how) to stop.

I had long (actually not quite that long, more like a week after) daydreamed of my rather virginal Arepa experience, wanting more. So I made my best attempt at recreating these delicate bellezas del cielo.

arepas 2 a streetcar named devour

Venezuelan-Style Arepas
Serves 3-6
Arepa dough recipe slightly adapted from Mommyhood’s Diary blog

FOR THE AREPAS (VIUDAS)
4 cups of water, room temperature
2 teaspoons Kosher salt
3 Tablespoons granulated sugar
3 cups Harina P.A.N (precooked white corn meal. Look for the “P.A.N” as it’s very different from the harina used in pupusas and gorditas.)
2 teaspoons vegetable oil

METHOD
In a medium-sized bowl add the water, salt and sugar. With a whisk, mix until the salt and sugar is dissolved. Slowly add in the Harina P.A.N. Using your hands, mix the dough, breaking any clumps with your fingers. Allow the dough to rest 5 minutes to thicken up.

unnamed-5

While you’re waiting, heat a non-stick griddle pan or cast-iron skillet over medium heat. Then add the oil to the dough, working the dough with your hands for about a minute. The arepa dough should be firm but not cracking when formed. If the dough is too soft add a little more of Harina P.A.N or more water if it’s too hard.

unnamed-7

Form dough balls and flatten them gently into discs until they’re about 1/2-inch thick. Immediately place the discs over your preheated pan and cook the arepas for 5-7 minutes on each side or until lightly golden brown. Repeat till all dough has been used. Serve immediately with your choice of fillings.

unnamed-2

FOR THE AREPAS RELLENAS (Filled arepas)
2 Tablespoons olive oil
1 medium onion, julienned
2 1/2 pounds flank or flat iron steak
1 cup (8 ounces) canned tomato sauce
2 teaspoons dried oregano
Salt and pepper, to taste
1 large ripened plantain, peeled and sliced into 1/2-inch pieces on a bias
6 Arepas vuidas
3 Tablespoons butter
1/2 of small wheel Queso Fresco, crumbled
1 cup Guasacaca Salsa*

For garnish
2 small green onions, julienned (green and whites)

METHOD
Rub a generous amount of salt and pepper to both sides of your steak. Preheat a large cast-iron skillet over medium heat. Add in the oil, and when the oil begins to slightly haze, add the steak.

Cook each side for about 3 minutes, or until lightly browned. When both sides are gently seared, using a pair of tongs, remove the steak and place onto plate to rest. Keeping the heat still on medium, add the onions  and sauté till onions are translucent. Then add the tomato sauce, stirring well. Add the oregano and season to taste with salt and pepper. Lower heat to low and allow to simmer for about 20-25 minutes to thicken.

unnamed-3

While your sauce is simmering, and after resting your steak for at least 15 minutes, slice your steak into even 1/4-inch slices. The steak should be at a nice rare pink.

unnamed-4

When your sauce has thickened up, immediately turn off the heat and throw in the sliced steak. The residual heat of the sauce will further cook the meat just a tad.

In another medium-sized non-stick pan or skillet, heat a Tablespoon of oil on medium.

unnamed-8

unnamed-5

Place the sliced plantains in the skillet, cooking each side for about 3 minutes each or until nicely browned and caramelized. Immediately remove from the pan and into a paper towel-lined plate to absorb excess oil.

unnamed-6

Next, gather all filling ingredients together.

unnamed-10

When ready to assemble, split each arepa in half horizontally with a knife. Butter each side of the still-warm arepa. Fill the bottoms of each arepa with the plantains, then layer on the steak, and a heaping spoonful of guasacaca salsaqueso fresco crumbles and green onion garnish.

Serve immediately. (Knife and fork optional, but highly recommended!)

a streetcar named devour arepa lede 3

a streetcar named devour areas lede 2

Whisk it. Whisk it good.

image

In culinary school, you learn how to make mayonnaise in the “classic” technique: using a whisk. The art of incorporating air into the egg yolks till they’re pale yellow in color and like “ribbons” when you run your spatula or finger through. A little salt is added with lemon juice, vinegar and Dijon mustard. Then whisk whisk whisk! And whisk some more as you very slowly drizzle droplets of oil into the mixture. Whisk whisk whisk. Repeat until the mixture is completely emulsified, like (you guessed it!) mayonnaise. It’s a good workout, really.

I’m used to making mayonnaise this way at home. But at an old job I made mayonnaise quite often. In very large batches. Like, 22 quarts. Weekly. (Which is pretty gross when you think about it.)  In that case, I would make the mayo with a Robot Coupe (an industrial-size food processor which costs upwards of $2000) or by using a large, hand-held Robot Coupe Power Mixer which looks like a slightly larger version of the Ghostbuster’s Proton Gun (minus the Proton Pack).

Using a food processor makes this recipe quite easy. Of course, if you don’t have a food processor, you can always go old-school with the whisk method. I liken myself to be an old-school kinda gal, so I prefer the latter.

image

Garlic Aioli
Recipe slightly adapted from the Food Network
Yields 1/2 cup

INGREDIENTS
3 ea. egg yolks
2 tablespoons fresh lemon juice
1/4 cup red wine vinegar
1 tablespoon Dijon mustard
1 1/2 cups oil (preferably vegetable, canola or peanut oil)
Salt and fresh ground black pepper, to taste
4 garlic cloves, minced

METHOD (the whisk method)
In a glass bowl whisk the egg yolks together till they’re a pale yellow color.

In a separate bowl combine the lemon juice and the vinegar. Add half of the mixture to the egg yolks. Start whisking briskly, then you can start slowly (and there’s an emphasis on slowly) a few droplets of the oil into the bowl. Continue to whisk the mixture, adding drops of the oil at a time. Once the mixture starts to thicken a bit, you can start adding the oil in a slow but steady stream, alternating between streaming the oil and whisking.

When half of the oil has been added to the bowl, add in the rest of the lemon juice, vinegar mixture and the minced garlic, continuing to whisk until all of the oil has been incorporated and you have a nice, thick (like mayonnaise!) emulsion. Add the Dijon mustard, salt and pepper to taste. Set aside. (Refrigerate the aioli for up to 1 week.)

image-2

image-1

METHOD (the tech-y route)
Place the egg yolks into a food processor. Process the yolks until they’re a pale yellow color. Add a pinch of salt and continue to pulse. Add the lemon juice, vinegar, Dijon and agave and pulse till well combined. Slowly stream in the oil, pulsing between small batches. Pulse until all of the oil is added. By now you should have a nice thick emulsion. Prepare the garlic as instructed above and place into the aioli.

Recreating The Father’s Office Burger » HERE