Flavor of the Week

Now in season: strawberries!

Now in season: strawberries!

When I worked as a Pastry Chef Assistant, I had the pleasure of making ice cream and sorbet bases daily. And when I say pleasure, I mean it. Ice cream and sorbets are a fairly easy sweet treat to make at home. And quite honestly, with all the ingredients listed on many store-bought ice creams–preservatives, additives, and chemicals one can’t even pronounce–it’s actually healthier (and perhaps safer) to consume those of the homemade variety. Wouldn’t you agree?

Now in season, strawberries are ideal for this warm weather, so sorbet is in order!

Ooh, and for a cool (alcoholic) refresher, you can add a scoop of the sorbet to a flute of sparkling wine (Prosecco works well) for a Bellini-style cocktail.

==

Warning: Consumption of strawberries before making sorbet is often unavoidable!

Strawberry Sorbet
Yields about 1 quart

INGREDIENTS
3/4 cup granulated sugar
3/4 cup water
3 1/2 cups (16 ounces or 1 pound) strawberries, stems removed and quartered
1 tablespoon lemon or lime juice (I used grapefruit juice and it tasted great!)

METHOD
Place the water and sugar into a small saucepan stirring to just combine. Heat over medium-high and boil until the sugar is completely dissolved. You’re basically making a simple syrup, so heat the sugar water till it’s a slightly syrupy consistency. Turn off the heat and transfer the simple syrup into a small bowl and into the refrigerator to cool.

While the simple syrup cools down, wash the strawberries and cut off the stems. Cut the strawberries into quarters. Place strawberries into a food processor or blender and blend till the fruit is completely broken down, adding a fresh squeeze of lemon juice.

Seriously so good

Seriously so good

Transfer the strawberry gazpacho to your ice cream maker, adding in the simple syrup. Churn the strawberry soup according to your ice cream maker’s manufacturer’s instructions. (My Hello Kitty Ice Cream Maker processes the mixture for 40 minutes.)

Sorbet before

Sorbet before

Sorbet after

Sorbet after

Once the mixture has been churned completely, place a sheet of plastic wrap just pressing the top of the sorbet to avoid getting ice crystals while freezing. Place into your freezer for at least 4 hours or until firm.

If I could escape...

If I could escape…

13 Going on 30

Birthday "Ding Dongs" with Salted Caramel Ganache

Birthday “Ding Dongs” with Salted Caramel Ganache

Hostess Ding Dongs were a common mainstay in my She-Ra lunchbox during grade school. I remember the excitement from opening up my lunch to find that little foil-wrapped cake waiting just for me. Some of my classmates would attempt to “trade” a Ding Dong for something like a baggie of chocolate Teddy Grahams or a bottle of Squeeze-It Juice. As tempting as it was, I never succumbed.

Nearly 25 years later, I still have that taste memory of those cakes fresh in my mind. For my former roommate Gina’s 30th birthday I decided to make her a batch of homemade “Ding Dongs.” Seeing as how Gina favors a salty-sweet taste aesthetic, the cakes are dipped in a salted caramel ganache, inspired by this recipe. And to make her “30, Flirty and Thriving”-themed surprise birthday extravaganza even more special, I cut the cakes into heart shapes.

Cook’s Note: These cakes are super-moist and airy, and the marshmallow filling isn’t as sweet as most recipes I’ve come across. The recipe yields about 12 “Ding Dongs” with plenty of cake scraps to snack on for later, as well as extra caramel ganache that can later used to top ice cream sundaes.

==

Surprise!

Surprise!


dingdongcutout

Allow the cakes to cool before cutting them into shapes (if you decide to do so)

Birthday “Ding Dongs” with Salted Caramel Ganache

FOR THE CAKE
Recipe adapted from Smitten Kitchen and Beantown Baker

INGREDIENTS
2 ounces semisweet chocolate
1 cup hot brewed coffee
2 cups sugar
1 2/3 cups flour
1 cup unsweetened cocoa powder (not Dutch process)
1 1/3 teaspoon baking soda
1/2 teaspoon baking powder
1 teaspoon salt
2 ea. eggs
1/2 cup vegetable or canola oil
1 cup buttermilk
1/2 teaspoon vanilla

METHOD
Preheat oven to 300°F and grease 2 10-inch round cake pans.

Finely chop chocolate and add into a bowl of hot coffee. Stir until chocolate has melted and the mixture is smooth.

Sift together the sugar, flour, cocoa powder, baking soda, baking powder, and salt in a large bowl. In another large mixing bowl beat the eggs until thickened slightly and lemon-yellow in color. Slowly stream in the oil, buttermilk, vanilla, and melted chocolate mixture to eggs, beating until combined well. Add sugar mixture and beat on medium speed until just combined.

Divide the cake batter between pans and bake in the middle rack until a tester inserted in center comes out clean, roughly one hour.

Cool cakes completely in pans on racks. Run a small knife or palette knife around the edges of pans and invert layers onto racks. You can make the cakes one day ahead and wrap them with plastic wrap and left out in room temperature.

*Cook’s Note: If you’re prepping the cakes for the following day, do not place them in the refrigerator, this causes the cake to dry out, no bueno! If you’re prepping a few days in advance, thoroughly wrap the cakes in plastic wrap and into the freezer. Defrost accordingly.

filling

Save your leftover marshmallow filling to top hot chocolate.

FOR THE MARSHMALLOW FILLING
Recipe adapted from Epicurious

INGREDIENTS
1 cup plus 2 tablespoons sugar
3 each large egg whites
1/4 teaspoon cream of tartar
1/8 teaspoon salt
1 tablespoon pure vanilla extract

METHOD
In large mixing bowl, whisk together 1/3 cup water, sugar, egg whites, cream of tartar, and salt. Set bowl over a double boiler of simmering water and mix with a whisk or handheld electric mixer at low speed. Gradually increase speed to high, beating until mixture holds stiff peaks, about 5 minutes.

Remove bowl from double boiler to a rolled up kitchen towel (this helps to keep the bowl in place) onto your counter and continue beating until mixture is cool and billowy, about 2 minutes more. Beat in the vanilla. This filling can be made ahead 4 hours before assembly, just cover with plastic wrap and chill.

FOR THE SALTED CARAMEL GANACHE
Recipe adapted from Bon Appetit

INGREDIENTS
9 ounces bittersweet chocolate, chopped
1 1/8 teaspoon kosher salt
1 cup granulated sugar
1 1/2 cups heavy whipping cream
1 teaspoon pure vanilla extract
Sea salt for garnish

METHOD
Place chopped chocolate and salt into a medium-sized bowl and set aside. Stir the sugar and 1/4 cup of water in a deep medium-sized saucepan over medium-low heat until the sugar dissolves. Increase the heat and cook, swirling the pan occasionally (don’t stir! It will cause the sugar to crystallize!) and brushing down the sides of the pan with a wet pastry brush if you have one. You want to cook the sugar till it is a deep amber color, this takes about 10 minutes. Once you achieve the amber color, remove the pan from the heat and stream in the heavy whipping cream. The mixture will bubble vigorously. Return the pan to cook over medium heat and stir until the caramel bits dissolve. Then pour over this mixture into the bowl of chopped chocolate. Add the vanilla and stir until the chocolate has melted and is smooth. Allow to cool slightly.

dingdongfilled

Assembly gets messy, but it’s so worth it


ganache

Salted caramel ganache! What?!


ASSEMBLY
Once the cake layers have cooled completely, use a small round cookie cutter (in my case I used a heart-shaped cookie cutter) to cut small circles of cake out of the layers. Reserve the cake scraps for future sweet treats!

Using the cone method, scoop out a small portion of cake from each circle. Fill with the marshmallow filling and replace top of cake.

With a pastry brush or spoon, cover individual cakes with salted caramel ganache. Sprinkle a bit of sea salt flakes over cakes for garnish. Allow ganache to completely set up before serving.

Split Decision

Secret Ingredient: Chickpeas!

Secret Ingredient: Chickpeas!

My sweet tooth is becoming a problem. A major problem. The kind of problem that goes straight to the thighs and derrière, so much so that my pants (two pairs, thus far) are waging a war against me–splitting at the most unpleasant of areas at the most inconvenient of times. Perhaps *they* are trying to tell me something?

Within the first few weeks of working at a former job, I had experienced one of the most embarrassing moments in a cook’s life–I had bent down to pick up a sheet tray from the rolling rack, and eek! my 3-year-old, culinary school-issued, black pants had split at the seam of my, err, caboose. I was exposed. Completely embarrassed, I had to scurry (apron now wrapped around my waist, concealing said ripped pants) to my sous chef and ask him for an emergency pair of black chef pants. My sous chef then contacted our restaurant’s general manager about the “situation” who then ran over to the human resources building to get me a new pair. Before I knew it, nearly everyone working in my cafe had found out about my pant mishap. Not only was I the “New Girl”, I was now the “New Girl with the Incredibly Splitting Pants!” I felt like a really bad circus act.

For this I blame a lack of exercise. Working 8-13 hours a day is hard on the body and doesn’t allow me the time to work out after-hours. By the time I get home from work, I’m extremely exhausted. While my job is very physically demanding–heavy lifting, running around, standing for long periods of time, etc.–I was missing the fat- and calorie-burning cardio exercise I needed to counter my sweet tooth-crazed problem. To combat this issue I’ve now begun walking to work, a mere 3.5 miles, 7 miles roundtrip. I’m now able to eat the sweet things (very sparingly!) without all the guilt.

Even still, cookies are my vice. Always have been. They’re my go-to snack whether they’re fresh from the oven (the best kind) or of the grocery store variety. I began researching for a healthy cookie option to help ease my daily sweet cravings. Does a healthy cookie even exist? I found a recipe via The Texanerin of a grain-free cookie made of (hold your breath now) chickpeas! Yes, I couldn’t believe it, either, when I first read about it. I immediately got to recipe testing. With some slight tweaking (I substituted the peanut butter for almond butter and added Nutella and brown sugar to the mix), this cookie does make me feel less guilty. And just to be sure, while I wait for the cookies to bake, I do squats and leg lifts in between.

==

IMG_1644

A Different Kinda Chocolate Chip Cookie

Grain-free Vegan Nutella-Almond Butter Dark Chocolate Chip Cookies
Recipe slightly adapted from Texanerin Baking
Yields about 17 cookies

INGREDIENTS
1 1/4 cups canned chickpeas, well-rinsed and patted dry or (350g cooked)
2 teaspoons vanilla extract
1/2 cup almond butter
1/3 cup + 1 teaspoon Nutella or hazelnut spread
1/4 cup (80 grams) honey
1 teaspoon baking powder
a pinch of salt
1/8 cup (70 grams) brown sugar
1/2 cup (90 grams) dark chocolate chips (65% cacao or more)

IMG_0578

Other ingredients: honey, almond butter, and of course, Nutella

IMG_0581

Dark chocolate chips

IMG_0597

Hey batter batter batter!

METHOD 
Preheat your oven to 350°F/175°C. Combine all the ingredients, except for the chocolate chips and brown sugar, in a food processor and process until very smooth. Make sure to scrape the sides and the top to get every little chunk of chickpeas and process again until they’re well combined.

Add in the chocolate chips and brown sugar and stir till just combined. The mixture will be very thick and sticky.

Transfer dough into a small bowl and place into refrigerator for 30 minutes to an hour to congeal. Allowing the dough to cool makes it slightly easier to handle.

When you’re ready, use an ice cream scoop or spoon to form 1- to 1/2-inch balls. Place onto a Silpat- or parchment paper-lined sheet tray. Bake for 10-15 minutes.

IMG_0662

Post-bake!

The Deep Fryer Diaries: Doughnuts

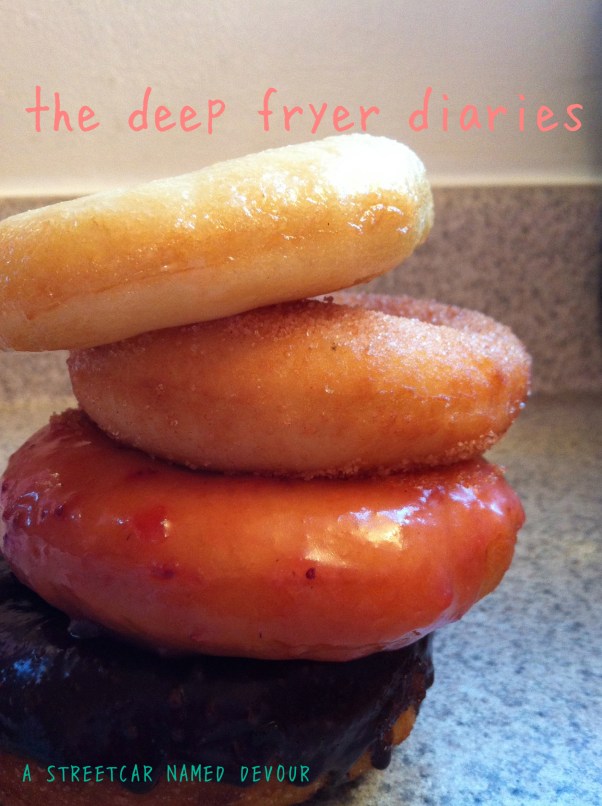
The Deep Fryer Diaries are a collection of my favorite tested and approved recipes, utilizing my most favorite-ist kitchen appliance, my deep fryer.

Doughnuts!

Doughnuts!

Dear Diary,

Let’s talk doughnuts.

My first doughnut food memory was when I was about 5 or 6 years old. When I was off from school and on summer or winter vacation, Mom would take my younger brother, Kevin and me to my grandmother’s house to babysit us while she and Dad went to work. On the drive to Grandma’s (whom I call, Nanang), Mom would often stop by the “Angel Food Donuts” shop on Long Beach Boulevard and we’d order doughnuts in the drive-thru. I always got the old-fashioned glaze while my brother got the ones with the sprinkles, and Mom always got the maple bar. Mom clearly wasn’t concerned with the impact of her children’s unavoidable sugar high while at Nanang’s, as I’m pretty sure she bought them for a reason: to get us kids out of bed. Even at a very young age, I was not a morning person. I was the kid who refused to wake up after naptime in Kindergarten; I always got in trouble with my teachers because of it. Yeah, I was that kid. Which is no surprise as to why I’m still not a morning person.

But the one thing that gets me up and out of bed, is breakfast. Namely coffee (lots and lots of it) and, on occasion, doughnuts.

In culinary school I learned that doughnut-making, like bread-making, is a labor of love. One must allow for the dough to rest, rise, deflate before rolling out, shape, and then rise once more. If you’re as serious about doughnuts as I am, then realize that this will take a lot of preparation and patience. (But I think you’ll agree that it’s well worth the wait.)

This basic yeast-raised doughnut recipe works well accompanying any type of glaze or filling. Because my childhood favorite was the old-fashioned glaze and because I now (at times) like a little booze in my coffee, why not add some whiskey to the glaze? This glaze can be modified to a bourbon, rum glaze as well. And because not all of us can stomach that boozy combination so early in the morning, I’ve also included a chocolate glaze recipe, too.

D’oh!

Yeast-Raised Doughnuts

FOR THE DOUGH
Recipe adapted from The Breakfast Bachelor
Yields: About 2 dozen doughnuts, depending on how thick you roll them out

INGREDIENTS
1 1/2 cups whole milk
1/3 cup vegetable shortening
2 packages active dry yeast
1/3 cup warm water
2 eggs, beaten
1/4 cup sugar
1 1/2 teaspoon salt
1/2 teaspoon nutmeg
5 1/2 cups all-purpose flour (and more for kneading)
1 1/2 quarts-2 quarts oil for frying

METHOD
Heat the milk in a sauce pot over medium heat. Once it starts bubbling add the shortening and stir till dissolved. Once dissolved, remove from pan and transfer to a large bowl and allow to cool to lukewarm.

Add the yeast into the *warm* (not hot, not cold) water, stir briefly and allow to sit and wait for bubbles to form. Once your milk is cooled to lukewarm, add the bubbly yeast into the bowl, adding the eggs, sugar, salt, nutmeg and about 2 cups of the flour. Stir the mixture a few times just to mix, then add in the rest of the flour. Continue to stir with a spatula till it forms a ball and the dough starts to pull from the sides of the bowl.

Place the dough ball onto a well-floured surface. Knead for about 5 minutes, adding bits of flour to keep it from getting sticky. You want the dough to feel somewhat smooth. Form the dough into a ball, add more flour to the surface and cover it with your bowl. Don’t lift the bowl at all. It’s nap time, let it rest for 1 hour.

*While your dough is resting, you can start to make the glazes. (Recipe below.)*

cutintoshapes

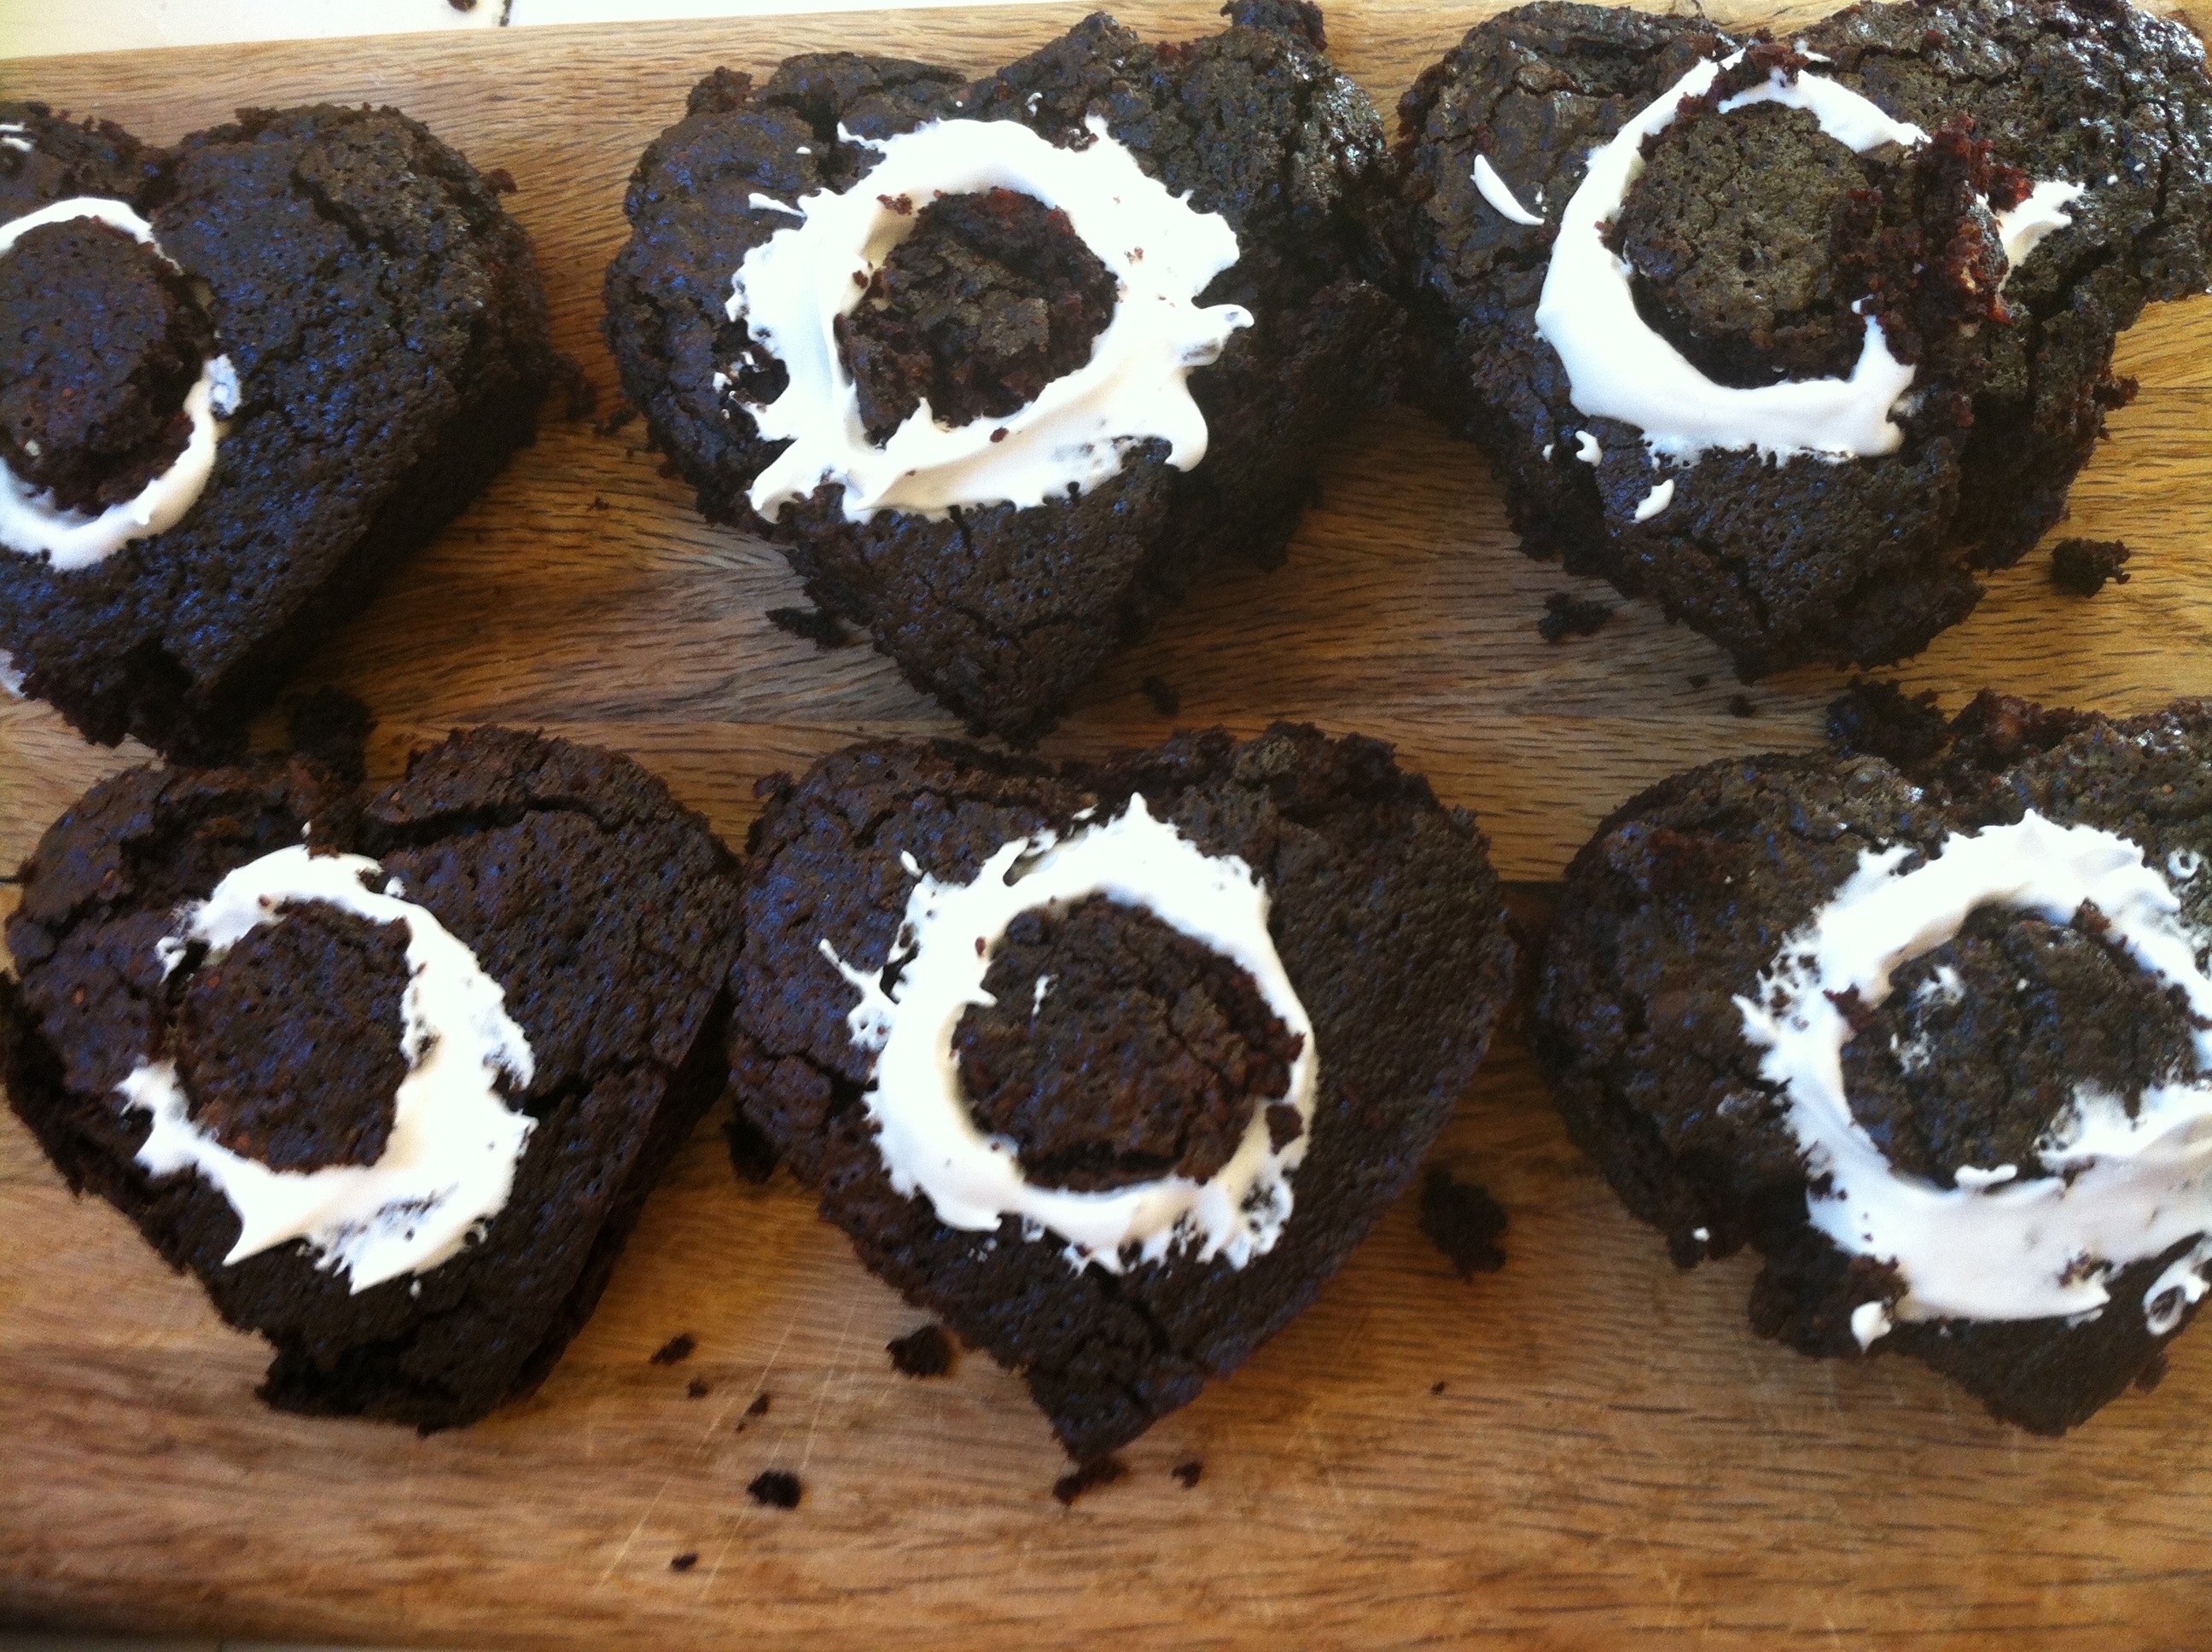
Don’t throw away those doughnut holes! (They’re the best part.)

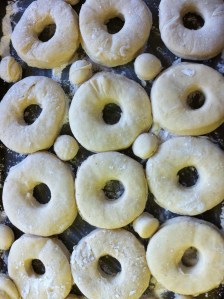
After the dough has been resting for an hour, take off the bowl and left the dough. It should be twice its size by now. Take the dough and drop it on the surface to “deflate” it. Next, you can start rolling it out to about 1/2-inch thick. If you have a doughnut cutter, great, if you’re like me and don’t have one, you can use any large round cup. (I used a 1-inch measuring cup for cutting.) Re-roll the scrap pieces to utilize all of the dough if necessary. You should have about 24 doughnuts. (If you want to make some unfilled doughnuts, set aside 12 to cut into rings for the whiskey glazed ones.)

Arrange the doughnuts onto a floured baking sheet and cover with a dishtowel. Allow them to rest for another 30 minutes.

fryer

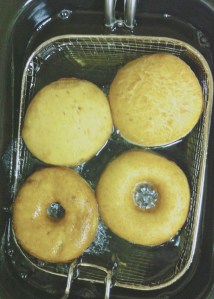
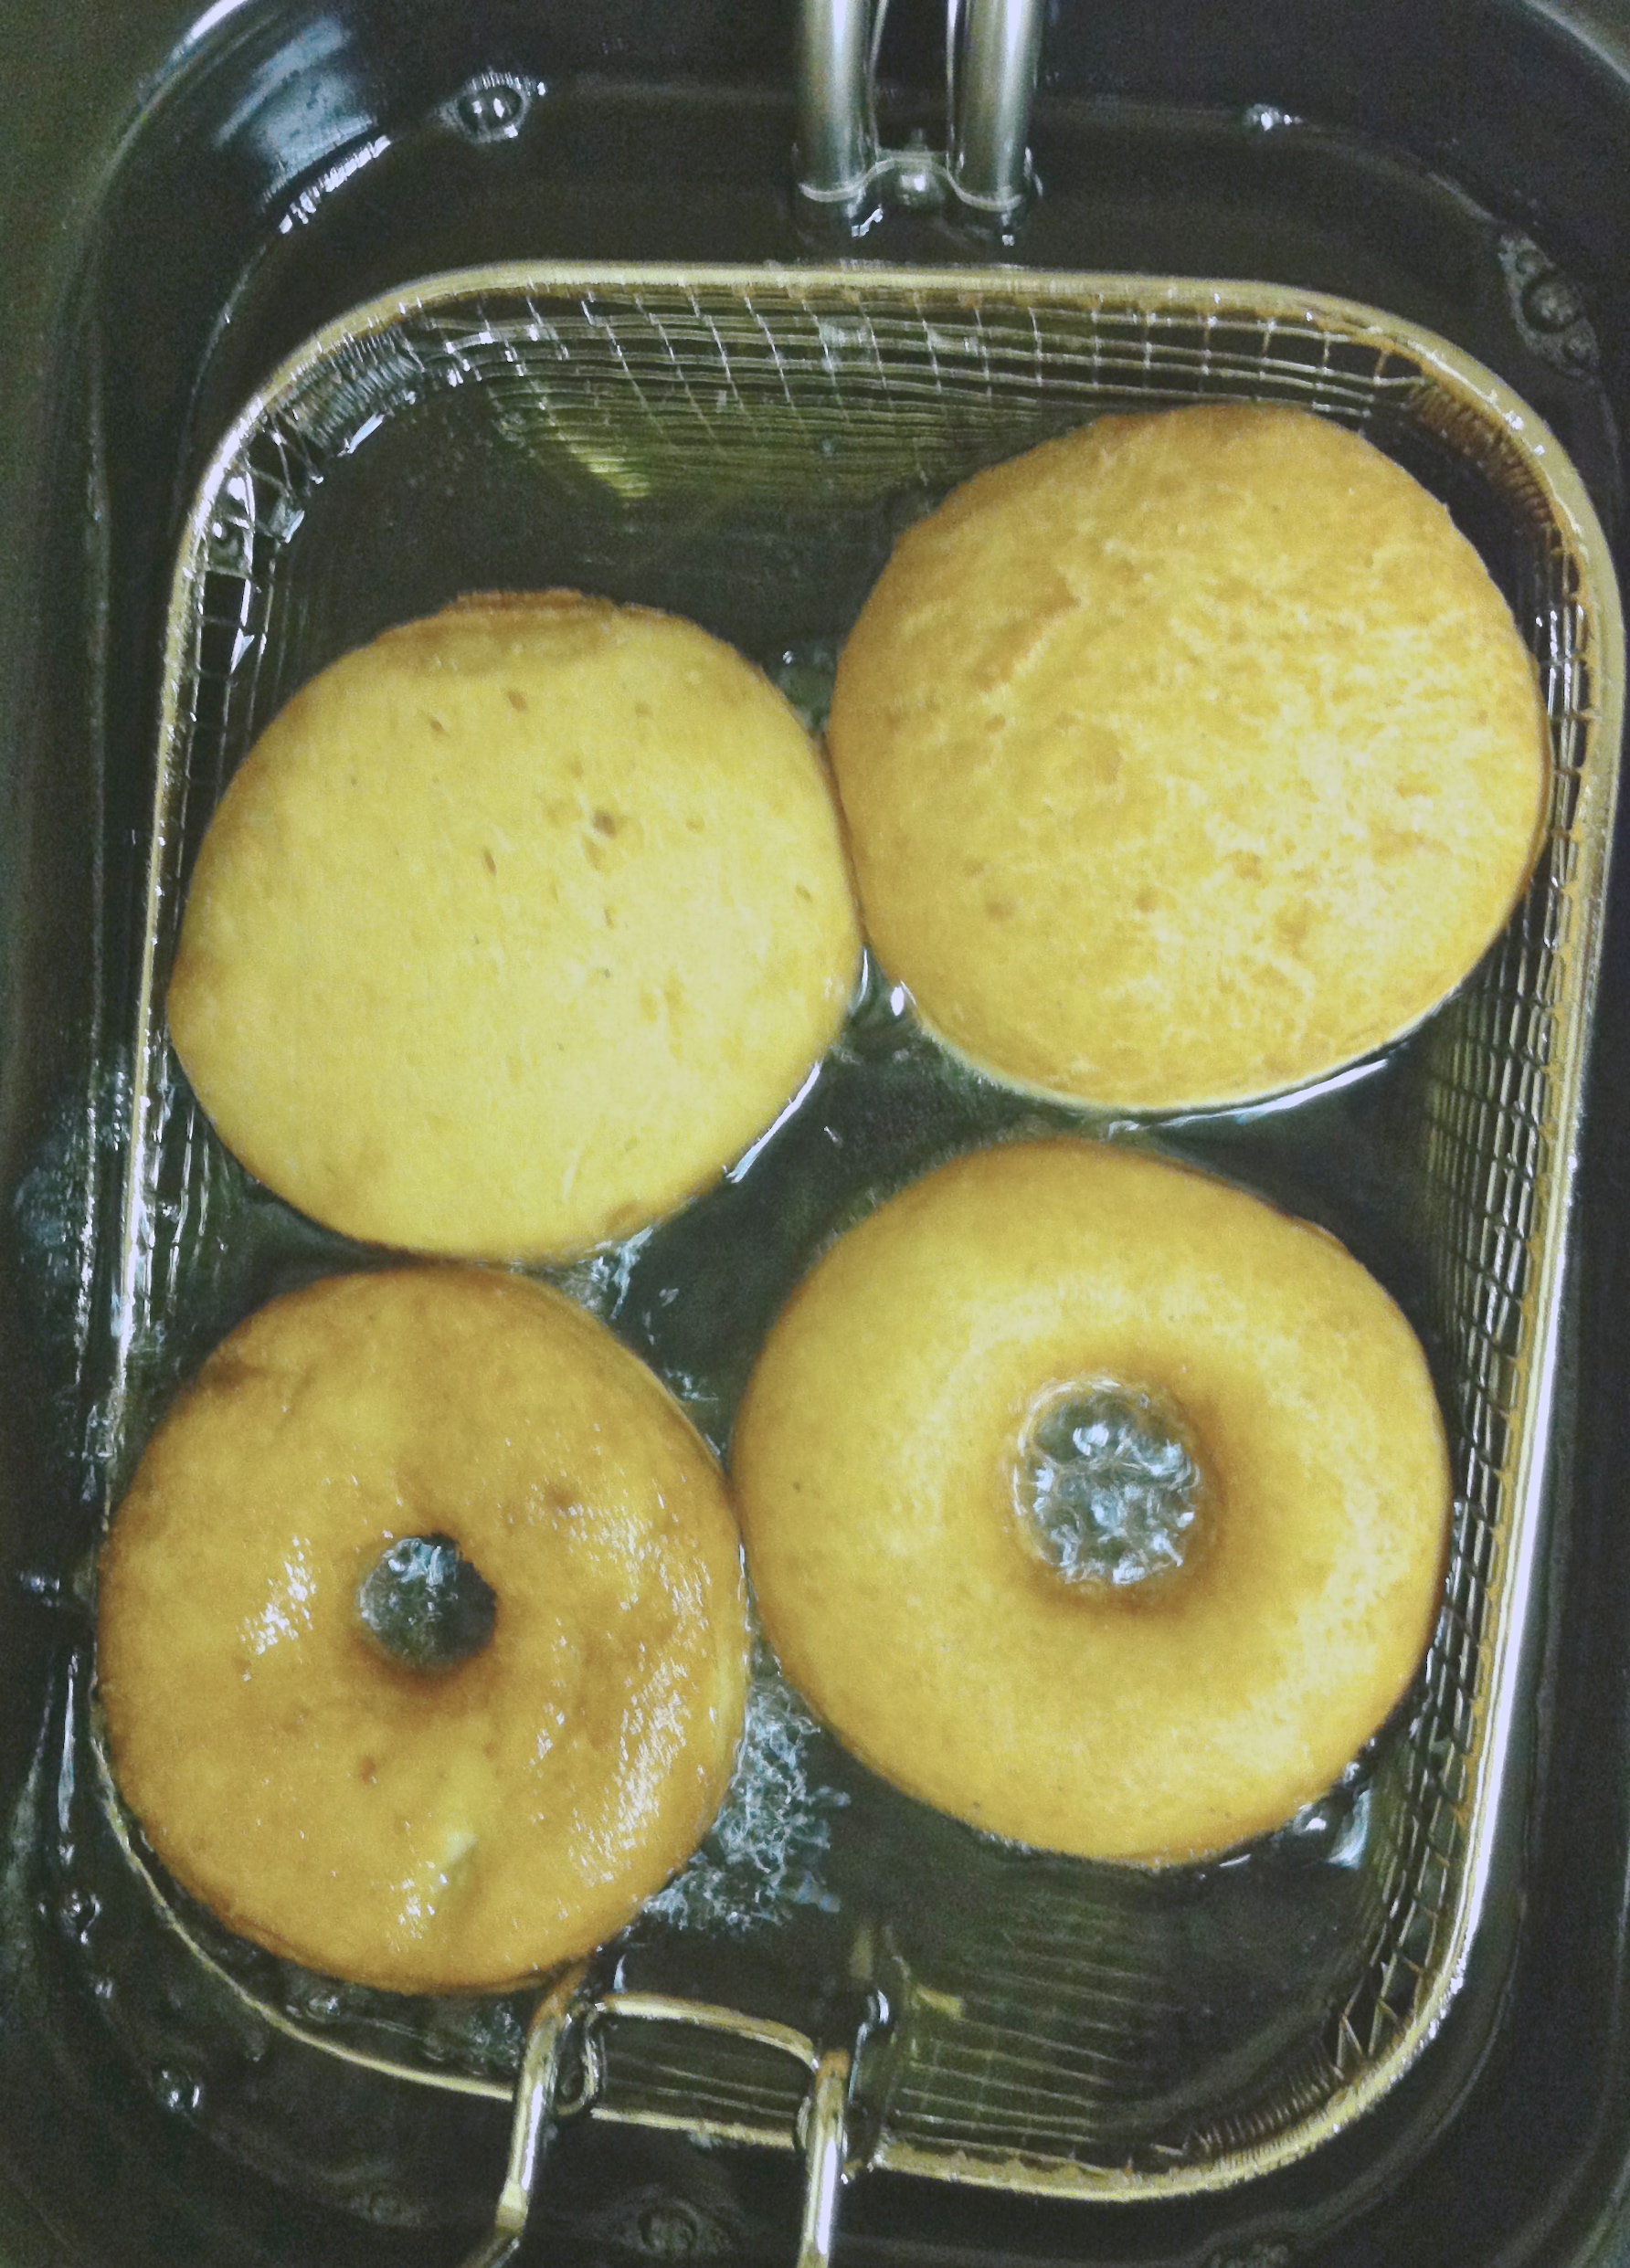
Fry ’em till they’re a light golden brown color

Heat your oil in your deep-fryer or a deep dutch oven. The oil needs to be 2-3 inches deep. Heat the oil depending on your fryer directions (I used 375 degrees) or to 365 on your dutch oven. Temperature is very important, as you want to make sure the dough cooks to a nice light golden brown. Use a candy thermometer if you have one. You can test the fryer oil, by dropping a bit of dough into the oil. If the dough bubbles and floats to the top right away, it’s ready. If the dough sinks, you need to wait a bit more. You have to kind of babysit the dough when you’re frying because the oil temperature changes, from getting too hot or too cold if you place too many doughnuts in the oil at the same time. Don’t overcrowd the pan! Remember, doughnut-making is a labor of love. It takes patience. So relax. Chill. Drink a cup of coffee.

When the oil is good and ready, carefully place the doughnuts into the pan, one at a time, making sure not to overcrowd them, Fry for about 45 seconds, then flip them over for another 30 seconds or so. Once both sides are nicely golden, remove them carefully into a cooling rack lined with paper towels. Repeat until you’ve fried them all. Once all of your doughnuts are fried, allow them to cool completely. Now you can start making the glazes.

glazed

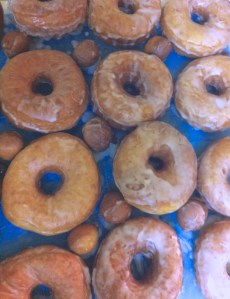
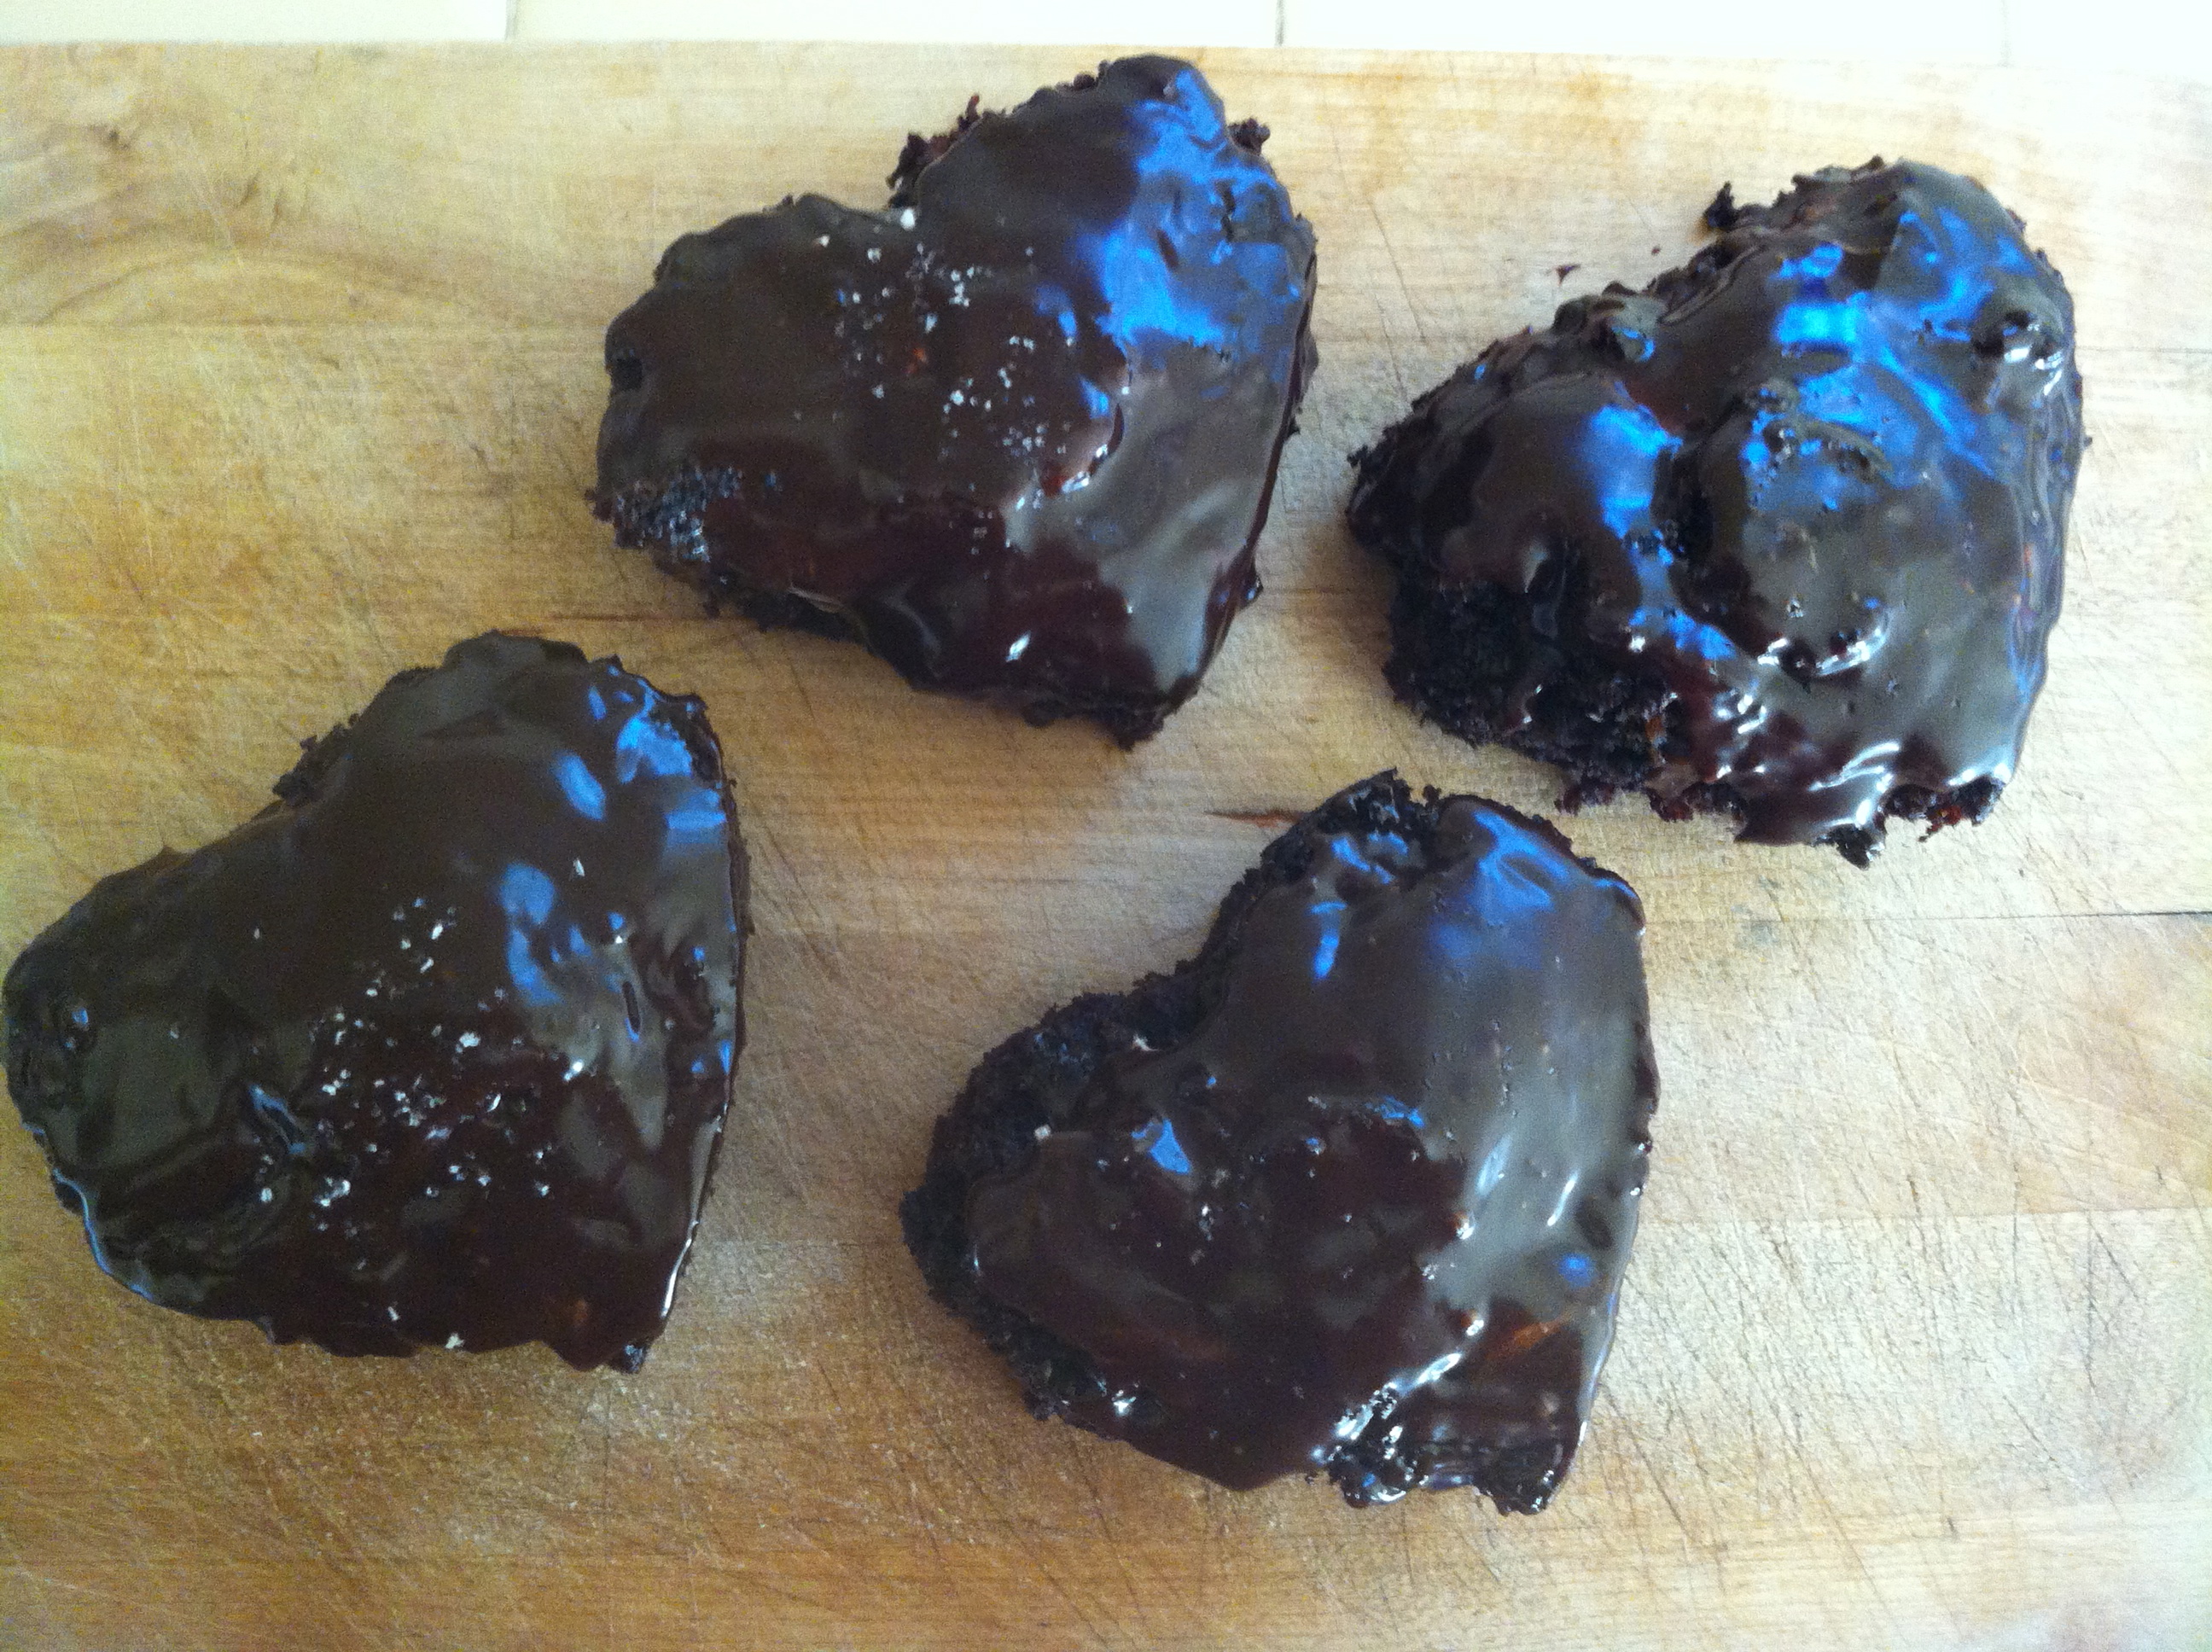
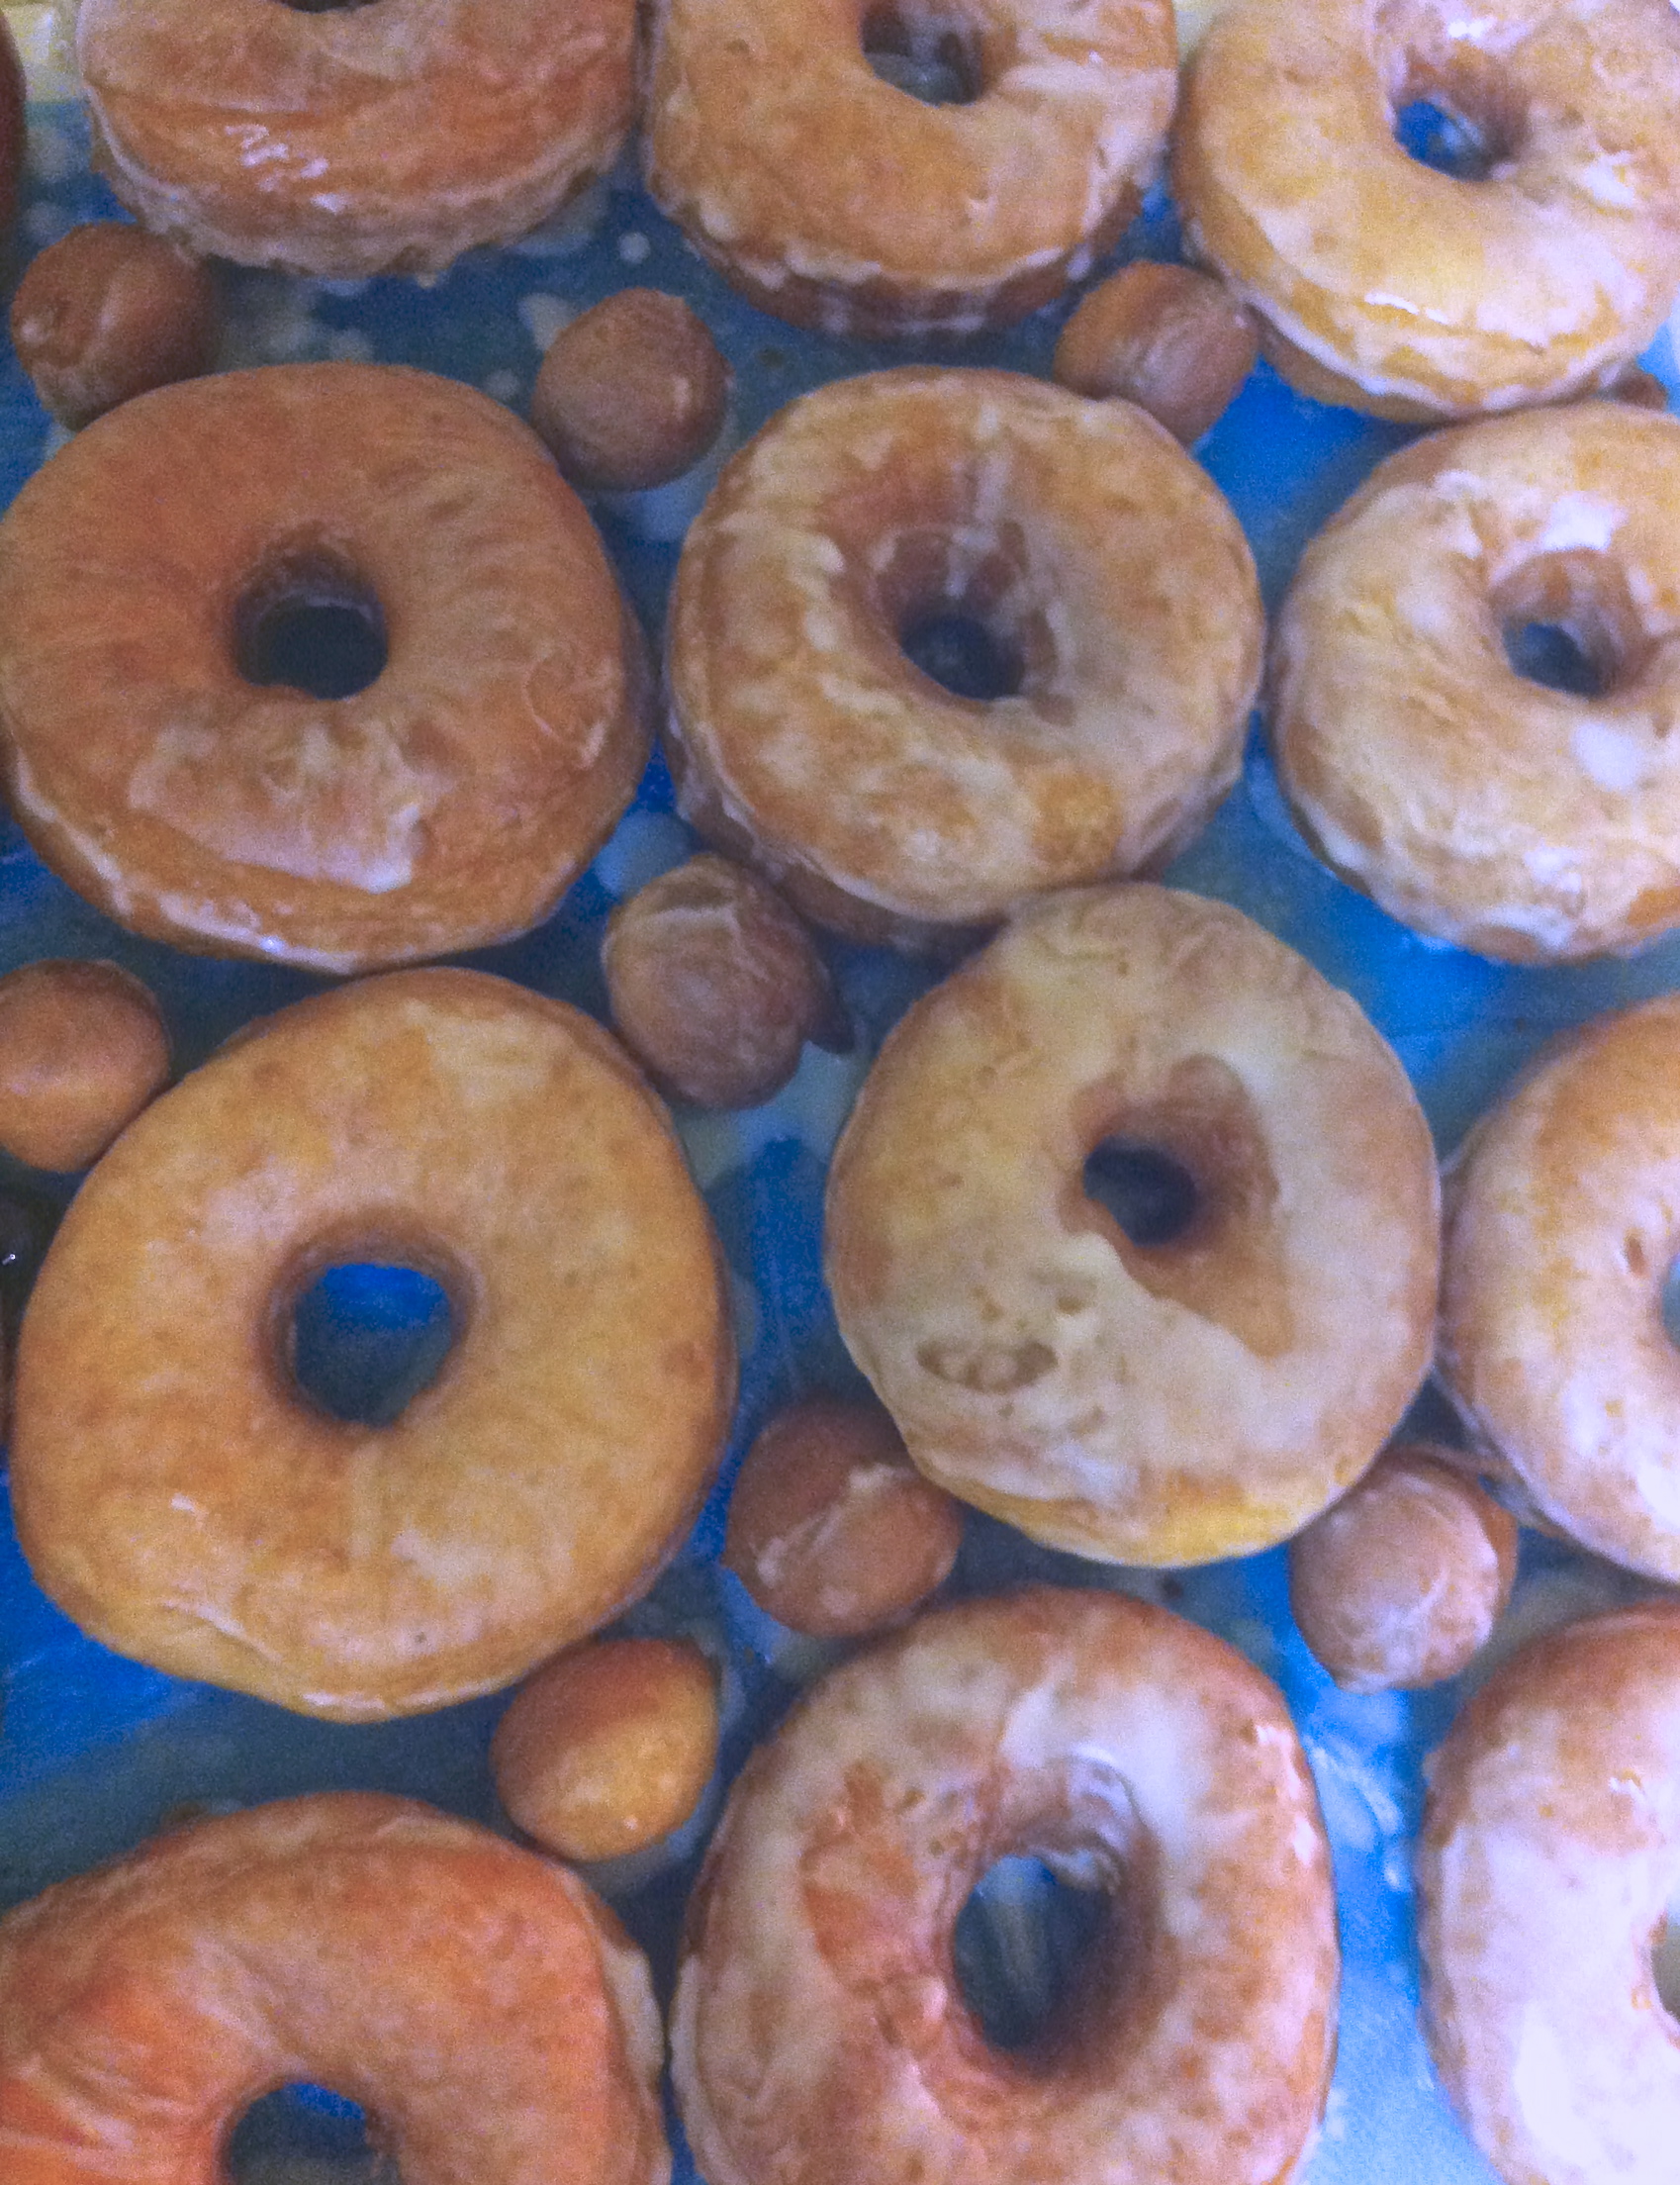
Glazed and delicious

FOR THE WHISKEY GLAZE
Recipe slightly adapted from The Breakfast Bachelor

INGREDIENTS
1/4 cup whiskey
1 tablespoon milk
1/4 teaspoon vanilla extract
1-2 cups powdered sugar, sifted

METHOD
Combine the whiskey, milk and extract. Whisk in the sifted powdered sugar till it’s smooth. Adjust quantity of sugar if too thin, or milk to thicken. You want a smooth, good-for-dipping consistency.

FOR THE CHOCOLATE GLAZE
Recipe adapted from the cookbook, Baked: New Frontiers in Baking

INGREDIENTS
6 ounces dark chocolate (60% cacao), coarsely chopped
1 teaspoon light corn syrup
1/2 cup (1 stick) unsalted butter, softened, cut into cubes

METHOD
In a large non-reactive metal bowl, combine the chocolate, corn syrup, and butter. Set the bowl over a saucepan of simmering water and cook, stirring with a rubber spatula, until the mixture is completely smooth and dip-able. Remove the bowl from the pan and stir for 30 seconds to cool slightly.