Do Fries Come With That Steak?

lomolede

I love Peruvian food. Like, I loooooooove it. A lot.

Peruvian cuisine is special in that it celebrates a vast cultural mélange–lending itself to Inkan, Spanish, Chinese, Japanese, African, and Italian influences. The food is as deeply rooted in tradition as it is culturally rich.

I was first introduced to Peruvian cuisine 7 years ago through my friend Yolie, when I was living in Los Angeles. She took me to this little South Bay gem heralded by all the in-the-know locals–a family-owned Peruvian chain called El Pollo Inka. 

And let me tell you, I still have cravings for their Pollo a la Brasa and Aguadito soup with extra aji verde. But my love…<raises both arms into the air> my LOVE, is for their famous, Lomo Saltado (stir-fried beef).

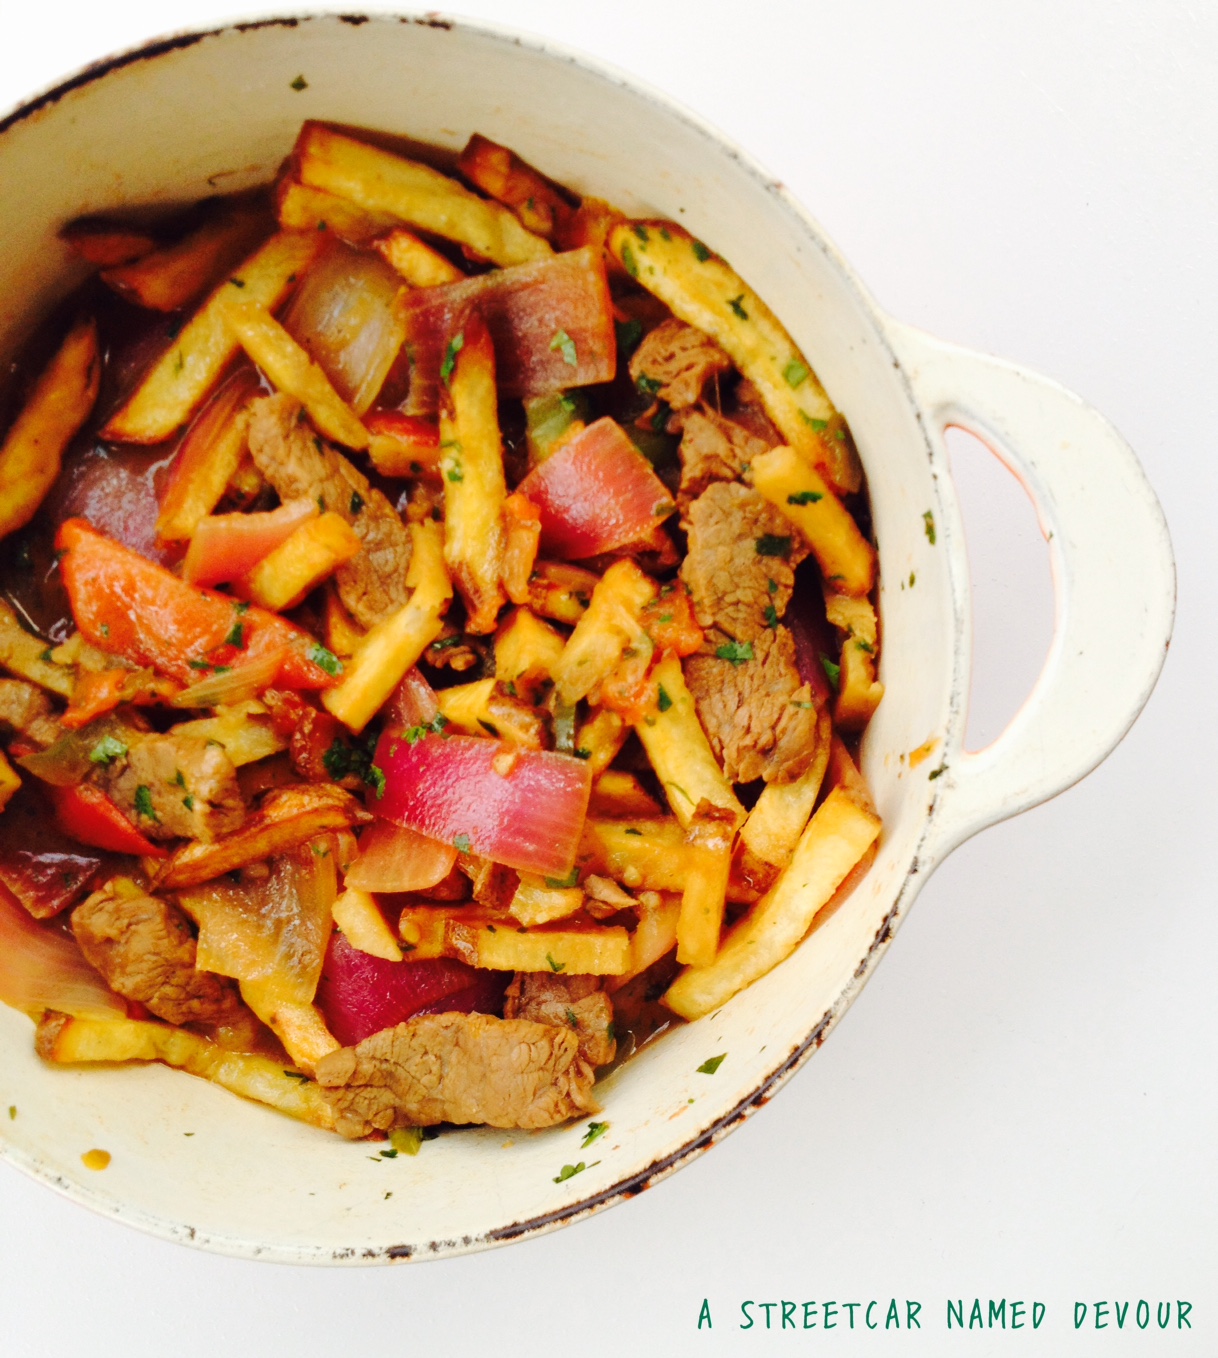
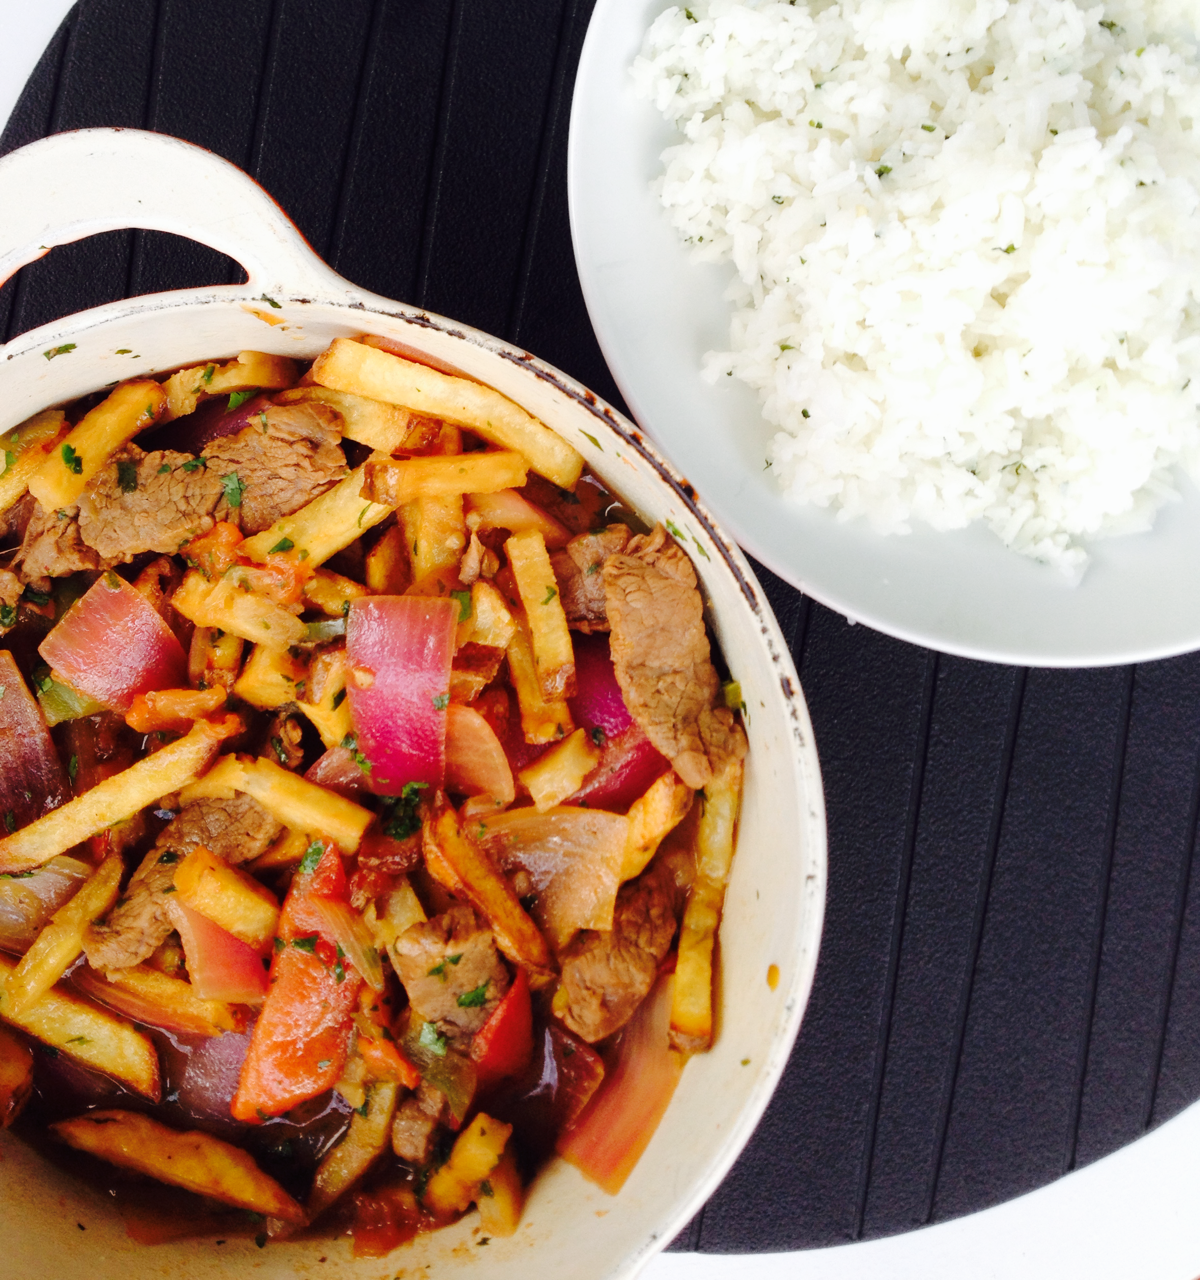
<Arms are still in the air> I can’t even begin to express how much I miss those tender chunks of wok-fried steak, crispy French fries with tomatoes, sweet red onions, fresh herbs, aji amarillo and soy sauce atop a bed of steamed rice. My body craves it like how I imagine a heroin addict yearns for another high–ploddingly reaching for the syringe:

“Just one more. One more hit is all it will take,” I can hear the addict saying.

But Lomo Saltado is a healthy addiction that I can speak openly about without reservations. It is the one dish I will always order at every Peruvian restaurant I encounter in my travels. San Francisco-based restaurant, Limón, has an exceptional take.

Lomo Saltado is a Chifa dish–the name for Peruvian-Chinese cuisine. Chifa comes from the Mandarin word, chī fàn, which means “to eat” or some will argue, specifically “to eat rice.” The dish is a perfect example of old- and new-world fusion.

As with most traditional dishes, recipes differ ever so slightly, depending on the kitchen. This recipe is an amalgam of the three very different versions I cited above.

lomo2

lomoplate

Lomo Saltado
Yields 2-4 servings

FOR THE MARINADE

INGREDIENTS
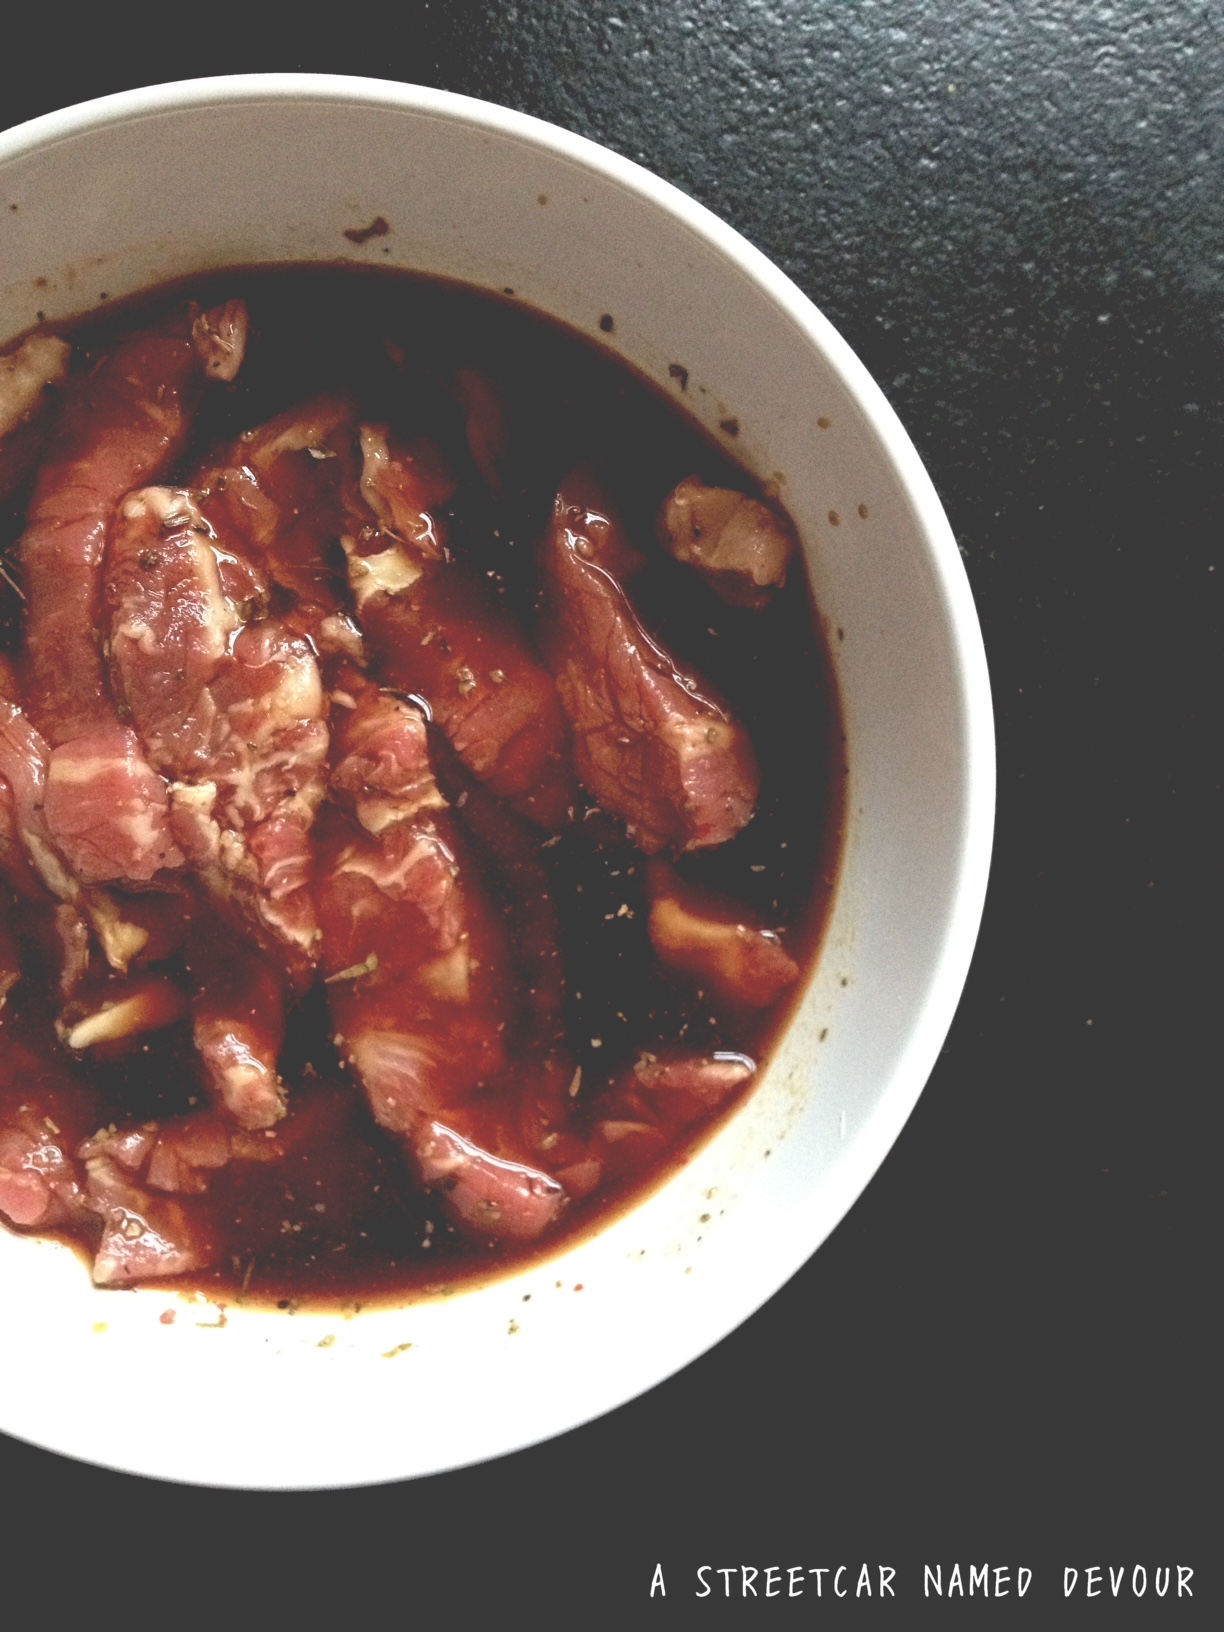
1 pound sirloin steak, cut into medium-sized strips
2 each garlic cloves, minced
4 tablespoons soy sauce
2 tablespoons red wine vinegar (apple cider vinegar works, too)
1 teaspoon oyster sauce
1 teaspoon ground cumin
1/8 teaspoon ground ginger

METHOD
Place all items in a medium-sized bowl. Cover with plastic wrap and place in the refrigerator until ready to cook.

lomomarinade

FOR THE STIR-FRY

INGREDIENTS
2 large Russet potatoes, washed + peeled, cut into matchsticks
vegetable oil, for frying
1 medium red onion, cut into thick wedges
2 Roma tomatoes, cut into wedges
1 amarillo chile, deseeded and julienned*
(*Cook’s note: aji amarillos are often hard to find. If that’s the case for you, substitute for 1 serrano chile)
1/4 cup cilantro, finely chopped
4 cups steamed rice

METHOD
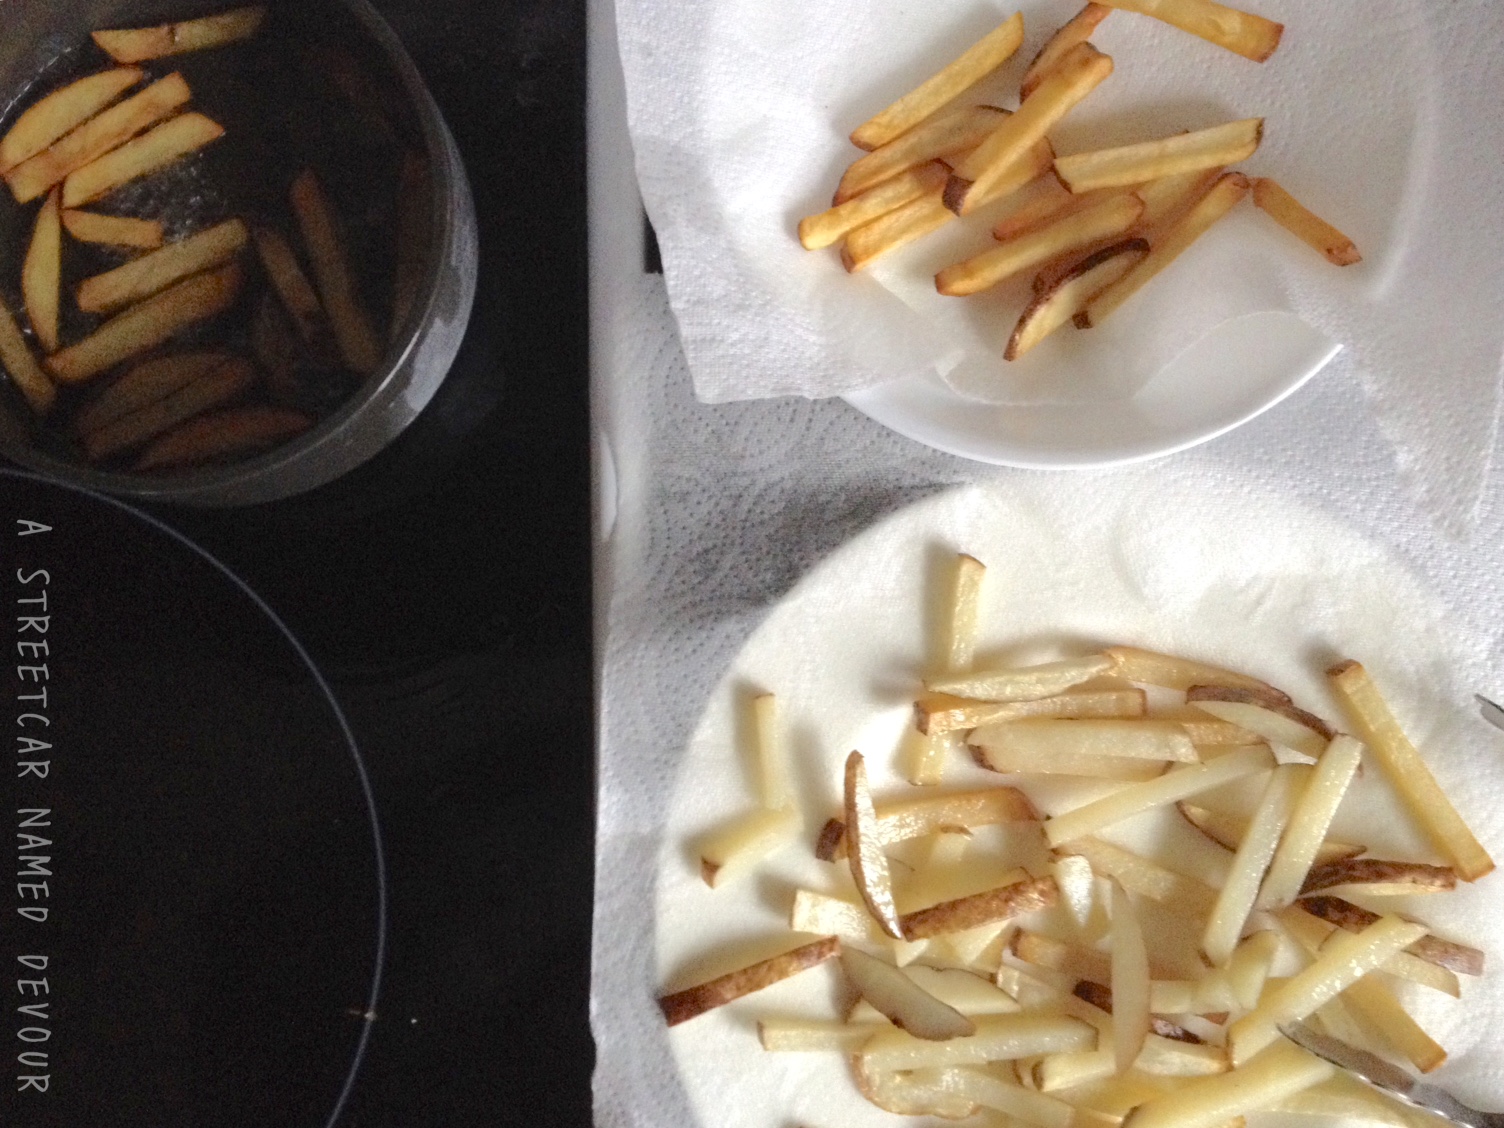
Fill a deep, heavy-bottomed pan (or deep-fryer) halfway with oil. Heat to 300 degrees. Fry potatoes for about 10 minutes or until softened. Remove from oil with a slotted spoon and place onto a plate with paper towel to drain excess oil.

Crank up the heat to about 375 degrees. Return the fries to the fryer and cook for an additional 5 minutes and golden brown. Remove from the oil and drain, keeping them in a warm place while you do the stir-fry.

Heat a deep cast-iron skillet or wok over medium-high heat with a tablespoon of oil. Drain the meat from the marinade (keep the marinade!) and when the oil is hot, add the meat. Use a wooden spoon to quickly sear the meat. Lower to medium heat, add the onion, stir-frying for about 2 minutes. Then add the tomato and chile. Cook for 1 minute. Then pour over the marinade. Allow the meat and vegetables to fully cook. Turn off the heat and add the reserved French fries to coat. Sprinkle with the cilantro and stir. Pour over the steamed rice and serve.

lomofries

lomo3

Sprinkle Me

hbd

Suga suga…

Cookies and ice cream are probably the best pairing next to cheese and wine. My favorite store-bought cookie as a child were the Mother’s Circus Animal Cookie Parade. I’d dig through the bag and just eat the frosted- and sprinkle-clad, buttery shortbread cookies, discarding the rest. For A Streetcar Named Devour’s 4th Birthday (GASP! It’s already been 4 years?!) I wanted to create a spin on an old-school favorite and make an ice cream that tasted like those pretty pink-and-white cookies.

cakebites

sprankles

This recipe includes real frosted vanilla cake bites (leftover birthday cake cut into bite-sized pieces) with a great vanilla ice cream base recipe from David Lebovitz’ must-have book, The Perfect Scoop, and, of course, sprinkles. And lots of ‘em.
Happy Birthday, Streetcar!

hbd2

Birthday Cake Ice Cream
Yields: About 1 quart
Adapted slightly from The Perfect Scoop

INGREDIENTS
1 cup whole milk
A pinch of salt
3/4 cup (150g) sugar
1 vanilla bean, split lengthwise
2 cups (500ml) heavy cream
5 large egg yolks
1 teaspoon pure vanilla extract
1 1/2 cups leftover cake, cut into bite-size pieces and frozen thoroughly** (If you don’t have any leftover cake on hand, go to the bakery section of your local grocery store and you’re sure to find birthday cupcakes and small cakes available.)
1/4 cup Jimmy sprinkles

METHOD
Heat the milk, salt, and sugar into a saucepan. Scrape the seeds from the vanilla bean into the milk with a paring knife, then add the bean pod to the milk. Cover, remove from heat, and infuse for about 1 hour.

To make the ice cream, set up an ice bath by placing a 2-quart bowl in a larger bowl partially filled with ice and water. Set a strainer over the top of the smaller bowl and pour the cream into the bowl.

In a separate bowl, stir together the egg yolks. Rewarm the milk then gradually pour some of the milk into the yolks, whisking constantly as you pour. Scrape the warmed yolks and milk back into the saucepan. Cook over low heat, stirring constantly and scraping the bottom with a heat-resistant spatula, until the custard thickens enough to coat the spatula.

Strain the custard into the heavy cream. Stir over the ice until cool, add the vanilla extract, frozen cake bites, and sprinkles. Refrigerate overnight to chill thoroughly.

**Cook’s note: It’s important to freeze your cake pieces beforehand, so that the pieces don’t soften once incorporated into the ice cream base. I like to first freeze the cake slices (and securely wrap them in plastic wrap) for about 3 hours, then cut them into the bite-size pieces, then return them to the freezer (again wrapped in plastic) before adding to the ice cream. 

unnamed-2

Body by Pizza

lead1

As a professional cook, I’m often asked what is my favorite thing to make at home. My answer is always breakfast; it’s my favorite meal. And the best thing about breakfast is that you can essentially eat it any time of day, sans guilt. (At least I don’t think so, anyway.) My go-to breakfast food that I usually make at home is chilaquiles. I usually have made-ahead enchilada sauce, tortilla chips, cheese and eggs in my pantry, so it takes just a few minutes to put it all together.

After a year working at an Italian restaurant, I became a bit of a pizza expert. I lived and breathed pizza. If you thought eating pizza every day would be tiresome, it’s surprisingly not. The pizzas we made changed daily, so there was always something new to try. I thank that job for these rock-hard abs I’m sporting these days. (That’s completely false, by the way. Purely fiction. The only thing hard on me is my inability to give up major vices: namely cookies, coffee, beer, hot men and, of course, pizza.)

After one night of not being able to decide between making chilaquiles or pizza for dinner, my brain had a ding-ding-ding! moment, where I thought: Why don’t I just put them together?

And that, I did.

=

lead2

Chilaquiles Pizza
Serves 1-4

FOR THE RED SAUCE
Recipe slightly adapted from A Cozy Kitchen

INGREDIENTS
1 pasilla chile, charred and scraped
15 ounces (1 can) tomatoes
1 medium shallot, minced
1 1/2 tablespoons of tomato paste
3/4 cup beer
2 handfuls, tortilla chips
salt and pepper, to taste

METHOD
Place the pasilla over the grates of a gas stove. Heat the chile, rotating it on medium-high heat and char till it’s evenly blackened. Place the charred pasilla in a medium-size bowl and tightly cover with plastic wrap. (The lack of released oxygen will cause the charred skin to easily separate itself from the flesh of the chile.) After about 5-7 minutes, remove the chile from the covered bowl and scrape apart the charred skin using a knife. Chop the pasilla’s flesh, removing the seeds and thick membrane. Place the chopped pasilla and canned tomatoes into a blender and pulse till smooth.

Meanwhile, in a medium-size skillet, heat 2 tablespoons of olive oil over medium-high heat. Add the shallot and cook till lightly browned (but not burned), about 7 minutes. Deglaze the pan with the beer. Stir to get all the tasty, sugary bits incorporated. Pour the tomato/pasilla sauce mixture and tomato paste into the skillet. Simmer the sauce, uncovered, until reduced by about half, about 10 minutes. Make sure to stir the mixture often, to avoid scorching. Add the tortilla chips and stir till softened. Season with salt and pepper, to taste.

sauce

FOR THE SALSA VERDE

INGREDIENTS
1 bunch cilantro, roughly chopped
1/4 bunch parsley, roughly chopped
1/2 red onion, small dice
1 jalapeño, charred, deseeded and roughly chopped
1 poblano, charred, deseeded and roughly chopped
1 lime, juiced
1/2 – 1 cup olive oil

METHOD
Add all the ingredients except the oil into a blender and pulse till incorporated. Stream in the oil to create an emulsion. Add more oil if too stiff. Season with salt, to taste.

FOR THE PIZZA DOUGH

INGREDIENTS
2 teaspoon active dry yeast
2/3 cup warm water**
2 cups flour
2 tablespoon olive oil
1/2 teaspoon kosher salt

METHOD
Place the room warm water and yeast into a KitchenAid mixing bowl and quickly whisk till incorporated. Allow to rest for 5 minutes to activate the yeast. **The yeast won’t properly activate if the water is too cold. And thus, will over activate if it’s too hot.**

Add the flour and then the salt. (Adding salt directly to yeast can kill it.) With the dough hook attachment, start mixing the dough for about 3 minutes on the medium speed. Slowly stream in the olive oil. Mix till fully incorporated and a little sticky.

Transfer the dough onto a well-oiled bowl and cover the bowl with plastic wrap. Allow the dough to rest in a warm spot in the kitchen. (I usually have it placed on top of the stove while I’m heating up the oven.) Let the dough proof until it doubles in size (about 1 hour, depending on the room temperature).

Once the dough has been proofed, roll out onto a well floured countertop. Knead the dough with your hands and divide into two equal size balls. Set one ball aside for later use by tightly wrapping and placing in the fridge or freezer. Roll the other ball evenly. Using a a floured rolling pin, roll out until evenly sized on a baking or pizza pan.

**PIZZA ASSEMBLY**

INGREDIENTS
1 pizza dough, rolled out
olive oil
1-2 ladles chilaquiles sauce
1 cup mozzarella cheese
1 egg
salsa verde, garnish
Mexican crema (optional)

sanschz


chz


eggy

METHOD
Preheat oven to 400 degrees. Brush three dots of olive oil onto the pizza dough. Sprinkle a bit of salt onto the dough, too. Using a ladle, spoon the chilaquiles sauce onto the surface evenly. Sprinkle the cheese on top. Create a little well in the center of the pizza to add the egg at the last few minutes of cooking.

Bake for 8 minutes on the bottom rack of the oven. Rotate pizza to make sure all sides cook evenly. Check for doneness. Cook for another 5 minutes. When the dough is 1/4 done (just slightly doughy) Slowly crack in the egg. This should cook for an additional 1-2 more minutes, till set but still runny.

When fully cooked, remove and place onto a cooling rack. Drizzle with salsa verde and crema, if desired.

unnamed